HP 6125G HP 6125G & 6125G/XG Blade Switches Security Configuration Gui - Page 57
AAA for Telnet users by separate servers, Network requirements, Configuration procedure
 |
View all HP 6125G manuals
Add to My Manuals
Save this manual to your list of manuals |
Page 57 highlights
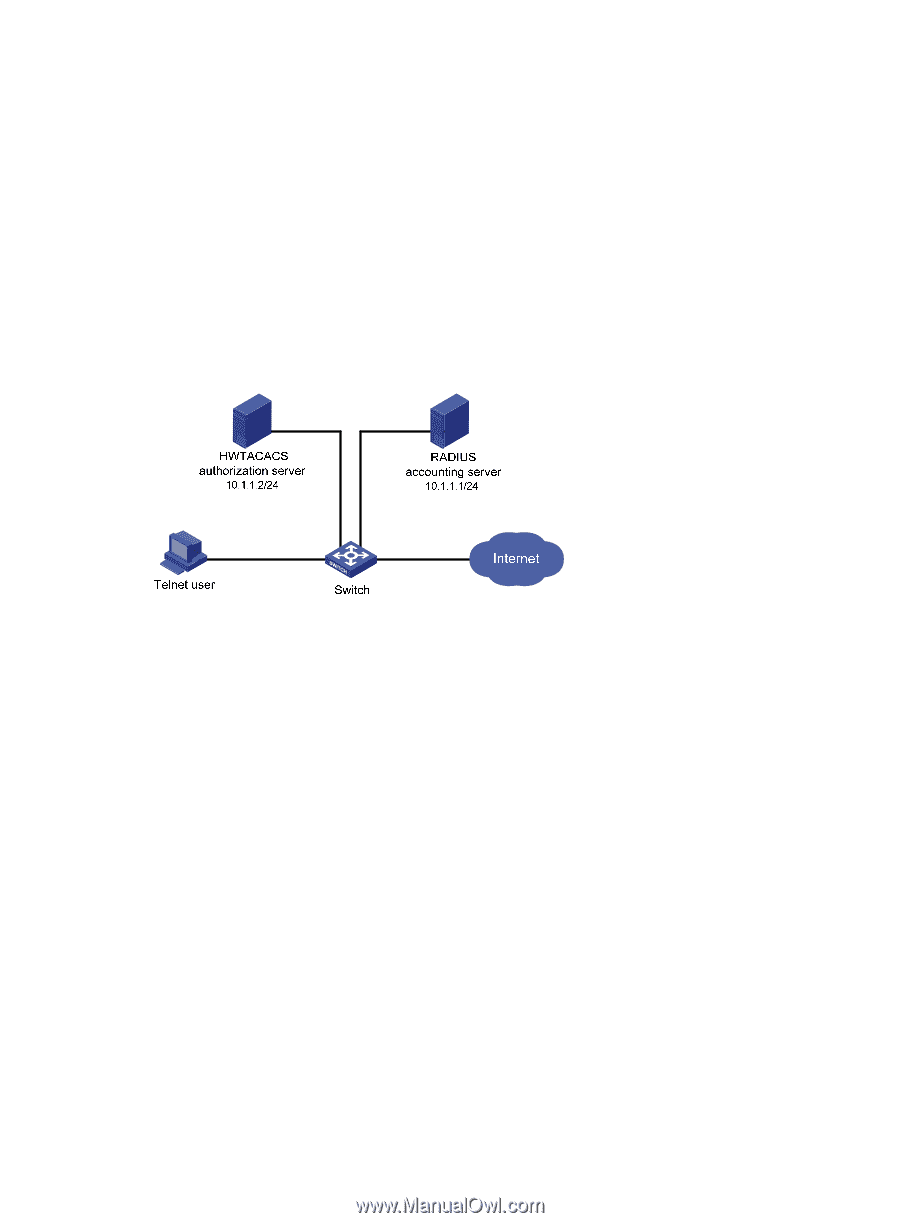
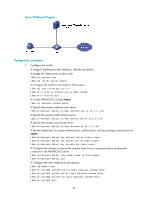
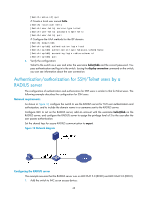
2. Verify the configuration: Telnet to the switch as a user and enter the correct username and password. You pass authentication and log in to the switch. Issuing the display connection command on the switch, you can see information about the user connection. AAA for Telnet users by separate servers Network requirements As shown in Figure 11, configure the switch to provide local authentication, HWTACACS authorization, and RADIUS accounting services for Telnet users. Set the shared keys for secure communication with the HWTACACS server and the RADIUS server to expert. Configure the switch to remove the domain name from a username before sending the username to the servers. Figure 11 Network diagram Configuration procedure 1. Configure the switch: # Assign IP addresses to interfaces. (Details not shown.) # Enable the Telnet server on the switch. system-view [Switch] telnet server enable # Configure the switch to use AAA for Telnet users. [Switch] user-interface vty 0 4 [Switch-ui-vty0-4] authentication-mode scheme [Switch-ui-vty0-4] quit # Configure the HWTACACS scheme. [Switch] hwtacacs scheme hwtac [Switch-hwtacacs-hwtac] primary authorization 10.1.1.2 49 [Switch-hwtacacs-hwtac] key authorization expert [Switch-hwtacacs-hwtac] user-name-format without-domain [Switch-hwtacacs-hwtac] quit # Configure the RADIUS scheme. [Switch] radius scheme rd [Switch-radius-rd] primary accounting 10.1.1.1 1813 [Switch-radius-rd] key accounting expert [Switch-radius-rd] server-type extended [Switch-radius-rd] user-name-format without-domain 47
-
 1
1 -
2
-
3
-
4
-
5
-
6
-
7
-
8
-
9
-
10
-
11
-
12
-
13
-
14
-
15
-
16
-
17
-
18
-
19
-
20
-
21
-
22
-
23
-
24
-
25
-
26
-
27
-
28
-
29
-
30
-
31
-
32
-
33
-
34
-
35
-
36
-
37
-
38
-
39
-
40
-
41
-
42
-
43
-
44
-
45
-
46
-
47
-
48
-
49
-
50
-
51
-
 52
52 -
 53
53 -
 54
54 -
 55
55 -
 56
56 -
 57
57 -
 58
58 -
 59
59 -
 60
60 -
 61
61 -
 62
62 -
63
-
64
-
65
-
66
-
67
-
68
-
69
-
70
-
71
-
72
-
73
-
74
-
75
-
76
-
77
-
78
-
79
-
80
-
81
-
82
-
83
-
84
-
85
-
86
-
87
-
88
-
89
-
90
-
91
-
92
-
93
-
94
-
95
-
96
-
97
-
98
-
99
-
100
-
101
-
102
-
103
-
104
-
105
-
106
-
107
-
108
-
109
-
110
-
111
-
112
-
113
-
114
-
115
-
116
-
117
-
118
-
119
-
120
-
121
-
122
-
123
-
124
-
125
-
126
-
127
-
128
-
129
-
130
-
131
-
132
-
133
-
134
-
135
-
136
-
137
-
138
-
139
-
140
-
141
-
142
-
143
-
144
-
145
-
146
-
147
-
148
-
149
-
150
-
151
-
152
-
153
-
154
-
155
-
156
-
157
-
158
-
159
-
160
-
161
-
162
-
163
-
164
-
165
-
166
-
167
-
168
-
169
-
170
-
171
-
172
-
173
-
174
-
175
-
176
-
177
-
178
-
179
-
180
-
181
-
182
-
183
-
184
-
185
-
186
-
187
-
188
-
189
-
190
-
191
-
192
-
193
-
194
-
195
-
196
-
197
-
198
-
199
-
200
-
201
-
202
-
203
-
204
-
205
-
206
-
207
-
208
-
209
-
210
-
211
-
212
-
213
-
214
-
215
-
216
-
217
-
218
-
219
-
220
-
221
-
222
-
223
-
224
-
225
-
226
-
227
-
228
-
229
-
230
-
231
-
232
-
233
-
234
-
235
-
236
-
237
-
238
-
239
-
240
-
241
-
242
-
243
-
244
-
245
-
246
-
247
-
248
-
249
-
250
-
251
-
252
-
253
-
254
-
255
-
256
-
257
-
258
-
259
-
260
-
261
-
262
-
263
-
264
-
265
-
266
-
267
-
268
-
269
-
270
-
271
-
272
-
273
-
274
-
275
-
276
-
277
-
278
-
279
-
280
-
281
-
282
-
283
-
284
-
285
 |
 |