HP Media Center m7200 Microsoft Windows XP Media Center Edition 2005 Software - Page 113
Recording TV programs to the HP Personal Media Drive
 |
View all HP Media Center m7200 manuals
Add to My Manuals
Save this manual to your list of manuals |
Page 113 highlights
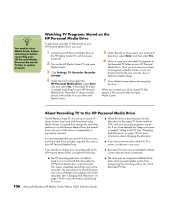
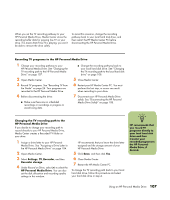
When you set the TV recording pathway to your HP Personal Media Drive, Media Center stores the recording buffer data for pausing live TV on your drive. This means that if live TV is playing, you won't be able to remove the drive safely. To avoid this scenario, change the recording pathway back to your local hard disk drive, and then restart the HP Media Center PC before disconnecting the HP Personal Media Drive. Recording TV programs to the HP Personal Media Drive 1 Change your recording pathway to your HP Personal Media Drive. See "Changing the TV recording path to the HP Personal Media Drive" on page 107. 2 Open Media Center. 3 Record TV programs. See "Recording TV from the Guide" on page 24. Your programs are recorded to the HP Personal Media Drive. 4 Before disconnecting the drive: ■ Make sure there are no scheduled recordings or recordings in progress to avoid losing data. ■ Change the recording pathway back to your local hard disk drive. See "Changing the TV recording path to the local hard disk drive" on page 108. 5 Close Media Center. 6 Restart your HP Media Center PC. You must perform this last step, or errors can result when recording to your drive. 7 Disconnect your HP Personal Media Drive safely. See "Disconnecting the HP Personal Media Drive Safely" on page 108. Changing the TV recording path to the HP Personal Media Drive If you decide to change your recording path to record directly to your HP Personal Media Drive, Media Center creates a Recorded TV folder on your drive: 1 Assign a drive letter to your HP Personal Media Drive. See "Assigning a Drive Letter to the HP Personal Media Drive" on page 104. 2 Open Media Center. 3 Select Settings, TV, Recorder, and then Recorder storage. 4 Under Record on Drive, select (+) to select the HP Personal Media Drive. You can also set the disk allocation and recording quality settings in this window. HP recommends that you know the drive letter assigned and the storage amount of your HP Personal Media Drive. 5 Click Save, and then click Yes. 6 Close Media Center. 7 Restart the HP Media Center PC. To change the TV recording path back to your local hard disk drive, follow this procedure and select your hard disk drive in step 4. n rHigPhrte.commends that you record TV programs directly to your local hard disk drive and then transfer your recorded programs to the HP Personal Media Drive, if desired. Using an HP Personal Media Drive 107
-
 1
1 -
2
-
3
-
4
-
5
-
6
-
7
-
8
-
9
-
10
-
11
-
12
-
13
-
14
-
15
-
16
-
17
-
18
-
19
-
20
-
21
-
22
-
23
-
24
-
25
-
26
-
27
-
28
-
29
-
30
-
31
-
32
-
33
-
34
-
35
-
36
-
37
-
38
-
39
-
40
-
41
-
42
-
43
-
44
-
45
-
46
-
47
-
48
-
49
-
50
-
51
-
52
-
53
-
54
-
55
-
56
-
57
-
58
-
59
-
60
-
61
-
62
-
63
-
64
-
65
-
66
-
67
-
68
-
69
-
70
-
71
-
72
-
73
-
74
-
75
-
76
-
77
-
78
-
79
-
80
-
81
-
82
-
83
-
84
-
85
-
86
-
87
-
88
-
89
-
90
-
91
-
92
-
93
-
94
-
95
-
96
-
97
-
98
-
99
-
100
-
101
-
102
-
103
-
104
-
105
-
106
-
107
-
 108
108 -
 109
109 -
 110
110 -
 111
111 -
 112
112 -
 113
113 -
 114
114 -
 115
115 -
 116
116 -
 117
117 -
 118
118 -
119
-
120
-
121
-
122
 |
 |
