HP Media Center m7200 Microsoft Windows XP Media Center Edition 2005 Software - Page 75
Audio CD tips, Creating audio CDs, Start, All Programs, Sonic, DigitalMedia Home, Audio, Audio CD
 |
View all HP Media Center m7200 manuals
Add to My Manuals
Save this manual to your list of manuals |
Page 75 highlights
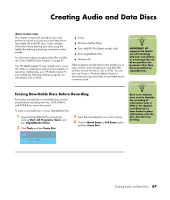
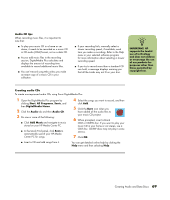
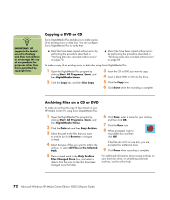
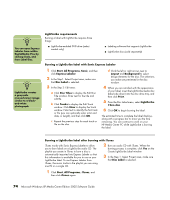
Audio CD tips When recording music files, it is important to note that: ■ To play your music CD in a home or car stereo, it needs to be recorded as a music CD in CD audio (CDA) format, not as a data CD. ■ As you add music files in the recording session, DigitalMedia Plus calculates and displays the amount of recording time available to record additional music files. ■ You can't record song titles unless you make an exact copy of a music CD in your collection. ■ If your recording fails, manually select a slower recording speed, if available, each time you make a recording. Refer to the Help menu in your selected software program for more information about selecting a slower recording speed. ■ If you try to record more than a standard CD can hold, a message displays warning you that all the tracks may not fit on your disc. n rIMigPhOt.RTANT: HP supports the lawful use of technology and does not endorse or encourage the use of our products for purposes other than those permitted by copyright law. Creating audio CDs To create uncompressed audio CDs using Sonic DigitalMedia Plus: 1 Open the DigitalMedia Plus program by clicking Start, All Programs, Sonic, and then DigitalMedia Home. 2 Click the Audio tab and then Audio CD. 3 Do one or more of the following: ■ Click Add Music and navigate to music stored on your HP Media Center PC. ■ In the Quick Find panel, click Scan to automatically search your HP Media Center PC for songs. 4 Select the songs you want to record, and then click Add. 5 Click the Burn icon when you have added all the audio files to your music CD project. 6 When prompted, insert a blank CD-R or CD-RW disc. If you want to play your music CD in your home or car stereo, use a CD-R disc. CD-RW discs may not play in some stereos. 7 Click OK. ■ Insert a CD and add songs from it. You can get detailed online help by clicking the Help menu and then selecting Help. Creating Audio and Data Discs 69
-
 1
1 -
2
-
3
-
4
-
5
-
6
-
7
-
8
-
9
-
10
-
11
-
12
-
13
-
14
-
15
-
16
-
17
-
18
-
19
-
20
-
21
-
22
-
23
-
24
-
25
-
26
-
27
-
28
-
29
-
30
-
31
-
32
-
33
-
34
-
35
-
36
-
37
-
38
-
39
-
40
-
41
-
42
-
43
-
44
-
45
-
46
-
47
-
48
-
49
-
50
-
51
-
52
-
53
-
54
-
55
-
56
-
57
-
58
-
59
-
60
-
61
-
62
-
63
-
64
-
65
-
66
-
67
-
68
-
69
-
 70
70 -
 71
71 -
 72
72 -
 73
73 -
 74
74 -
 75
75 -
 76
76 -
 77
77 -
 78
78 -
 79
79 -
 80
80 -
81
-
82
-
83
-
84
-
85
-
86
-
87
-
88
-
89
-
90
-
91
-
92
-
93
-
94
-
95
-
96
-
97
-
98
-
99
-
100
-
101
-
102
-
103
-
104
-
105
-
106
-
107
-
108
-
109
-
110
-
111
-
112
-
113
-
114
-
115
-
116
-
117
-
118
-
119
-
120
-
121
-
122
 |
 |