HP Media Center m7200 Microsoft Windows XP Media Center Edition 2005 Software - Page 53
Assigning a keyword to your pictures, Searching for pictures in HP Image Zone Plus, HP Image Zone
 |
View all HP Media Center m7200 manuals
Add to My Manuals
Save this manual to your list of manuals |
Page 53 highlights
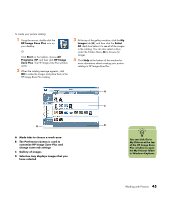
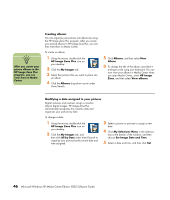
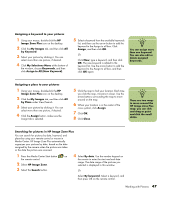
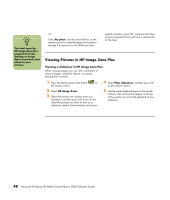
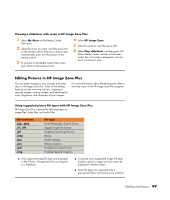
Assigning a keyword to your pictures 1 Using your mouse, double-click the HP Image Zone Plus icon on the desktop. 2 Click the My Images tab, and then click All by Keyword. 3 Select your picture by clicking it. You can select more than one picture, if desired. 4 Click My Selections Menu at the bottom of the window, choose Keywords, and then click Assign to All (New Keyword). 5 Select a keyword from the available keywords list, and then use the arrow button to add the keyword to the Assign to all box. Click Assign, and then click OK. Or Click New, type a keyword, and then click OK. The new keyword is added to the keyword list. Use the arrow button to add the keyword to the Assign to all box, and then click OK again. n You can assign more than one keyword. You can also edit or delete assigned keywords. Assigning a place to your pictures 1 Using your mouse, double-click the HP Image Zone Plus icon on the desktop. 2 Click the My Images tab, and then click All by Place under View/Search. 3 Select your picture by clicking it. You can select more than one picture, if desired. 4 Click the Assign button, make sure the Assign tab is selected. 5 Click the map to find your location. Each time you click the map, it zooms in closer. Use the arrow buttons surrounding the map to move around on the map. 6 When your location is in the center of the cross symbol, click Assign. 7 Click OK. 8 Click Close. n There are two ways to move around the HP Image Zone Plus map: you can click and drag or point and click the small globe. Searching for pictures in HP Image Zone Plus You can search for pictures by date, keyword, and place by using your remote control or mouse in Media Center. HP Image Zone Plus automatically organizes your pictures by date, based on the date assigned by the camera when the picture was taken or the date the picture was scanned. 1 Press the Media Center Start button the remote control. 2 Select HP Image Zone. 3 Select the Search button. on 4 Select By date. Use the number keypad on the remote to enter the start and end date range. The date range of the pictures you selected is displayed in this window. Or Select By keyword. Select a keyword, and then press OK on the remote control. Working with Pictures 47
-
 1
1 -
2
-
3
-
4
-
5
-
6
-
7
-
8
-
9
-
10
-
11
-
12
-
13
-
14
-
15
-
16
-
17
-
18
-
19
-
20
-
21
-
22
-
23
-
24
-
25
-
26
-
27
-
28
-
29
-
30
-
31
-
32
-
33
-
34
-
35
-
36
-
37
-
38
-
39
-
40
-
41
-
42
-
43
-
44
-
45
-
46
-
47
-
 48
48 -
 49
49 -
 50
50 -
 51
51 -
 52
52 -
 53
53 -
 54
54 -
 55
55 -
 56
56 -
 57
57 -
 58
58 -
59
-
60
-
61
-
62
-
63
-
64
-
65
-
66
-
67
-
68
-
69
-
70
-
71
-
72
-
73
-
74
-
75
-
76
-
77
-
78
-
79
-
80
-
81
-
82
-
83
-
84
-
85
-
86
-
87
-
88
-
89
-
90
-
91
-
92
-
93
-
94
-
95
-
96
-
97
-
98
-
99
-
100
-
101
-
102
-
103
-
104
-
105
-
106
-
107
-
108
-
109
-
110
-
111
-
112
-
113
-
114
-
115
-
116
-
117
-
118
-
119
-
120
-
121
-
122
 |
 |