HP Neoware c50 TeemTalk® 5.0 for Unix User's Guide - Page 29
Testing The Installation
 |
View all HP Neoware c50 manuals
Add to My Manuals
Save this manual to your list of manuals |
Page 29 highlights
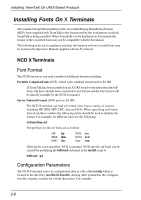
Installing TeemTalk On UNIX Based Products Testing The Installation TeemTalk should now be run up and work perfectly - if however you get the error message, Cannot Load Font..., then the font installation has failed. The following tips may be useful: - The installation is designed to load the fonts in the format required by the workstation that TeemTalk is being loaded onto. If TeemTalk is to be run from another display (workstation or X terminal), then a different version of bdftosnf (supplied with the other display) or the standard bdftosnf but with different parameters may need to be used. Most X terminals usually look in different directories for the fonts so the installation script will need modifying to reflect this. - Some workstations/X terminals require the fonts to have both read and surprisingly write permission for them to able to be loaded by the server. - Try restarting the X server. If xset fp rehash failed then this is a sure way to make sure the server is aware of additions to the fonts. - Check that the correct version of bdftosnf is being used. It is possible that someone has loaded a version with different defaults (for another workstation). It is unlikely that the original will have been overwritten but it is possible that the wrong version is being picked up by the OS first. - xlsfonts is a useful way of listing fonts known to the server. Check that the TeemTalk fonts are listed (e.g. xlsfonts | grep tis). If they are listed but TeemTalk cannot load them then check the protections as described above. - Check that the directory in which the fonts have been installed is part of the server font path. The font path that the server is using is easily found by looking at the font path reported by xset q. Make sure when running xset that it is done from the display where TeemTalk is going to be run. - If all the above fail, re-run the installation paying careful attention to any error messages which may have been missed first time around. 2-11
-
 1
1 -
2
-
3
-
4
-
5
-
6
-
7
-
8
-
9
-
10
-
11
-
12
-
13
-
14
-
15
-
16
-
17
-
18
-
19
-
20
-
21
-
22
-
23
-
 24
24 -
 25
25 -
 26
26 -
 27
27 -
 28
28 -
 29
29 -
 30
30 -
 31
31 -
 32
32 -
 33
33 -
 34
34 -
35
-
36
-
37
-
38
-
39
-
40
-
41
-
42
-
43
-
44
-
45
-
46
-
47
-
48
-
49
-
50
-
51
-
52
-
53
-
54
-
55
-
56
-
57
-
58
-
59
-
60
-
61
-
62
-
63
-
64
-
65
-
66
-
67
-
68
-
69
-
70
-
71
-
72
-
73
-
74
-
75
-
76
-
77
-
78
-
79
-
80
-
81
-
82
-
83
-
84
-
85
-
86
-
87
-
88
-
89
-
90
-
91
-
92
-
93
-
94
-
95
-
96
-
97
-
98
-
99
-
100
-
101
-
102
-
103
-
104
-
105
-
106
-
107
-
108
-
109
-
110
-
111
-
112
-
113
-
114
-
115
-
116
-
117
-
118
-
119
-
120
-
121
-
122
-
123
-
124
-
125
-
126
-
127
-
128
-
129
-
130
-
131
-
132
-
133
-
134
-
135
-
136
-
137
-
138
-
139
-
140
-
141
-
142
-
143
-
144
-
145
-
146
-
147
-
148
-
149
-
150
-
151
-
152
-
153
-
154
-
155
-
156
-
157
-
158
-
159
-
160
-
161
-
162
-
163
-
164
-
165
-
166
-
167
-
168
-
169
-
170
-
171
-
172
-
173
-
174
-
175
-
176
-
177
-
178
-
179
-
180
-
181
-
182
-
183
-
184
-
185
-
186
-
187
-
188
-
189
-
190
-
191
-
192
-
193
-
194
-
195
-
196
-
197
-
198
-
199
-
200
-
201
-
202
-
203
-
204
-
205
-
206
-
207
-
208
-
209
-
210
-
211
-
212
-
213
-
214
-
215
-
216
-
217
-
218
-
219
-
220
-
221
-
222
-
223
-
224
-
225
-
226
-
227
-
228
-
229
-
230
-
231
-
232
-
233
-
234
-
235
-
236
-
237
-
238
-
239
-
240
-
241
-
242
-
243
-
244
-
245
-
246
-
247
-
248
-
249
-
250
-
251
-
252
-
253
-
254
-
255
-
256
-
257
-
258
-
259
-
260
-
261
-
262
-
263
-
264
-
265
-
266
-
267
-
268
-
269
-
270
-
271
-
272
-
273
-
274
-
275
-
276
-
277
-
278
-
279
-
280
-
281
-
282
-
283
-
284
-
285
-
286
-
287
-
288
-
289
-
290
-
291
-
292
-
293
-
294
-
295
-
296
-
297
-
298
-
299
-
300
-
301
-
302
-
303
-
304
-
305
-
306
-
307
-
308
-
309
-
310
-
311
-
312
-
313
-
314
-
315
-
316
-
317
-
318
-
319
-
320
-
321
-
322
-
323
-
324
-
325
-
326
-
327
-
328
-
329
-
330
-
331
-
332
-
333
-
334
-
335
-
336
-
337
-
338
-
339
-
340
-
341
-
342
-
343
-
344
-
345
-
346
-
347
-
348
-
349
-
350
-
351
-
352
-
353
-
354
-
355
-
356
-
357
-
358
-
359
-
360
-
361
-
362
-
363
-
364
-
365
-
366
-
367
-
368
-
369
-
370
-
371
-
372
-
373
-
374
-
375
-
376
-
377
-
378
-
379
-
380
 |
 |
