HP Officejet 4500 User Guide - Page 28
Turn off the device, CAUTION - cartridge
 |
View all HP Officejet 4500 manuals
Add to My Manuals
Save this manual to your list of manuals |
Page 28 highlights
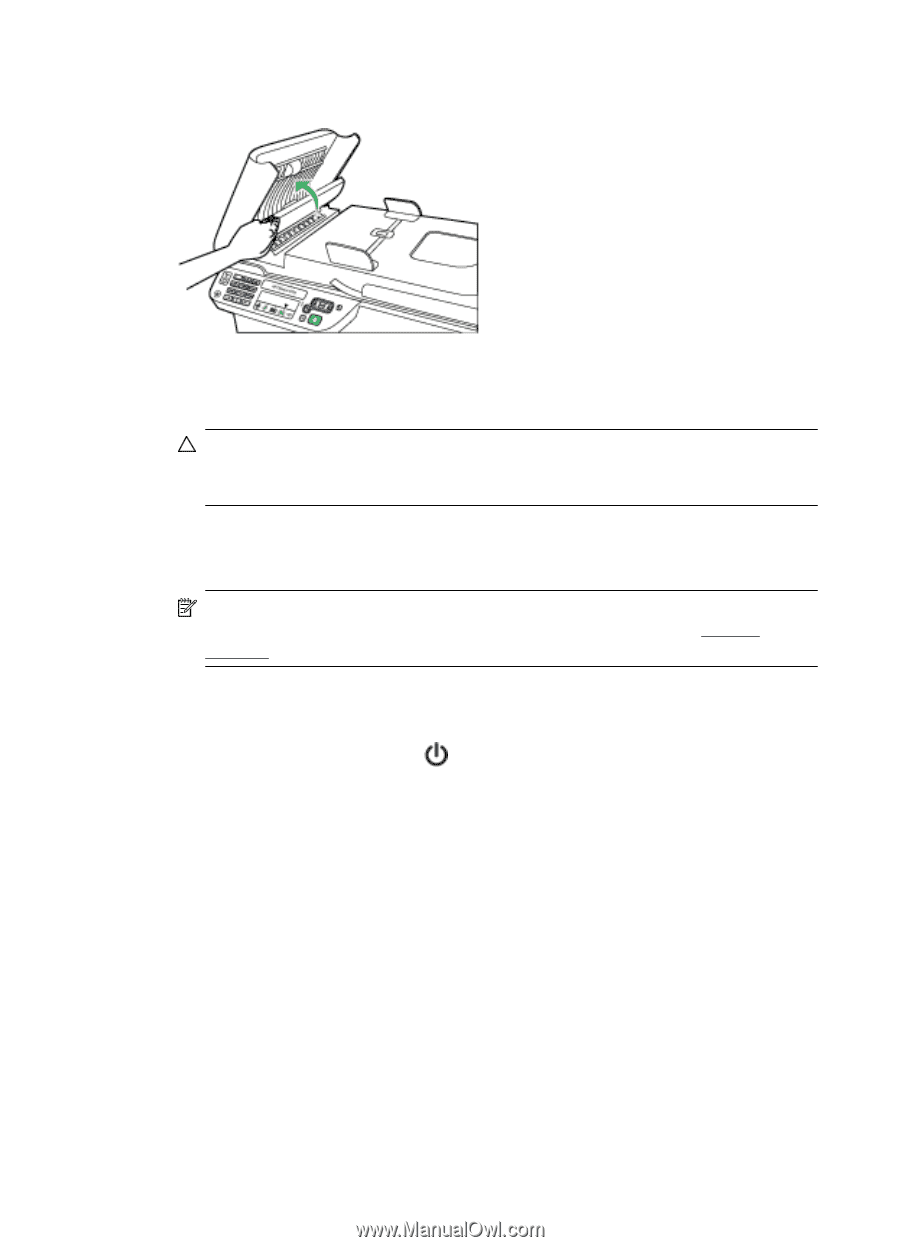
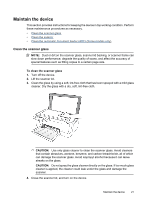
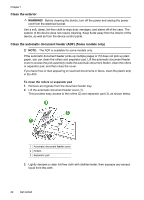
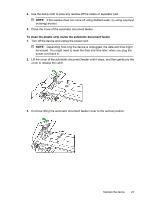
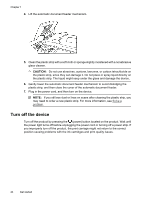
Chapter 1 4. Lift the automatic document feeder mechanism. 5. Clean the plastic strip with a soft cloth or sponge slightly moistened with a nonabrasive glass cleaner. CAUTION: Do not use abrasives, acetone, benzene, or carbon tetrachloride on the plastic strip, since they can damage it. Do not place or spray liquid directly on the plastic strip. The liquid might seep under the glass and damage the device. 6. Gently lower the automatic document feeder mechanism to avoid dislodging the plastic strip, and then close the cover of the automatic document feeder. 7. Plug in the power cord, and then turn on the device. NOTE: If you still see dust or lines on scans after cleaning the plastic strip, you may need to order a new plastic strip. For more information, see Solve a problem. Turn off the device Turn off the product by pressing the (power) button located on the product. Wait until the power light turns off before unplugging the power cord or turning off a power strip. If you improperly turn off the product, the print carriage might not return to the correct position causing problems with the ink cartridges and print quality issues. 24 Get started
-
 1
1 -
2
-
3
-
4
-
5
-
6
-
7
-
8
-
9
-
10
-
11
-
12
-
13
-
14
-
15
-
16
-
17
-
18
-
19
-
20
-
21
-
22
-
 23
23 -
 24
24 -
 25
25 -
 26
26 -
 27
27 -
 28
28 -
 29
29 -
 30
30 -
 31
31 -
 32
32 -
 33
33 -
34
-
35
-
36
-
37
-
38
-
39
-
40
-
41
-
42
-
43
-
44
-
45
-
46
-
47
-
48
-
49
-
50
-
51
-
52
-
53
-
54
-
55
-
56
-
57
-
58
-
59
-
60
-
61
-
62
-
63
-
64
-
65
-
66
-
67
-
68
-
69
-
70
-
71
-
72
-
73
-
74
-
75
-
76
-
77
-
78
-
79
-
80
-
81
-
82
-
83
-
84
-
85
-
86
-
87
-
88
-
89
-
90
-
91
-
92
-
93
-
94
-
95
-
96
-
97
-
98
-
99
-
100
-
101
-
102
-
103
-
104
-
105
-
106
-
107
-
108
-
109
-
110
-
111
-
112
-
113
-
114
-
115
-
116
-
117
-
118
-
119
-
120
-
121
-
122
-
123
-
124
-
125
-
126
-
127
-
128
-
129
-
130
-
131
-
132
-
133
-
134
-
135
-
136
-
137
-
138
-
139
-
140
-
141
-
142
-
143
-
144
-
145
-
146
-
147
-
148
-
149
-
150
-
151
-
152
-
153
-
154
-
155
-
156
-
157
-
158
-
159
-
160
-
161
-
162
-
163
-
164
-
165
-
166
-
167
-
168
-
169
-
170
-
171
-
172
-
173
-
174
-
175
-
176
-
177
-
178
-
179
-
180
-
181
-
182
-
183
-
184
-
185
-
186
-
187
-
188
-
189
-
190
-
191
-
192
-
193
-
194
-
195
-
196
-
197
-
198
-
199
-
200
-
201
-
202
-
203
-
204
-
205
-
206
-
207
-
208
-
209
-
210
-
211
-
212
-
213
-
214
-
215
-
216
-
217
-
218
-
219
-
220
-
221
-
222
-
223
-
224
-
225
-
226
-
227
-
228
 |
 |