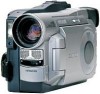
Hitachi DZ-MV100A Owners Guide
Hitachi DZ-MV100A - Camcorder Manual
 |
View all Hitachi DZ-MV100A manuals
Add to My Manuals
Save this manual to your list of manuals |
Hitachi DZ-MV100A manual content summary:
- Hitachi DZ-MV100A | Owners Guide - Page 1
Instruction Manual DZ-MV100A HITACHI AMERICA, LTD. HOME ELECTRONICS DIVISION 1855 Dornoch Court San Diego, CA 92154-7225 Tel. 1-800-HITACHI (1-800-448-2244) HITACHI CANADA LTD. DIGITAL MEDIA DIVISON 6740 Campobello Road Mississauga, Ontario L5N 2L8 CANADA Tel. 1-800-HITACHI (1-800-448-2244) Thank - Hitachi DZ-MV100A | Owners Guide - Page 2
To prevent fire or shock hazard, use the recommended accessories only. The DVD camcorder and AC adapter/ charger have the following caution marks. any problems. CAUTION : TO REDUCE THE RISK OF ELECTRIC SHOCK, DO NOT OPEN. NO USER-SERVICEABLE PARTS INSIDE. REFER SERVICING TO QUALIFIED SERVICE - Hitachi DZ-MV100A | Owners Guide - Page 3
and, if not installed and used in accordance with the instructions, may cause harmful interference to radio communications. However, there the equipment and receiver. • Connect the equipment into an outlet on a circuit different from that to which the receiver is connected. • Consult the dealer or - Hitachi DZ-MV100A | Owners Guide - Page 4
DVD camcorder and accessory equipment. Please read it carefully before operating your video product and keep it in a handy place for future reference. I○N○S○T○A○L○LA○ T○I○O○N 1 Read and Follow Instructions - All the safety and operating instructions replaced by your service technician if - Hitachi DZ-MV100A | Owners Guide - Page 5
the video product manufacturer's instructions have been followed. 9 Attachments - Do not use attachments unless recommended by the video product manufacturer as they may cause hazards. Caution: Maintain electrical safety. Powerline operated equipment or accessories connected to this unit should bear - Hitachi DZ-MV100A | Owners Guide - Page 6
lightning and power-line surges. S○ E○R○V○I○C○E 17 Servicing - Do not attempt to service this video product yourself as opening or removing covers by following the operating instructions. Adjust only those controls that are covered by the operating instructions. Improper adjustment of other - Hitachi DZ-MV100A | Owners Guide - Page 7
battery and (3) product using battery. 3. Also read all instructions on pages 4-6. 4. Caution - To reduce risk of injury, charge only rechargeable battery, DZ-BP16 or DZ-BP28. Other types of batteries : take it to a qualified serviceman when service or repair is required. Incorrect reassembly may - Hitachi DZ-MV100A | Owners Guide - Page 8
of contents directing you to specific information quickly (page 10). Get to know your DVD camcorder by using this manual, and get to know Hitachi. We appreciate your business. Quick Index Charging Battery Pack 40 Recording Movie 66 Immediately Checking Recorded Scene 93 Connecting to a TV and - Hitachi DZ-MV100A | Owners Guide - Page 9
Read This First 9 - Hitachi DZ-MV100A | Owners Guide - Page 10
24 Suggestions and restrictions 25 About this text 25 Checking provided accessories 26 Names of parts 29 DVD-RAM discs 33 Setups 39 Setting the battery 40 Using DVD camcorder with AC adapter/charger 45 Setting up the DVD camcorder 47 Setting date and time 52 Setting up the infrared remote - Hitachi DZ-MV100A | Owners Guide - Page 11
-RAM disc 136 Updating control information 138 Connecting DVD Camcorder to Other Devices 139 Viewing on TV screen 140 Recording image from other AV devices 142 Transferring data to PC 146 Subsidiary Information 149 Cleaning 150 Trouble messages 151 Troubleshooting 153 Major specifications - Hitachi DZ-MV100A | Owners Guide - Page 12
beginning this manual, refer to "Checking Provided Accessories" on page 26 and make sure that all accessories are provided in package. N○ ○ec○ e○s○s○a○ry○ ○D○e○v○ic○e○s DVD camcorder AC adapter/ charger DZ-ACP1 DC power cable Power cable 8 cm DVD-RAM disc When using a battery pack, charge - Hitachi DZ-MV100A | Owners Guide - Page 13
Connect the plug on the other end of power cable to AC outlet. DC power cable AC adapter/charger DZ-ACP1 2-3 Power cable 2-1 2-4 2-2 3. Insert the DVD-RAM Continue to open the cover by hand. 3-3 Insert the DVD-RAM disc cartridge into the disc guide, so that the side of disc (A or B) you want - Hitachi DZ-MV100A | Owners Guide - Page 14
). Open the LCD monitor if you want to check the image on the LCD screen. 5. Set the current date and time (see p. 52). When the DVD camcorder is first turned on, the date will be "January 1, 2000". It is important to correctly set the date and time: If recording is made with - Hitachi DZ-MV100A | Owners Guide - Page 15
the switch down: The red indicator of the button will go out. Wait a few seconds until the indicator turns off. Do not remove the battery pack or AC adapter/ charger from the DVD camcorder until the indica- tor at the center of POWER switch and ACCESS indicator are completely off. POWER 15 - Hitachi DZ-MV100A | Owners Guide - Page 16
16 - Hitachi DZ-MV100A | Owners Guide - Page 17
Before You Begin Features of DVD camcorder 18 Cautions when using 20 Cautions when storing 24 Suggestions and restrictions 25 About this text 25 Checking provided accessories 26 Names of parts 29 DVD-RAM discs 33 17 - Hitachi DZ-MV100A | Owners Guide - Page 18
forwarded and rewound. In addition, simply loading a disc into a PC, equipped with DVD-RAM drive and software compatible with 8 cm DVD-RAM, allows you to easily view the recorded image. R○ e○ c○o○rd○ i○n○g○ M○ ○o○v○ie○ ○a○n○d○S○t○ill The DVD camcorder can record movies of events and sports, in the - Hitachi DZ-MV100A | Owners Guide - Page 19
D○ e○ v○ i○ce○ s Connect this DVD camcorder to your TV and you can enjoy the playback picture with your family and friends on the large TV screen; or connect it to a video printer (generally available) to print the recorded image. You can also transfer the recorded movies and stills to PC. 19 - Hitachi DZ-MV100A | Owners Guide - Page 20
a fault as the LCD panel stretches the limits of current technology. • The LCD screen and viewfinder will be slightly dimmer than usual when the DVD camcorder is at low temperature, as in cold areas, or immediately after power is turned on. The normal brightness will be restored when the temperature - Hitachi DZ-MV100A | Owners Guide - Page 21
place where the temperature is over 104 °F (40 °C) or under 32 °F (0 °C) will not allow it to make normal recording/playback. • Do not leave the DVD camcorder in a closed vehicle where the temperature is very high for a long time: This could cause malfunctions. Do not point directly at the sun: • If - Hitachi DZ-MV100A | Owners Guide - Page 22
by gasoline and diesel engines, or corrosive gas such as hydrogen sulfide, could corrode the battery connecting terminals, which could result in loss of power. Do not use the DVD camcorder near ultrasonic humidifier: With some water in humidifier, calcium and others dissolved in water could - Hitachi DZ-MV100A | Owners Guide - Page 23
Remove battery pack. • Disconnect AC adapter/charger. • Plug or unplug PC connection cable. • Remove DVD-RAM disc. ACCESS If the DVD camcorder is instructions. Also read the instructions attached with optional accessories: For optional accessories, follow the cautions and instruction manuals - Hitachi DZ-MV100A | Owners Guide - Page 24
storing it in a closet, etc. Do not store the DVD camcorder in a place subject to strong magnetism or intense vibrations: This could cause malfunctions. Detach the battery from DVD camcorder and store it in a cool place: Leaving the battery attached or storing it at high temperature could shorten - Hitachi DZ-MV100A | Owners Guide - Page 25
contents cannot be played back because of a defect in the DVD camcorder or DVD-RAM disc. Also, Hitachi will not be responsible for your recorded video and audio. Copyright: The data recorded on the DVD-RAM disc in your DVD camcorder through other digital/analog media or devices are protected by the - Hitachi DZ-MV100A | Owners Guide - Page 26
video device. 8 cm DVD-RAM disc: Connect between household AC outlet and AC adapter/ charger. 2 Ferrite cores: Attach the lens cap when not recording, to protect the lens. PC Connection Software CDROM PC Connection cable Stores video and audio recorded on this DVD camcorder. This disc has already - Hitachi DZ-MV100A | Owners Guide - Page 27
Checking Provided Accessories A○ t○ta○ c○ h○ i○n○g○F○e○rr○it○e○ C○ o○ r○e○s Although the cores are not attached in the illustrations of the cables in text, be sure to attach the ferrite core (provided) - Hitachi DZ-MV100A | Owners Guide - Page 28
c○ h○ i○n○g○L○e○n○s ○C○a○p Pass the provided string through the hole in the lens cap and attach it to the hand strap of DVD camcorder. 1. Use the string to attach the cap to the DVD camcorder. 2. Push the both sides of cap inward and attach it over the lens. Caution: • Always keep the lens cap on - Hitachi DZ-MV100A | Owners Guide - Page 29
Names of Parts Lens hood Zoom lever (P. 64,67) Optical 12X zoom lens Name of Parts PHOTO button (shutter) (P. 82) RECORDING MODE switch (P. 64,66,82) Flash (P. 84) Stereo microphone (P. 80) Information LCD monitor Infrared receiver(P. 55) (P. 63,148) 3.5-inch color LCD monitor (P. 60) - Hitachi DZ-MV100A | Owners Guide - Page 30
,52,59) Bottom Diopter control (P. 59) PROG.AE EXPOSURE FOCUS MENU PUSH PUSH 30 Hand strap (P. 48,58) REC button (P. 64,66) Battery attachment platform (P. 42) Battery eject button (P. 43) PROG AE button (P. 64,72) EXPOSURE button (P. 64,78) FOCUS button (P. 64,74,89) MENU button (P. 25,52,64 - Hitachi DZ-MV100A | Owners Guide - Page 31
DISC NAVIGATION button (P. 100) DELETE button (P. 101,108,109) SHIFT button (P. 101,104) 3.5-inch color LCD monitor (P. 60) Speaker CANCEL button (P. 101,120,121) RESET button (P. 134) Name of Parts Cursor button (P. 69,101,104) MENU button (P. 101) RECORDING MODE DISC NAVIGATION DELETE MENU - Hitachi DZ-MV100A | Owners Guide - Page 32
ENTER button (P. 107) DISPLAY EXT.DISPLAY SEARCH REC SKIP PHOTO DIGITAL ZOOM VOL ZOOM DISC NAVIGATION DELETE MENU ENT SHIFT CANCEL HITACHI PHOTO button (P. 82) DIGITAL ZOOM button (P. 68) ZOOM button (P. 67) DISC NAVIGATION button (P. 100) MENU button (P. 68,102) SHIFT button (P. 104 - Hitachi DZ-MV100A | Owners Guide - Page 33
for digital recording because of its compactness and mass storage. It has been adopted to this DVD camcorder, a world first, as a home use DVD camcorder. (as of thirdquarter, 2000) DVD-RAM Standard Book Diameter Storage capacity Transfer rate Laser used Book 2.1 Book 1.0 12cm 8cm 12cm 4.7 GB - Hitachi DZ-MV100A | Owners Guide - Page 34
, and some can be removed but recording cannot be made on them. For details, read the instruction sheet provided with discs or consult the disc maker. Examples of discs that cannot be used on this DVD camcorder: 8 cm DVD-RAM discs for PC, CD, DVD-ROM, DVD-Video, MO, MD, iD, floppy disks, etc. 34 - Hitachi DZ-MV100A | Owners Guide - Page 35
DVD camcorder: Be careful when removing the disc. • The DVD-RAM disc is a very delicate recording medium. Leave the disc in the cartridge when using it in this DVD camcorder you handle or use the DVD-RAM disc incorrectly, the recorded data may be lost. Hitachi cannot be responsible for damages from - Hitachi DZ-MV100A | Owners Guide - Page 36
○ D○ ○is○c○f○ro○ m○ ○C○a○r○tr○id○ g○ e The DVD-RAM disc used with this DVD camcorder can be removed from the cartridge and used with DVD-RAM drives, DVD players and DVD recorders that are compatible with 8 cm DVD-RAM discs. Refer to the disc instruction sheet for details on how to remove disc from - Hitachi DZ-MV100A | Owners Guide - Page 37
cm DVD-RAM discs can be removed from cartridges if they are for video cameras; However, before removing disc from cartridge, read the instruction from cartridge and the data stored by this DVD camcorder is rewritten on devices other than this DVD camcorder, recording or playback may not be normal, - Hitachi DZ-MV100A | Owners Guide - Page 38
cartridge, the disc can be replaced in the cartridge and used with this DVD camcorder, but be sure to observe the following: • Before replacing the disc performed with the disc removed from cartridge. Write-protect tabs The DVD-RAM disc cartridge has write-protect tabs to prevent overwrit- ing on - Hitachi DZ-MV100A | Owners Guide - Page 39
that you have all accessories, referring to page 26. When using the DVD camcorder outdoors, you will usually have to use a battery to power the DVD camcorder. First, while charging the battery, set up the DVD camcorder for recording. Setting up the battery 40 Using DVD camcorder with AC adapter - Hitachi DZ-MV100A | Owners Guide - Page 40
for the DVD camcorder: Using other batteries could cause the DVD camcorder to malfunction, or result in fire. C○ h○ a○ r○g○in○ g○ ○B○a○tt○e○ry Use the provided AC adapter/charger to charge the battery. Cautions • Charging will not be possible if the DC power cable is left connected to the - Hitachi DZ-MV100A | Owners Guide - Page 41
is between 40 and 60 minutes (with model DZ-BP16) or between 70 and 100 minutes (with model DZ-BP28), and prepare the type and number of batteries to allow for the time you are planning to record on the DVD camcorder. Note that the battery discharges faster in cold places. The time taken for - Hitachi DZ-MV100A | Owners Guide - Page 42
Pull out the viewfinder fully and raise it. 1 2. Align the top of battery with the top surface of battery attachment platform of DVD camcorder. 3. While fitting the battery onto the DVD 2 · 3 camcorder, slide it downward until a click is heard. R○ e○ m○ ○o○vi○n○g○ B○ a○ t○te○ r○y After using - Hitachi DZ-MV100A | Owners Guide - Page 43
o○ f○ ○B○a○tt○e○ry Be sure to use the specified battery (DZ-BP16 or DZ-BP28): Using other batteries could cause faulty DVD camcorder operation, or possibly a fire. Charge the battery immediately before using the DVD camcorder: If a charged battery is stored, it will discharge on its own; therefore - Hitachi DZ-MV100A | Owners Guide - Page 44
on the ambient environment and how often the DVD camcorder is used. If the usable time of DVD camcorder with a fully charged battery is noticeably short, the battery is probably dead: Purchase a new battery. Disposing of the dead battery: Dispose of battery safety in accordance with local laws. Do - Hitachi DZ-MV100A | Owners Guide - Page 45
to your PC, etc. Caution • Be sure to use the specified AC adapter/charger (DZ-ACP1) to power the DVD camcorder. Using other AC adapters could cause electric shock or result in fire. 1. Attach the terminal device of provided DC power cable to the battery attachment platform on DVD camcorder. Align - Hitachi DZ-MV100A | Owners Guide - Page 46
adapter can be used around the world. An AC plug adapter is required in some foreign countries. If you need one purchase it from your Hitachi distributor. Caution • If the POWER indicator on AC adapter/charger does not light when it is plugged into AC outlet, unplug the AC adapter/charger - Hitachi DZ-MV100A | Owners Guide - Page 47
Setting Up the DVD Camcorder Setting Up the DVD Camcorder I○n○se○ r○ t○in○ g○ ○D○V○D○-○R○A○M○ ○d○is○ c With this DVD camcorder the recorded video and audio are stored on the DVD-RAM disc. The 8 cm DVD-RAM disc for AV (provided) is already formatted: When using an uninitialized DVD-RAM disc, it - Hitachi DZ-MV100A | Owners Guide - Page 48
cartridge will stop once midway: Firmly push it in until it stops. Disc guide Hand strap Shutter Caution: • The DVD-RAM disc has an orientation: If it is forcibly inserted from the wrong direction, the DVD camcorder or cartridge could be damaged. 5. Gently push the section indicated "PUSH" on the - Hitachi DZ-MV100A | Owners Guide - Page 49
open slightly. EJECT 3. Gently open the cover until it stops. When the cover is fully open, the disc will slightly come out from the disc guide, and stop. Caution: • Do not remove the DVD-RAM disc with the battery attachment platform of DVD camcorder facing down: Disc could fall out. 49 - Hitachi DZ-MV100A | Owners Guide - Page 50
the DVD-RAM disc. Caution: Be careful when removing the disc, since the temperature at the shutter will be very high. Disc guide Hand strap Shutter 5. Gently push the section indicated "PUSH" on the cover of disc insertion block (hand strap), to close the cover. Tip: • Even when the DVD camcorder - Hitachi DZ-MV100A | Owners Guide - Page 51
The movies and stills that can be recorded on an 8 cm DVD-RAM disc used in this DVD camcorder are as follows: Prepare discs according to the scheduled recording time and conditions. Recordable time of movies on DVD-RAM disc Movie quality mode FINE (MPEG2, approx. 6 Mbps) STND (MPEG2, approx - Hitachi DZ-MV100A | Owners Guide - Page 52
can also be used to correct the date and time you have already set.) 1. Turn the DVD camcorder on. While holding down the button at the center of POWER switch, push the switch down. When the DVD camcorder is first turned on, the date will be "12:00AM 1/1/2000". POWER 2. Press the MENU button - Hitachi DZ-MV100A | Owners Guide - Page 53
tt○e○ry This DVD camcorder incorporates a battery to back up the date and time. Connect the AC adapter/charger or charged battery to the DVD camcorder once every two months, and leave the connection status for at least 24 hours with camcorder power turned off: The built-in battery will be charged - Hitachi DZ-MV100A | Owners Guide - Page 54
control to use it. The remote control can control the DVD camcorder from a distance of up to approximately 18 feet (5 m). Caution • If the batteries are dead, pressing buttons on remote control will not operate the DVD camcorder: Replace the batteries. 1. Push the tab on the back of remote con- trol - Hitachi DZ-MV100A | Owners Guide - Page 55
. • If there is an obstacle between the remote control and infrared receiver of DVD camcorder, remote control may not be possible. • This DVD camcorder uses the "VCR2" remote control code of Hitachi VCRs. If you use a Hitachi VCR, etc. with the remote control code set to "VCR2", a VCR placed near - Hitachi DZ-MV100A | Owners Guide - Page 56
56 - Hitachi DZ-MV100A | Owners Guide - Page 57
Recording Two recording modes are available on this DVD camcorder: movie and still. Here we will explain the methods for each recording and various functions. Basic handling of DVD camcorder 58 Recording movie 66 Useful functions during recording of movie 71 Recording stills 82 57 - Hitachi DZ-MV100A | Owners Guide - Page 58
press the REC button with your thumb. Cautions • Do not adjust the hand strap while holding the DVD camcorder: Doing this could cause the DVD camcorder to fall and be damaged. • Do not lift the DVD camcorder by holding the viewfinder or LCD monitor: If the viewfinder or LCD monitor comes off, the - Hitachi DZ-MV100A | Owners Guide - Page 59
the button at the center of POWER switch, push the switch down. The red indicator of the button will light. The DVD camcorder starts to recognize the disc, and after approximately 25 seconds, it POWER will enter the recording pause status. V○ i○e○w○ i○n○g○S○u○b○je○ c○t○t○h○ro○ u○ g○ h○ ○V○ie - Hitachi DZ-MV100A | Owners Guide - Page 60
chapter 3_Recording O○ ○p○en○ i○n○g○ L○C○D○ ○M○o○n○it○o○r If you open the LCD monitor, you can monitor subject image on the LCD screen. If the monitor is open, the viewfinder will be off. 1. Press the OPEN button to open the LCD monitor. The LCD monitor can be opened up to approximately 115°. - Hitachi DZ-MV100A | Owners Guide - Page 61
LCD BRIGHT button. The "BRT" indicator will light on the screen. (The indicator will go out in approximately 3 seconds.) Basic handling of DVD camcorder Screen brightness adjustment 2. Turn the Select dial to adjust the screen brightness. Turning the Select dial will change the brightness of LCD - Hitachi DZ-MV100A | Owners Guide - Page 62
(When digital zoom is on) When adjusting exposure When focusing manually : When flash always emits light : When flash does not DVD camcorder, or disc has not yet been initialized, write-protected disc or disc with no remaining time is inserted. **** The DVD camcorder status and remaining battery - Hitachi DZ-MV100A | Owners Guide - Page 63
button. The full and minimum display modes will alternate. Tip: • The DVD camcorder does not record the recording date/ time as a part of image. However the LCD monitor is closed: You can check it any time. Battery remaining level Recording mode Movie Still RECORDING MODE Remaining free space on - Hitachi DZ-MV100A | Owners Guide - Page 64
FOCUS button (6) MENU button (7) Select dial (5) FOCUS button To switch to manual focus. After pressing FOCUS, use the select dial to adjust the focus. screen. The menu screen will appear even if no disc is in the DVD camcorder. (7) Select dial To adjust program AE, exposure, focus, and LCD screen - Hitachi DZ-MV100A | Owners Guide - Page 65
of screen (autofocus). When the DVD camcorder is turned on, auto-focus will always be set. Focusing range • On T (tele) side: approximately 3.6 feet (1 m) from lens surface to infinity • On W (wide) side: approximately 3/8" (1 cm) from lens surface to infinity Manually focus the following objects - Hitachi DZ-MV100A | Owners Guide - Page 66
various functions available during recording of movie, see "Useful Functions during Recording of Movie" on page 71. 3. When recording is finished, turn the DVD camcorder off. Caution: • Hitachi cannot be responsible for video and audio that cannot be recorded or edited because of any defect. 66 - Hitachi DZ-MV100A | Owners Guide - Page 67
Off Time" on page 131). Even during recording pause, battery power is consumed at the same level as during recording. Especially when power save has been released, turn the DVD camcorder off if possible, except during recording. Z○ o○ o○ m○ ○in○ g This DVD camcorder can zoom in on subject up to 12 - Hitachi DZ-MV100A | Owners Guide - Page 68
chapter 3_Recording S○ w○ ○it○ch○ i○n○g○ D○ ○ig○it○a○l○Z○o○o○m○ ○O○ f○f When the Zoom lever T control is held down, digital zoom will automatically start when optical 12X zoom range is exceeded. When digital zoom is engaged, the image quality will be a little rougher, so if you do not need digital - Hitachi DZ-MV100A | Owners Guide - Page 69
The menu screen for setting camera functions will appear. Recording Movie Tips: • When the LCD monitor is open, you can use the cursor, MENU and ENTER buttons in place of the Select dial to operate the menu. DISC VIGATION DELETE MENU HIFT CANCEL DISPLAY RESET ENTER LCD BRIGHT 3. Turn the - Hitachi DZ-MV100A | Owners Guide - Page 70
another menu item, select it instead of pressing MENU in step 5. • You can check D.ZOOM ON or OFF by reviewing the on-screen information. • The pointer of zoom indicator shows whether the DVD camcorder is in the optical 12X zoom range or in the digital 4X zoom range. When D.ZOOM is OFF: ̬ When - Hitachi DZ-MV100A | Owners Guide - Page 71
Functions during Recording of Movie S○ e○le○ c○t○in○g○ ○sh○ o○ o○ t○in○g○ ○m○ o○d○e○ ○to○ ○m○a○t○ch○ ○th○ e○ ○su○ b○ j○e○ct switching program AE mode) This DVD camcorder automatically sets the shutter speed and aperture according to the subject brightness for optimum recording: You can also specify - Hitachi DZ-MV100A | Owners Guide - Page 72
chapter 3_Recording Switching shooting mode: 1. Press the PROG AE button in recording pause status. Pressing the button will switch the shooting mode between program AE mode (4-type) and full auto mode. 1 2. Turn the Select dial to select the de- PROG.AE sired program AE mode. Turning the - Hitachi DZ-MV100A | Owners Guide - Page 73
image, it will correct fuzziness in the recorded image. Tips: • It is recommended that you release electronic image stabilizer when using the DVD camcorder on a desk or tripod. • When electronic image stabilizer is activated, there will be a slight difference between the actual movement and the - Hitachi DZ-MV100A | Owners Guide - Page 74
You can check whether electronic image stabilizer is engaged or not by reviewing the on-screen information. Electronic image stabilizer Note that the setting of electronic image stabilizer will not change when the DVD camcorder is turned off: After recording with EIS set to OFF, it is recommended - Hitachi DZ-MV100A | Owners Guide - Page 75
image down to the desired size, and then start recording. Tips • Manual focus is released when the DVD camcorder is turned off. When you turn the DVD camcorder on next time, auto focus will be restored. • To return to auto-focus from manual focus not yet locked, press the FOCUS button. M○ ○a○cr - Hitachi DZ-MV100A | Owners Guide - Page 76
-timer on p. 88.) Cautions: • Do not record for a prolonged time with the LCD monitor turned 180 ° in close contact with the DVD camcorder body: Doing this could cause the DVD camcorder and LCD monitor to become hot. • When the LCD monitor is turned 180 °, no image will appear in the viewfinder. 76 - Hitachi DZ-MV100A | Owners Guide - Page 77
" mode. Block-like noise may appear in recorded image, or the outline of subject image is distored under the recording conditions listed below: Pan the camcorder as slowly as possible. (Block noise is likely to appear in the "STND" mode): • If there is a complicated pattern (trees, fence, etc.) in - Hitachi DZ-MV100A | Owners Guide - Page 78
by reviewing the on-screen information. Movie quality mode The setting of movie quality mode will not change when the DVD camcorder is DVD camcorder measures the subject brightness and automatically adjusts the exposure. For special effects recording, you can also adjust the exposure manually - Hitachi DZ-MV100A | Owners Guide - Page 79
. Useful Functions during Recording of Movie Tips • The exposure setting will be memorized even if the DVD camcorder is turned off. • To return to automatic exposure from manual exposure not yet locked, press the EXPOSURE button. W○ ○h○it○e○ B○ a○ l○a○n○ce○ ○(A○ U○ ○TO○ ○/○H○O○L○D With this - Hitachi DZ-MV100A | Owners Guide - Page 80
○ic○ro○ p○ h○ o○ n○ e Connect a high-performance microphone (generally available) to the external microphone jack of this DVD camcorder: Clearer sound can be recorded. Turn on the switch on the DVD camcorder and start recording. For details on microphone, see "Major Specifications" on page 161 - Hitachi DZ-MV100A | Owners Guide - Page 81
the on setting of microphone filter by reviewing on-screen information: MIC will appear for ON setting, and no indication will appear for OFF setting. The microphone filter setting will be held in memory until it is changed even after the DVD camcorder is turned off. Microphone filter indicator 81 - Hitachi DZ-MV100A | Owners Guide - Page 82
You can also switch off digital zoom (see p. 68). 4. Press the PHOTO button (shutter) half way: The operating sound will be heard twice. The DVD camcorder automatically focuses on the subject at the center of screen (when auto focus is selected). 5. Press the PHOTO button all the way in. The screen - Hitachi DZ-MV100A | Owners Guide - Page 83
Power save and discharge of battery" on p. 67). You can also release power save and change the time until the DVD camcorder automatically turns off (see button, pan the DVD camcorder until your desired composition is obtained. 3. Press the button all the way in. You can also manually focus on the - Hitachi DZ-MV100A | Owners Guide - Page 84
subject" on page 71. Tip: • Use the electronic flash function to record a subject lighted from rear, for a clearer still. Shutter speed: The DVD camcorder automatically sets the shutter speed between 1/800 and 1/30 second according to the subject brightness. When the subject is darker, the shutter - Hitachi DZ-MV100A | Owners Guide - Page 85
to "ON" or "OFF". Recording Stills 4. Press the MENU button to switch off the menu screen. You can check the condition of flash function by reviewing the on-screen information. No indication will appear when "FLASH AUTO" is specified. Flash Tip: • When the subject brightness is low with flash set - Hitachi DZ-MV100A | Owners Guide - Page 86
is recommended that you return the option to AUTO and then turn the DVD camcorder off, unless you always record still with the same flash setting. R○ : • Manual focus • Macro recording • Recording image of yourself • Recording by manually adjusting exposure • Recording by manually adjusting white - Hitachi DZ-MV100A | Owners Guide - Page 87
INT. ". Recording Stills 5. Press the MENU button to switch off the menu screen. You can also check that interval recording has been set by reviewing the on-screen information. Interval recording 6. Press the PHOTO button: Interval recording will start. Stills will be recorded in succession at the - Hitachi DZ-MV100A | Owners Guide - Page 88
turn the DVD camcorder off. Cautions: • The interval time in interval recording is a reference only, not an accurate time. • Dark subjects may not be focused even if electronic flash is used. It is recommended that you light a subject when recording in a dark place, or use manual focus to previously - Hitachi DZ-MV100A | Owners Guide - Page 89
the menu screen. You can also check that self-timer has been set by reviewing the on-screen information. Self-timer recording 5. Press the PHOTO button (shutter). The tally indicator at the front of DVD camcorder will blink. Approximately 10 seconds later, the shutter will open. The self-timer mode - Hitachi DZ-MV100A | Owners Guide - Page 90
appear on the screen. Tip: • Pressing FOCUS will alternate between manual focus and auto focus. With auto focus, no indication will , press the PHOTO Button. With manual focus, you do not need to press the PHOTO button half way. Manual focus will be released when the DVD camcorder is turned off. 90 - Hitachi DZ-MV100A | Owners Guide - Page 91
play back images recorded on the DVD camcorder, with the DVD camcorder alone. The built-in Disc Navigation tool allows you to do simple movie work with the DVD camcorder alone, such as attaching titles, special effects 114 Dividing movies 116 Creating new play list 119 Trouble messages 125 91 - Hitachi DZ-MV100A | Owners Guide - Page 92
Reverse search button (5) Forward skip button (6) Reverse skip button (1) Playback/pause button Press this button during recording pause after recording: The DVD camcorder will play back the scene recorded last from its first image. (2) Stop button To restore the recording pause status or Disc - Hitachi DZ-MV100A | Owners Guide - Page 93
temporarily stop playback. Cautions: • Pressing immediately after recording a scene will allow you to review approximately the last 5 seconds of the scene you have last recorded. When playback is finished, the DVD camcorder will return to the recording pause status, but this will function only when - Hitachi DZ-MV100A | Owners Guide - Page 94
first image of scene being played back. Press once during playback of the portion within approximately 2 seconds from the start of the scene: The DVD camcorder will return to the 1 start of the preceding scene (see p. 98 for scenes), and start playback. Press once during playback pause of the - Hitachi DZ-MV100A | Owners Guide - Page 95
6x approx. 3x approx. 6x approx. 3x approx. 1/2x approx. 1/2x approx. 3/4x approx. 1/2x • Scenes are limited to those recorded on this DVD camcorder. • Speeds in this table are only for reference: The speed may be slower during operation. • In forward slow, a rapidly moving subject image may be - Hitachi DZ-MV100A | Owners Guide - Page 96
chapter 4_Playing Back, Deleting and Editing Your Recordings F○r○a○m○ e○ ○A○d○v○a○n○c○e○/F○ r○a○m○ e○ ○B○a○c○k○/○Sl○o○w○ ○P○la○ y○ b○ a○ c○ k 1. During playback pause, press the button once: Picture will advance one frame. Press once: Picture will go back 15 frames. 2 1 2. When the image you - Hitachi DZ-MV100A | Owners Guide - Page 97
Playing Back O○ ○n○-S○c○r○ee○ n○ ○In○ f○o○r○m○a○t○io○n○ ○D○u○ri○n○g○ P○ l○a○y○b○a○c○k Various types of information on recording will be superimposed on playback picture you are viewing in the viewfinder or on the LCD screen. Playback status: Playback Play pause Fast forward Fast back Forward - Hitachi DZ-MV100A | Owners Guide - Page 98
DVD camcorder. S○t○ru○c○tu○r○e○o○f ○D○a○ta○ R○ e○ c○o○rd○ e○d○ o○ n○ ○Th○ i○s ○D○V○D○ C○ a○m○ c○o○r○de○ r Movies and stills recorded using this DVD camcorder will be stored on the DVD-RAM functions are available by displaying all programs or a specific program in thumbnails: • Select one scene and - Hitachi DZ-MV100A | Owners Guide - Page 99
of movie, set memos and special effects of movies, skip setting, etc.) (p. 118). Create and Edit Play List You can display all programs or a specific program in thumbnails, select scenes, and create up to 99 original stories (play list, p. 119). You can change the composition of play list any time - Hitachi DZ-MV100A | Owners Guide - Page 100
scene being selected Operating guide Title of scene being selected *Scene no. if no title is attached Location of thumbnails displayed among all scenes Status of disc When being accessed When not being accessed Color will change when the temperature inside DVD camcorder rises. Activating Disc - Hitachi DZ-MV100A | Owners Guide - Page 101
can be operated using either the buttons or select dial on either the DVD camcorder or remote control: Here is the explanation for using the buttons on the DVD camcorder. Tip: • For full-scale editing, connect the DVD camcorder to TV (see p. 140) and use the remote control • When are shown in - Hitachi DZ-MV100A | Owners Guide - Page 102
Selecting Program) If there are many scenes on a disc, editing may be easier if you select scenes from a specific day to be edited. The scenes recorded on this DVD camcorder are stored collectively as a "program" for each recording date. Selecting a program allows you to display the scenes recorded - Hitachi DZ-MV100A | Owners Guide - Page 103
of the program. • Even if date is reset (see p. 52), the titles that have already been set and the display order will not change. • When a specific program is selected and displayed, you can select, play and edit scenes, in the same way as in thumbnail display of all programs. Tip: • The - Hitachi DZ-MV100A | Owners Guide - Page 104
chapter 4_Playing Back, Deleting and Editing Your Recordings S○ e○le○ c○t○in○g○ ○a○S○c○e○ne 1. Press while the thumbnail display screen is being displayed. The selected scene will be shadowed in blue. This is called a "cursor". The number of the selected scene will appear at the top right of - Hitachi DZ-MV100A | Owners Guide - Page 105
3. Press the cursor button to move the cursor to the last scene in the range you want to select. Using Disc Navigation SHIFT Tip: Scenes in the selected range will be shadowed in deep blue. • You can also select scenes in reverse from the last scene in the range. To release multiple selection, - Hitachi DZ-MV100A | Owners Guide - Page 106
chapter 4_Playing Back, Deleting and Editing Your Recordings 4. Choose "All" to specify all scenes, choose "Start ˠ current" to specify the scene the cursor is designating and preceding scenes, or "Current ˠ end" to specify the scene the cursor is designating and following scenes, and then press the - Hitachi DZ-MV100A | Owners Guide - Page 107
the last or start image of a scene is reached by fast forward/fast back, forward slow/reverse slow, etc. during playback, the DVD camcorder will enter the playback pause status. P○ l○a○y○in○g○ ○B○a○ck○ ○O○n○ly○ ○S○ti○ll○s○(○Sl○id○ e○ ○P○la○ y 1. Press the MENU button while the thumbnail display - Hitachi DZ-MV100A | Owners Guide - Page 108
chapter 4_Playing Back, Deleting and Editing Your Recordings D○ e○ l○e○ti○n○g○S○c○e○ne○ s○ ○u○si○n○g○ M○ ○e○n○u○ S○c○re○ e○ n 1. Select a scene to be deleted, and press the MENU button to display the Disc Navigation menu screen. 2. Press to choose "Scene ", and then press to display the menu - Hitachi DZ-MV100A | Owners Guide - Page 109
will simultaneously record two types of still: A still to be played back on DVD camcorder and a still to be used on PC. However, the above deletion function will delete only stills to be played back on DVD camcorder. • If the time of deleted scenes (stills) is quite short, the remaining free - Hitachi DZ-MV100A | Owners Guide - Page 110
chapter 4_Playing Back, Deleting and Editing Your Recordings 2. Press to choose "Cancel skip", and then press the ENTER button. After the proceeding message is displayed, skipping of the selected scene will be released, and the thumbnail display screen will be restored (the skip mark will disappear - Hitachi DZ-MV100A | Owners Guide - Page 111
Using Disc Navigation A○ t○ta○ c○ h○ i○n○g○T○it○le You can attach a title of up to 20 characters to a scene. 1. Select the scene for title attachment, and press the MENU button to display the Disc Navigation menu screen. You can also specify a range of scenes, and attach the same title to all of - Hitachi DZ-MV100A | Owners Guide - Page 112
chapter 4_Playing Back, Deleting and Editing Your Recordings For example, input "TOM 2000" using the following procedure: 4. Press the DISPLAY button to display Mode 1. Use the cursor keys to choose "T", and then press the ENTER button. "T" will appear on the left end of title input box. 5. Keeping - Hitachi DZ-MV100A | Owners Guide - Page 113
9. The message for verification will appear. Choose "Yes" and press the ENTER button. After the proceeding message appears, the thumbnail display screen will be restored. The entered title will appear at the bottom right of screen. Using Disc Navigation Tips: TOM 2000 • To delete any characters - Hitachi DZ-MV100A | Owners Guide - Page 114
chapter 4_Playing Back, Deleting and Editing Your Recordings A○ d○ d○ i○n○g○ S○ p○ e○c○ia○ l○ E○f○fe○c○ts Special effects refer to effects to be added when scenes are switched, such as fade, wipe, B/W, etc. You can add different effects to the first and last images of one scene. There are three - Hitachi DZ-MV100A | Owners Guide - Page 115
5. After selecting effects for "IN" and "OUT", choose "Set", and then press the ENTER button. After the proceeding message appears, the thumbnail display screen will be restored. Using Disc Navigation The scenes for which special effects have been set will be attached with marks " ", " ". "Out" - Hitachi DZ-MV100A | Owners Guide - Page 116
chapter 4_Playing Back, Deleting and Editing Your Recordings D○ i○v○id○ i○n○g○M○ o○ v○ i○e○s You can divide a scene into two parts. To delete unnecessary portion of scene, first divide the scene, and then delete the unnecessary portion. You can also cut out a part of scene and use it in the play - Hitachi DZ-MV100A | Owners Guide - Page 117
Using Disc Navigation C○ o○ m○ ○b○in○in○ g○ ○M○ u○ l○ti○p○le○ ○S○ce○ n○ e○s You can combine multiple scenes into one, and you can also combine divided scenes to restore the original scene. Be sure to select multiple scenes when combining. 1. Select multiple scenes by specifying the range, and then - Hitachi DZ-MV100A | Owners Guide - Page 118
chapter 4_Playing Back, Deleting and Editing Your Recordings D○ i○s○p○la○y○in○ g○ ○In○ f○o○rm○ ○a○t○io○n○ u○ s○ i○n○g○D○ i○sc○ ○N○a○v○ig○ a○ t○io○ n You can display various information on a scene: the recording date/time and length, set memo and special effects. 1. Select a scene and press the - Hitachi DZ-MV100A | Owners Guide - Page 119
l○a○y○ L○is○ t 1. Display the thumbnails of the scenes you want to add to the play list. If you create a play list of scenes recorded on a specific day, display only the scenes for that day, referring to "Selecting Program" on page 102. You can also add scenes on another day or delete - Hitachi DZ-MV100A | Owners Guide - Page 120
"Program", "Select", and then select "All Programs" or a specific program. • Serial numbers are attached to play lists in the order of creation. Before titles are attached to play lists, the attached creating dates according to the date set on the DVD camcorder will be the titles of play lists. Even - Hitachi DZ-MV100A | Owners Guide - Page 121
3. Choose "Play List", "Edit", and then press the ENTER button. The menu screen for selecting play list will appear. Using Disc Navigation 4. Select the number of the play list to which you want to add scenes, and then press the ENTER button. A screen for editing a play list will appear, and the - Hitachi DZ-MV100A | Owners Guide - Page 122
and perform playback (p. 106), repeat play (p. 106) or slide play (p. 107). The procedure for each playback is the same as that when all programs or a specific program is selected. During playback you can use all buttons available for playback. 122 - Hitachi DZ-MV100A | Owners Guide - Page 123
Editing play list You can perform the following for the play list being displayed: Using Disc Navigation Operating play lists: Attach titles: See p. 123. Delete play lists: See p. 124 Operating individual scenes in play list: Delete scenes from play list: See p. 108 Set or release skip: - Hitachi DZ-MV100A | Owners Guide - Page 124
chapter 4_Playing Back, Deleting and Editing Your Recordings 3. After entering the title, choose "Enter" and press the ENTER button. 4. Choose "Yes" for verifying message, and press the ENTER button. The play list thumbnail display will be restored. Tip: • The registered title can be changed at any - Hitachi DZ-MV100A | Owners Guide - Page 125
Trouble Messages Trouble Messages A message may appear while you are operating the DVD camcorder DVD camcorder. • Disc may be dirty. All scenes are unloaded from the play list. - Troubleshooting the limit that can be entered. Replace with a charged battery. Select a range of at least 2 scenes to be - Hitachi DZ-MV100A | Owners Guide - Page 126
and wipe off fingerprints, dust, etc. before reusing it, or use another disc. Turn off the DVD camcorder with the disc being used in it, connect AC adapter/charger, and then power the DVD camcorder again. Scenes will be repaired. Delete unnecessary scenes before using this disc, or use another disc - Hitachi DZ-MV100A | Owners Guide - Page 127
DVD camcorder is powered by a battery. Troubleshooting Turn the DVD camcorder off and wait for a while. The temperature will be effectively decreased if the DVD camcorder is placed in a well-ventilated spot. Follow the instructions DVD camcorder afterwards, and connect the AC adapter/ charger. 127 - Hitachi DZ-MV100A | Owners Guide - Page 128
chapter 4_Playing Back, Deleting and Editing Your Recordings Message Error ocurred Please change / format disc Cause Abnormality with the disc to be repaired. Troubleshooting Initialize the disc before using it again, or use the other side of the same disc or another disc. 128 - Hitachi DZ-MV100A | Owners Guide - Page 129
DVD Camcorder Settings Switching operating sound on or off 130 Releasing power save/changing off time 131 Changing display format of date and time 132 Initializing all settings to defaults 133 System reset 134 Checking remaining free space on DVD-RAM disc 135 Initializing DVD-RAM disc 136 - Hitachi DZ-MV100A | Owners Guide - Page 130
Operating Sound On or Off This DVD camcorder will generate sound when the POWER Operating sound Recording still with external input Recognition of disc is complete PC connections are complete PC connections are finished Disc Navigetion : Initialization check screen is displayed. Disc Navigetion - Hitachi DZ-MV100A | Owners Guide - Page 131
for you, you can change the auto power off time up to 30 minutes. If you want to use up the battery when you have no intention to use the DVD camcorder for a long time, you can switch off the Power save function. 1. Press the MENU button in the recording pause status to - Hitachi DZ-MV100A | Owners Guide - Page 132
Changing Display Format of Date and Time You can select one of three date display formats: month/day/year, day/month/year or year/month/day. Associated with the selected date display, the time display format will also change as follows: Display format M/D/Y D/M/Y Y/M/D Date display month/day/year - Hitachi DZ-MV100A | Owners Guide - Page 133
Initializing All Settings to Defaults Initializing All Settings to Defaults You can restore all camera menu settings to defaults (initial settings at the factory). (The date and time will not be reset.) 1. Press the MENU button in the recording pause status to display the menu screen. 2. Use the - Hitachi DZ-MV100A | Owners Guide - Page 134
settings to factory defaults. The date and time will also be reset: Set the date and time again before using the DVD camcorder. 1. Turn the DVD camcorder off, and detach the battery or AC adapter/ charger. 2. Use a fine tipped pen to hold down the reset button for several seconds. RESET List of - Hitachi DZ-MV100A | Owners Guide - Page 135
Checking Remaining Free Space on DVD-RAM Disc Checking Remaining Free Space on DVDRAM Disc You : • With a write-protected disc, the remaining space will be displayed as "0". • You can also review the remaining space on the information screen for recording mode (see p. 62). 5. Press the CANCEL button - Hitachi DZ-MV100A | Owners Guide - Page 136
disc. Initialization will not be possible when the battery used to power the DVD camcorder is discharged. • Initialization with verification may not be possible for discs with severe scratches or dirt: Such discs cannot be used. 1. Insert the DVD-RAM disc with the side you want to initialize facing - Hitachi DZ-MV100A | Owners Guide - Page 137
concerning disc. Initializing DVD-RAM Disc 5. Press to choose "Format Disc", and then press the ENTER button. The message for verifying initialization will appear. 6. Choose "Yes" and press the ENTER button. When initializing one side of the disc is complete, the DVD camcorder will return to the - Hitachi DZ-MV100A | Owners Guide - Page 138
processes the information on scenes in a unique manner. If you use some other device to edit the video data on the DVD-RAM disc recorded on this DVD camcorder, a mismatch will occur in the control information that may disable correct playback on Disc Navigation. In this case, update the control - Hitachi DZ-MV100A | Owners Guide - Page 139
Connecting DVD Camcorder to Other Devices This section explains the methods for connecting to AV devices such as TV, and transferring the data on DVD-RAM disc to your PC. Viewing on TV screen 140 Recording image from other AV devices 142 Transferring data to PC 146 139 - Hitachi DZ-MV100A | Owners Guide - Page 140
e○c○ti○n○g○ t○o○ a○ ○TV Use the provided AV input/output cable to connect the DVD camcorder to a TV as follows: To input jacks of TV S VI AUDIO Refer to the TV instruction manual for how to switch the TV input. 2. Turn the DVD camcorder on. The image that the DVD camcorder is seeing will appear - Hitachi DZ-MV100A | Owners Guide - Page 141
Screen Tip: • The infrared remote control is useful when operating the DVD camcorder while viewing an image on TV screen. However, if you use a Hitachi VCR, the remote control may inadvertently operate the VCR if it is near the DVD camcorder. To prevent this, set the remote control code of the VCR - Hitachi DZ-MV100A | Owners Guide - Page 142
priority. • In case of camera recording with this DVD camcorder, do not connect the AV input/output cable or Svideo cable to the output jacks of any other device: If you do this, sound from the other device may leak to this DVD camcorder. • If you use a Hitachi VCR, it will be operated by the remote - Hitachi DZ-MV100A | Owners Guide - Page 143
to confirm that the external input has been selected. 6. Turn on the connected device, and start playback of picture. The picture will appear on the LCD screen or viewfinder of this DVD camcorder. 7. Start to record on this DVD camcorder. The operation of this line-input recording is the same as for - Hitachi DZ-MV100A | Owners Guide - Page 144
recordings on videotape Video signal dubbed repeatedly and video signal with much noise Video signal from video game or PC Video signal whose TV system is different from that of this DVD camcorder (NTSC color TV system) • During recording, do not switch the channel on TV, or switch the signal using - Hitachi DZ-MV100A | Owners Guide - Page 145
still recording format You can check the still recording format of external input image by reviewing the onscreen information. Once the still recording format of external input image has been set, it will remain the same until it is changed again, even after the DVD camcorder is turned off. 145 - Hitachi DZ-MV100A | Owners Guide - Page 146
in which PC connection software can be used" carefully. • When this DVD camcorder is connected to the USB terminal of PC, it will be recognized as an external DVD-RAM drive of PC. Data will be writable and readable on this DVD camcorder as the external DVDRAM drive, but Hitachi does not guarantee - Hitachi DZ-MV100A | Owners Guide - Page 147
And, thoroughly read the instruction manual of PC connection software. • Connect the DVD camcorder to PC at comfortable room temperature: If movies are transferred at ambient temperature of 95˚F (35˚C) or more for an extended time, reading errors could result. • Hitachi does not guarantee operation - Hitachi DZ-MV100A | Owners Guide - Page 148
in information LCD monitor When the DVD camcorder is connected to PC, the 3.5" LCD monitor and viewfinder will be off: Close the LCD monitor and check with "PC connection display" in the information LCD monitor on the DVD camcorder. Battery remaining level Cursor display PC connection display 148 - Hitachi DZ-MV100A | Owners Guide - Page 149
Subsidiary Information Cleaning 150 Trouble messages 151 Troubleshooting 153 Major specifications 161 Index 163 Introduction to optional accessories 167 149 - Hitachi DZ-MV100A | Owners Guide - Page 150
not use benzene or thinner to clean DVD camcorder case: The coating of case could peel off or the case could deteriorate. Wipe off dirt on the case with a moist cloth which has been completely wrung out. When using chemical cleaning cloth, follow instructions for use. If dust adheres to viewfinder - Hitachi DZ-MV100A | Owners Guide - Page 151
Trouble Messages Message Probable Cause Troubleshooting COPY ERROR CHECK DISC INITIALIZE DISC END OF DISC DISC ALMOST FULL The video signal input to this DVD camcorder may be copy-guarded. Disc that cannot be used on this DVD camcorder has been inserted or DVD-RAM disc is write protected. DVD - Hitachi DZ-MV100A | Owners Guide - Page 152
Message Probable Cause Troubleshooting DISC ACCESS NO DISC This DVD camcorder is verifying whether the correct DVD-RAM disc has been inserted. The recorded scene is being stored on DVD-RAM disc. DVD-RAM disc has not been inserted. This message may appear when the DVD camcorder or DVD-RAM disc is - Hitachi DZ-MV100A | Owners Guide - Page 153
Troubleshooting Troubleshooting Check to see the following before asking for a repair. If the suggested solution still cannot restore the DVD camcorder Check to see Is battery charged? Correction Charge it. Reference page 40 Was the DVD This DVD camcorder left for camcorder is 5 minutes or - Hitachi DZ-MV100A | Owners Guide - Page 154
/charger lit or blinking during charging? Correction Unplug the PC connection cable. Reference page 148 Press the DISC NAVIGATION button. 100 The DVD camcorder can normally be used for 40 minutes to one hour with a fully charged DZ- BP16 battery, but 41 this time will be shorter at low - Hitachi DZ-MV100A | Owners Guide - Page 155
reattach it. If the battery is still not 43 charged, it may be dead: Pur- chase a new one. If it is set to still, recording is not possible by pressing REC. Set 66 the switch to the movie mode. Copy-guarded image cannot be recorded on this 144 DVD camcorder. Clean the disc - Hitachi DZ-MV100A | Owners Guide - Page 156
correct. Check to see Is some other AV device directly connected to the video/audio input jacks of this DVD camcorder? Are you attempting to record image from video game or PC? Has brightness of LCD screen been adjusted? Is the DVD camcorder being used outdoors? Is it difficult to use auto focus - Hitachi DZ-MV100A | Owners Guide - Page 157
picture appears on TV screen. Troubleshooting Check to see Correction Is DVD camcorder. Is TV input Some TVs have selector set multiple video input correctly? jacks. Check whether the correct input was selected on TV to match the connected jacks. If 140 the DVD camcorder is connected - Hitachi DZ-MV100A | Owners Guide - Page 158
not appear. Check to see Is the DVD camcorder connected to TV correctly? Is input selector of this DVD camcorder set to "LINE"? Is disc scratched or ? Correction Check the connections. Reference page 140 Change it to "CAMERA" mode. 143 Clean the disc. 38 The problem may be improved if - Hitachi DZ-MV100A | Owners Guide - Page 159
cannot be removed. Has the DVD camcorder been subjected to impact? Has the DVD camcorder been left unused for a long period of time? Has the internal backup battery been charged? Has disc rotation stopped? Troubleshooting Correction Reference page Detach the battery or AC adapter/ charger - Hitachi DZ-MV100A | Owners Guide - Page 160
or strong fluorescent light, etc.? Are there batteries in the remote control? Is the DVD camcorder powered? Is disc correctly inserted? Was disc inserted until it locked? Was disc inserted from wrong direction? Correction Reference page Connect the battery pack or AC adapter/ charger, turn the - Hitachi DZ-MV100A | Owners Guide - Page 161
Specifications Major Specifications Battery system /16" (38-456 mm) Auto/Manual Optical 12X, 48X with digital zoom DVD-RAM disc (conforming to DVD-RAM Book 2.1) Video/audio input/output x 1, S-video input/output x 1, External microphone input x 1, Digital input/ output terminal (connected to PC USB - Hitachi DZ-MV100A | Owners Guide - Page 162
g) (when using DZ-BP16 battery) AC adapter/charger, battery, DC power cable, AV input/output cable, infrared remote control, 2 "AA" batteries for remote control, lens cap, lens cap string, shoulder strap, power cable, 2 ferrite cores, DVD-RAM disc, PC connection cable, PC connection software CD-ROM - Hitachi DZ-MV100A | Owners Guide - Page 163
DVD camcorder ..... 42 Setting up 40 Beep 130 Built-in battery 53 Buttons and switches used when recording .... 64 Buttons used for playback 92 B/W (special sffect 114 C Camera (input select 142 Cautions when storing 24 Cautions when using 20 Cleaning 150 Control information 138 Connecting - Hitachi DZ-MV100A | Owners Guide - Page 164
75 Manual focus When recording movie 74 When recording still 89 Menu 68 Messages Camcorder 151 Disc accessories 167 P PC Connecting 148 Transferring data 146 Windows 147 PC connection software 98 Program AE 71 Provided accessories 26 R Recordable time (on DVD-RAM disc) ...... 51 Recording - Hitachi DZ-MV100A | Owners Guide - Page 165
Special effects 114 Specifications 161 SPORTS (program AE 71 SPOTLIGHT (program AE 71 Still Changing recording method ......... 145 Manual focus 89 Playing 102 Title 102 Transferring data to PC 146 Trial recording 25 Troubleshooting 153 Turning camcorder on 67 V Viewfinder 59 During - Hitachi DZ-MV100A | Owners Guide - Page 166
a week, 24 hours a day 1-800-448-2244 Hitachi America, Ltd. Home Electronics Division Hitachi has made every effort to assure you hours of trouble free operation from your unit. However, should you require service, a network of Hitachi Authorized Service Facilities has been established in all 50 - Hitachi DZ-MV100A | Owners Guide - Page 167
Introduction to Optional Accessories Introduction to Optional Accessories P○ o○ w○ ○e○r ○S○u○p○p○lie○ s DZ-BP16 battery: 7.2 V/1600 mAh DZ-BP28 battery: 7.2 V/2800 mAh 167 - Hitachi DZ-MV100A | Owners Guide - Page 168
To Order in the United States B○ y○ ○P○h○o○n○e 1-800-HITACHI (1-800-448-2244) FOR AUTHORIZED HITACHI SERVICE FACILITY IN CANADA Please consult the following telephone number: Hitachi Canada Ltd. Digital Media Division 1-800-HITACHI (1-800-448-2244) during business hours Monday-Friday EST 9: - Hitachi DZ-MV100A | Owners Guide - Page 169
MEMO 169 - Hitachi DZ-MV100A | Owners Guide - Page 170
MEMO 170
-
 1
1 -
 2
2 -
 3
3 -
 4
4 -
 5
5 -
 6
6 -
 7
7 -
8
-
9
-
10
-
11
-
12
-
13
-
14
-
15
-
16
-
17
-
18
-
19
-
20
-
21
-
22
-
23
-
24
-
25
-
26
-
27
-
28
-
29
-
30
-
31
-
32
-
33
-
34
-
35
-
36
-
37
-
38
-
39
-
40
-
41
-
42
-
43
-
44
-
45
-
46
-
47
-
48
-
49
-
50
-
51
-
52
-
53
-
54
-
55
-
56
-
57
-
58
-
59
-
60
-
61
-
62
-
63
-
64
-
65
-
66
-
67
-
68
-
69
-
70
-
71
-
72
-
73
-
74
-
75
-
76
-
77
-
78
-
79
-
80
-
81
-
82
-
83
-
84
-
85
-
86
-
87
-
88
-
89
-
90
-
91
-
92
-
93
-
94
-
95
-
96
-
97
-
98
-
99
-
100
-
101
-
102
-
103
-
104
-
105
-
106
-
107
-
108
-
109
-
110
-
111
-
112
-
113
-
114
-
115
-
116
-
117
-
118
-
119
-
120
-
121
-
122
-
123
-
124
-
125
-
126
-
127
-
128
-
129
-
130
-
131
-
132
-
133
-
134
-
135
-
136
-
137
-
138
-
139
-
140
-
141
-
142
-
143
-
144
-
145
-
146
-
147
-
148
-
149
-
150
-
151
-
152
-
153
-
154
-
155
-
156
-
157
-
158
-
159
-
160
-
161
-
162
-
163
-
164
-
165
-
166
-
167
-
168
-
169
-
170
 |
 |
Instruction Manual
DZ-MV100A
HITACHI AMERICA, LTD.
HOME ELECTRONICS DIVISION
1855 Dornoch Court
San Diego, CA 92154-7225
Tel.
1-800-HITACHI
(1-800-448-2244)
HITACHI CANADA LTD.
DIGITAL MEDIA DIVISON
6740 Campobello Road
Mississauga, Ontario L5N 2L8
CANADA
Tel.
1-800-HITACHI
(1-800-448-2244)
Thank you for buying a Hitachi product. Please take time to become familiar with the manual and how
it is set up. Keep it handy for future reference.
QR32454 © Hitachi. Ltd. 2000
Printed in Japan 00-TH (HE)