Hitachi DZ-MV100A Owners Guide - Page 121
Choose Play List, Edit, and then, to move the cursor to the up
 |
View all Hitachi DZ-MV100A manuals
Add to My Manuals
Save this manual to your list of manuals |
Page 121 highlights
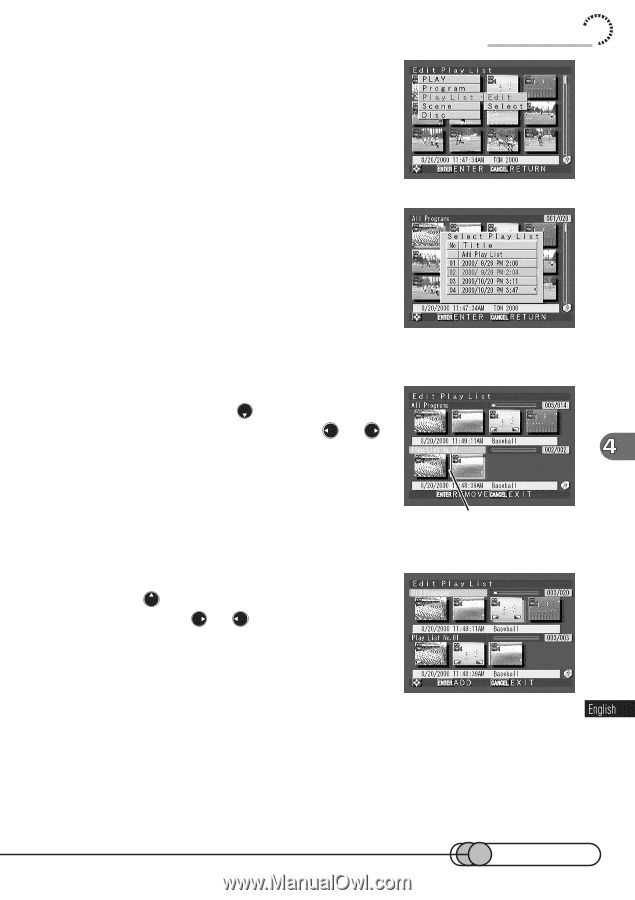
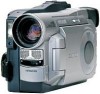
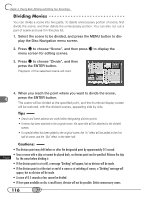
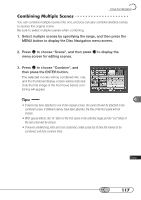
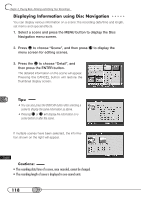
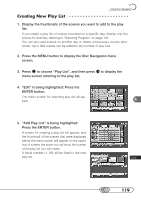
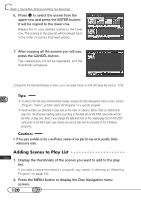
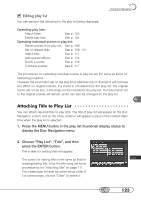
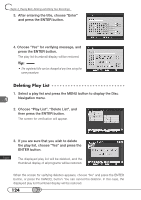
3. Choose "Play List", "Edit", and then press the ENTER button. The menu screen for selecting play list will appear. Using Disc Navigation 4. Select the number of the play list to which you want to add scenes, and then press the ENTER button. A screen for editing a play list will appear, and the thumbnails of the scenes that were displayed before the menu screen will appear on the upper row of screen, and the selected play list will appear on the lower row. 5. To insert a scene in the middle of multiple scenes, press to move the cursor to the lower row, and press or to select the position where the scene is to be inserted. Pressing the ENTER button will remove the scene on the right next to the position where the new scene is to be inserted, from the play list. Insertion position 6. After specifying the insertion position, press to move the cursor to the upper row, use or to select the scene, and then press the ENTER button. The selected scene will be added to the insertion position of lower row. 7. After adding all the scenes you want using the same procedure, press the CANCEL button. The edited play list will be displayed with thumbnails. 121
-
 1
1 -
2
-
3
-
4
-
5
-
6
-
7
-
8
-
9
-
10
-
11
-
12
-
13
-
14
-
15
-
16
-
17
-
18
-
19
-
20
-
21
-
22
-
23
-
24
-
25
-
26
-
27
-
28
-
29
-
30
-
31
-
32
-
33
-
34
-
35
-
36
-
37
-
38
-
39
-
40
-
41
-
42
-
43
-
44
-
45
-
46
-
47
-
48
-
49
-
50
-
51
-
52
-
53
-
54
-
55
-
56
-
57
-
58
-
59
-
60
-
61
-
62
-
63
-
64
-
65
-
66
-
67
-
68
-
69
-
70
-
71
-
72
-
73
-
74
-
75
-
76
-
77
-
78
-
79
-
80
-
81
-
82
-
83
-
84
-
85
-
86
-
87
-
88
-
89
-
90
-
91
-
92
-
93
-
94
-
95
-
96
-
97
-
98
-
99
-
100
-
101
-
102
-
103
-
104
-
105
-
106
-
107
-
108
-
109
-
110
-
111
-
112
-
113
-
114
-
115
-
 116
116 -
 117
117 -
 118
118 -
 119
119 -
 120
120 -
 121
121 -
 122
122 -
 123
123 -
 124
124 -
 125
125 -
 126
126 -
127
-
128
-
129
-
130
-
131
-
132
-
133
-
134
-
135
-
136
-
137
-
138
-
139
-
140
-
141
-
142
-
143
-
144
-
145
-
146
-
147
-
148
-
149
-
150
-
151
-
152
-
153
-
154
-
155
-
156
-
157
-
158
-
159
-
160
-
161
-
162
-
163
-
164
-
165
-
166
-
167
-
168
-
169
-
170
 |
 |