Hitachi DZ-MV100A Owners Guide - Page 85
never emitting light, and then press the, select dial.
 |
View all Hitachi DZ-MV100A manuals
Add to My Manuals
Save this manual to your list of manuals |
Page 85 highlights
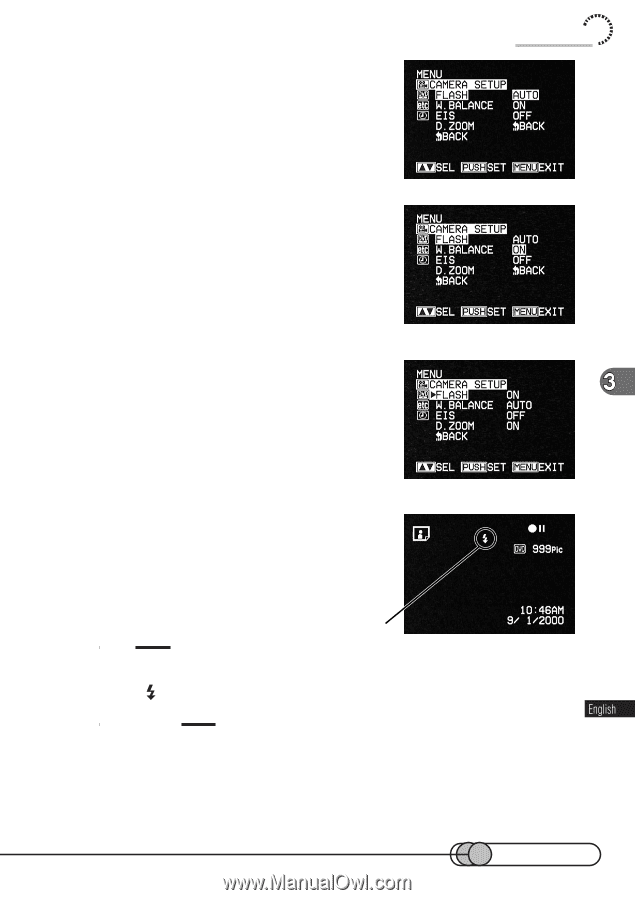
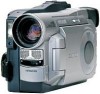
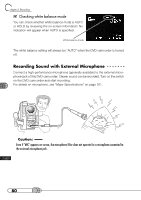
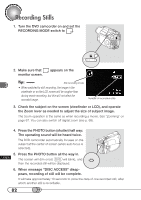
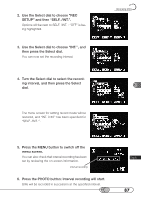
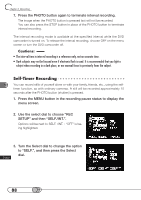
2. Use the Select dial to choose "CAMERA SETUP" and then "FLASH". Options will be next to FLASH: "AUTO" is being highlighted. 3. Turn the Select dial to switch the option to "ON" (always emitting light) or "OFF" (never emitting light), and then press the select dial. The menu screen for setting camera functions will be restored, and "FLASH" has been changed to "ON" or "OFF". Recording Stills 4. Press the MENU button to switch off the menu screen. You can check the condition of flash function by reviewing the on-screen information. No indication will appear when "FLASH AUTO" is specified. Flash Tip: • When the subject brightness is low with flash set to "AUTO" (automatically emits light), a flash mark ( ) will appear on the screen when the PHOTO button is pressed half or all the way in. Cautions: • Flash automatically adjusts the amount of light to be emitted, but if the distance to subject is too far or too near, the light amount adjustment may not be sufficient. The distance to subject that allows optimum light amount adjustment varies depending on the subject, but is approximately 1.8 - 9.0 feet (0.5 - 2.5 m). • Set flash to "OFF" for macro still recording. When the subject is too near, white compression could occur. 85
-
 1
1 -
2
-
3
-
4
-
5
-
6
-
7
-
8
-
9
-
10
-
11
-
12
-
13
-
14
-
15
-
16
-
17
-
18
-
19
-
20
-
21
-
22
-
23
-
24
-
25
-
26
-
27
-
28
-
29
-
30
-
31
-
32
-
33
-
34
-
35
-
36
-
37
-
38
-
39
-
40
-
41
-
42
-
43
-
44
-
45
-
46
-
47
-
48
-
49
-
50
-
51
-
52
-
53
-
54
-
55
-
56
-
57
-
58
-
59
-
60
-
61
-
62
-
63
-
64
-
65
-
66
-
67
-
68
-
69
-
70
-
71
-
72
-
73
-
74
-
75
-
76
-
77
-
78
-
79
-
 80
80 -
 81
81 -
 82
82 -
 83
83 -
 84
84 -
 85
85 -
 86
86 -
 87
87 -
 88
88 -
 89
89 -
 90
90 -
91
-
92
-
93
-
94
-
95
-
96
-
97
-
98
-
99
-
100
-
101
-
102
-
103
-
104
-
105
-
106
-
107
-
108
-
109
-
110
-
111
-
112
-
113
-
114
-
115
-
116
-
117
-
118
-
119
-
120
-
121
-
122
-
123
-
124
-
125
-
126
-
127
-
128
-
129
-
130
-
131
-
132
-
133
-
134
-
135
-
136
-
137
-
138
-
139
-
140
-
141
-
142
-
143
-
144
-
145
-
146
-
147
-
148
-
149
-
150
-
151
-
152
-
153
-
154
-
155
-
156
-
157
-
158
-
159
-
160
-
161
-
162
-
163
-
164
-
165
-
166
-
167
-
168
-
169
-
170
 |
 |