Hitachi DZ-MV100A Owners Guide - Page 82
Recording Stills, When message DISC ACCESS disap
 |
View all Hitachi DZ-MV100A manuals
Add to My Manuals
Save this manual to your list of manuals |
Page 82 highlights
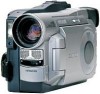
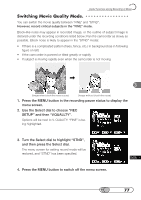
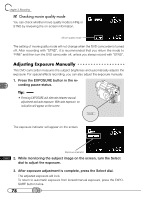
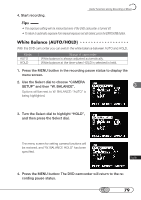
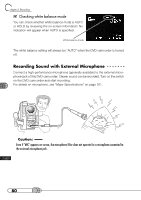
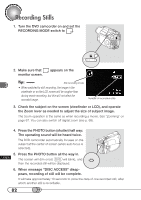
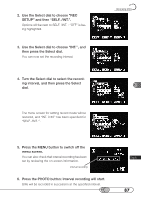
Recording Stills 1. Turn the DVD camcorder on and set the RECORDING MODE switch to . 2. Make sure that monitor screen. appears on the Tip: Still recording mode • When switched to still recording, the image in the viewfinder or on the LCD screen will be rougher than during movie recording, but this will not affect the recorded image. Number of recordable stills 3. Check the subject on the screen (viewfinder or LCD), and operate the Zoom lever as needed to adjust the size of subject image. The zoom operation is the same as when recording a movie. See "Zooming" on page 67. You can also switch off digital zoom (see p. 68). 4. Press the PHOTO button (shutter) half way: The operating sound will be heard twice. The DVD camcorder automatically focuses on the subject at the center of screen (when auto focus is selected). 5. Press the PHOTO button all the way in. The screen will dim once( DVD will blink), and then the recorded still will be displayed. 6. When message "DISC ACCESS" disappears, recording of still will be complete. It will take approximately 10 seconds to store the data of one recorded still, after which another still is recordable. 82
-
 1
1 -
2
-
3
-
4
-
5
-
6
-
7
-
8
-
9
-
10
-
11
-
12
-
13
-
14
-
15
-
16
-
17
-
18
-
19
-
20
-
21
-
22
-
23
-
24
-
25
-
26
-
27
-
28
-
29
-
30
-
31
-
32
-
33
-
34
-
35
-
36
-
37
-
38
-
39
-
40
-
41
-
42
-
43
-
44
-
45
-
46
-
47
-
48
-
49
-
50
-
51
-
52
-
53
-
54
-
55
-
56
-
57
-
58
-
59
-
60
-
61
-
62
-
63
-
64
-
65
-
66
-
67
-
68
-
69
-
70
-
71
-
72
-
73
-
74
-
75
-
76
-
 77
77 -
 78
78 -
 79
79 -
 80
80 -
 81
81 -
 82
82 -
 83
83 -
 84
84 -
 85
85 -
 86
86 -
 87
87 -
88
-
89
-
90
-
91
-
92
-
93
-
94
-
95
-
96
-
97
-
98
-
99
-
100
-
101
-
102
-
103
-
104
-
105
-
106
-
107
-
108
-
109
-
110
-
111
-
112
-
113
-
114
-
115
-
116
-
117
-
118
-
119
-
120
-
121
-
122
-
123
-
124
-
125
-
126
-
127
-
128
-
129
-
130
-
131
-
132
-
133
-
134
-
135
-
136
-
137
-
138
-
139
-
140
-
141
-
142
-
143
-
144
-
145
-
146
-
147
-
148
-
149
-
150
-
151
-
152
-
153
-
154
-
155
-
156
-
157
-
158
-
159
-
160
-
161
-
162
-
163
-
164
-
165
-
166
-
167
-
168
-
169
-
170
 |
 |