Hitachi DZ-MV100A Owners Guide - Page 81
Reducing Wind Noise Picked Up by Microphone, Checking microphone filter setting
 |
View all Hitachi DZ-MV100A manuals
Add to My Manuals
Save this manual to your list of manuals |
Page 81 highlights
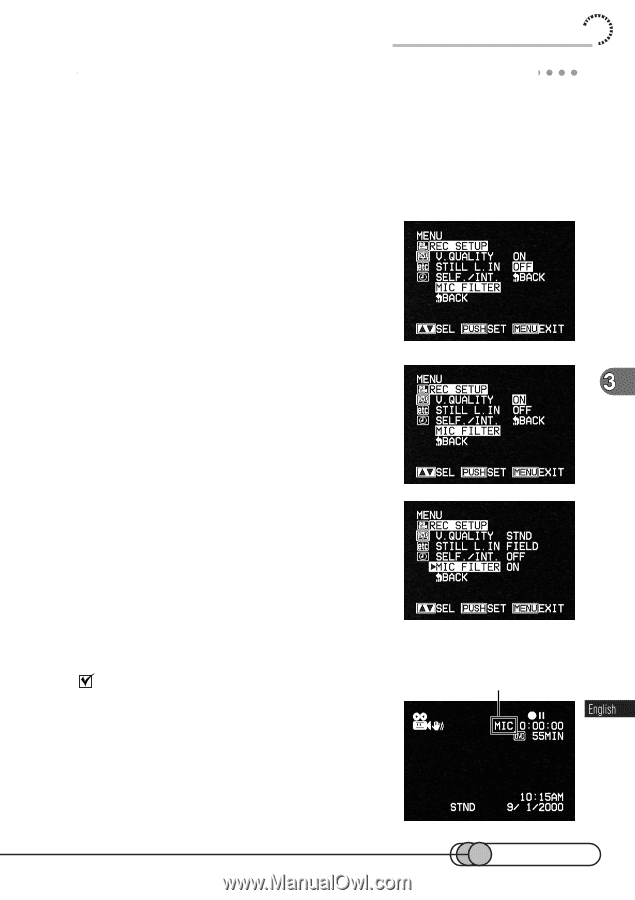
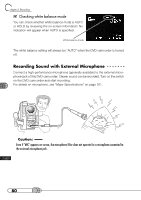
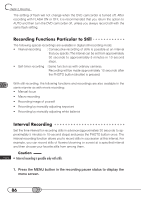
Useful Functions during Recording of Movie R○ e○ d○ u○c○in○ g○ ○W○ i○n○d○ N○ ○o○is○e○ P○ i○ck○ e○ d○ ○U○p○ b○ y○ ○M○ i○cr○o○p○h○o○n○e When recording sound using the built-in microphone, you can reduce wind noise by filtering it. Since the low-frequency components of sound input to the microphone during recording are cut, the object sound will be easy to hear. 1. Press the MENU button in the recording pause status to display the menu screen. 2. Choose "REC SETUP" and then "MIC FILTER". Options will be next to "MIC FILTER": "OFF" is being highlighted. 3. Turn the Select dial to change the option to "ON", and then press the Select dial. The menu screen for setting record mode will be restored, and "MIC FILTER ON" has been specified. 4. Press the MENU button to switch off the menu screen. Checking microphone filter setting You can check the on setting of microphone filter by reviewing on-screen information: MIC will appear for ON setting, and no indication will appear for OFF setting. The microphone filter setting will be held in memory until it is changed even after the DVD camcorder is turned off. Microphone filter indicator 81
-
 1
1 -
2
-
3
-
4
-
5
-
6
-
7
-
8
-
9
-
10
-
11
-
12
-
13
-
14
-
15
-
16
-
17
-
18
-
19
-
20
-
21
-
22
-
23
-
24
-
25
-
26
-
27
-
28
-
29
-
30
-
31
-
32
-
33
-
34
-
35
-
36
-
37
-
38
-
39
-
40
-
41
-
42
-
43
-
44
-
45
-
46
-
47
-
48
-
49
-
50
-
51
-
52
-
53
-
54
-
55
-
56
-
57
-
58
-
59
-
60
-
61
-
62
-
63
-
64
-
65
-
66
-
67
-
68
-
69
-
70
-
71
-
72
-
73
-
74
-
75
-
 76
76 -
 77
77 -
 78
78 -
 79
79 -
 80
80 -
 81
81 -
 82
82 -
 83
83 -
 84
84 -
 85
85 -
 86
86 -
87
-
88
-
89
-
90
-
91
-
92
-
93
-
94
-
95
-
96
-
97
-
98
-
99
-
100
-
101
-
102
-
103
-
104
-
105
-
106
-
107
-
108
-
109
-
110
-
111
-
112
-
113
-
114
-
115
-
116
-
117
-
118
-
119
-
120
-
121
-
122
-
123
-
124
-
125
-
126
-
127
-
128
-
129
-
130
-
131
-
132
-
133
-
134
-
135
-
136
-
137
-
138
-
139
-
140
-
141
-
142
-
143
-
144
-
145
-
146
-
147
-
148
-
149
-
150
-
151
-
152
-
153
-
154
-
155
-
156
-
157
-
158
-
159
-
160
-
161
-
162
-
163
-
164
-
165
-
166
-
167
-
168
-
169
-
170
 |
 |