Hitachi DZ-MV270A Owners Guide - Page 16
Viewing Demonstration
 |
View all Hitachi DZ-MV270A manuals
Add to My Manuals
Save this manual to your list of manuals |
Page 16 highlights
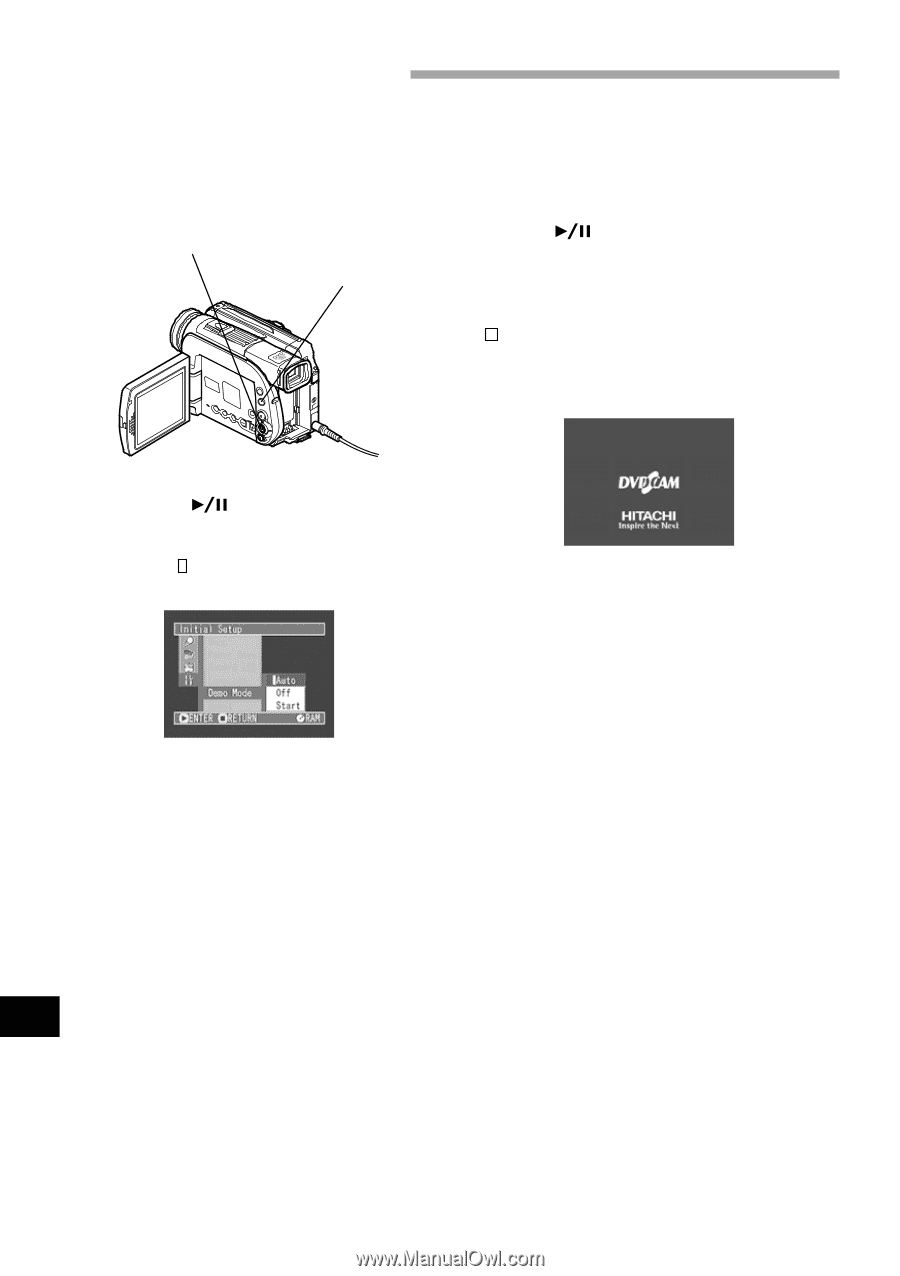
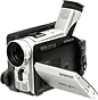
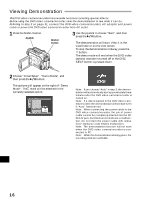
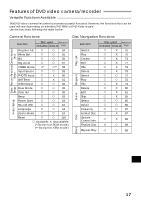
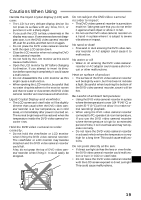
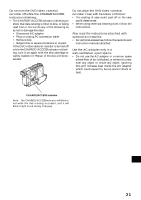
Viewing Demonstration This DVD video camera/recorder has versatile functions, including special effects. Before using the DVD video camera/recorder, view the demonstration to see what it can do. Referring to step 2 on page 31, connect the DVD video camera/recorder, AC adapter and power cable to power the DVD video camera/recorder from AC outlet. 1 Press the MENU button. Joystick MENU button 3 Use the joystick to choose "Start", and then press the button. The demonstration will start: View it in the viewfinder or on the LCD screen. To stop the demonstration midway, press the button. The demo mode will end when the DVD video camera/recorder is turned off or the DISC EJECT button is pressed down. 2 Choose "Initial Setup", "Demo Mode", and then press the button. The options will appear on the right of "Demo Mode": The mark will be attached to the currently selected option. Note: If you choose "Auto" in step 3, the demonstration will automatically start approximately three minutes after the DVD video camera/recorder is turned on. Note: If a disc is loaded in the DVD video camera/recorder, the demonstration will not start even if "Auto" has been set. Note: When connecting the power cable to the DVD video camera/recorder, the pin of power cable cannot be completely inserted into the DC IN 8.4V jack, but this does not indicate a malfunction. Do not insert the power cable with undue force: Doing so could result in malfunction. Note: The demonstration function will not work when the DVD video camera/recorder is connected to PC. Note: While the demonstration is being given, the recording indicator will blink. English 16
-
 1
1 -
2
-
3
-
4
-
5
-
6
-
7
-
8
-
9
-
10
-
 11
11 -
 12
12 -
 13
13 -
 14
14 -
 15
15 -
 16
16 -
 17
17 -
 18
18 -
 19
19 -
 20
20 -
 21
21 -
22
-
23
-
24
-
25
-
26
-
27
-
28
-
29
-
30
-
31
-
32
-
33
-
34
-
35
-
36
-
37
-
38
-
39
-
40
-
41
-
42
-
43
-
44
-
45
-
46
-
47
-
48
-
49
-
50
-
51
-
52
-
53
-
54
-
55
-
56
-
57
-
58
-
59
-
60
-
61
-
62
-
63
-
64
-
65
-
66
-
67
-
68
-
69
-
70
-
71
-
72
-
73
-
74
-
75
-
76
-
77
-
78
-
79
-
80
-
81
-
82
-
83
-
84
-
85
-
86
-
87
-
88
-
89
-
90
-
91
-
92
-
93
-
94
-
95
-
96
-
97
-
98
-
99
-
100
-
101
-
102
-
103
-
104
-
105
-
106
-
107
-
108
-
109
-
110
-
111
-
112
-
113
-
114
 |
 |