Hitachi DZ-MV270A Owners Guide - Page 82
under IN and OUT:
 |
View all Hitachi DZ-MV270A manuals
Add to My Manuals
Save this manual to your list of manuals |
Page 82 highlights
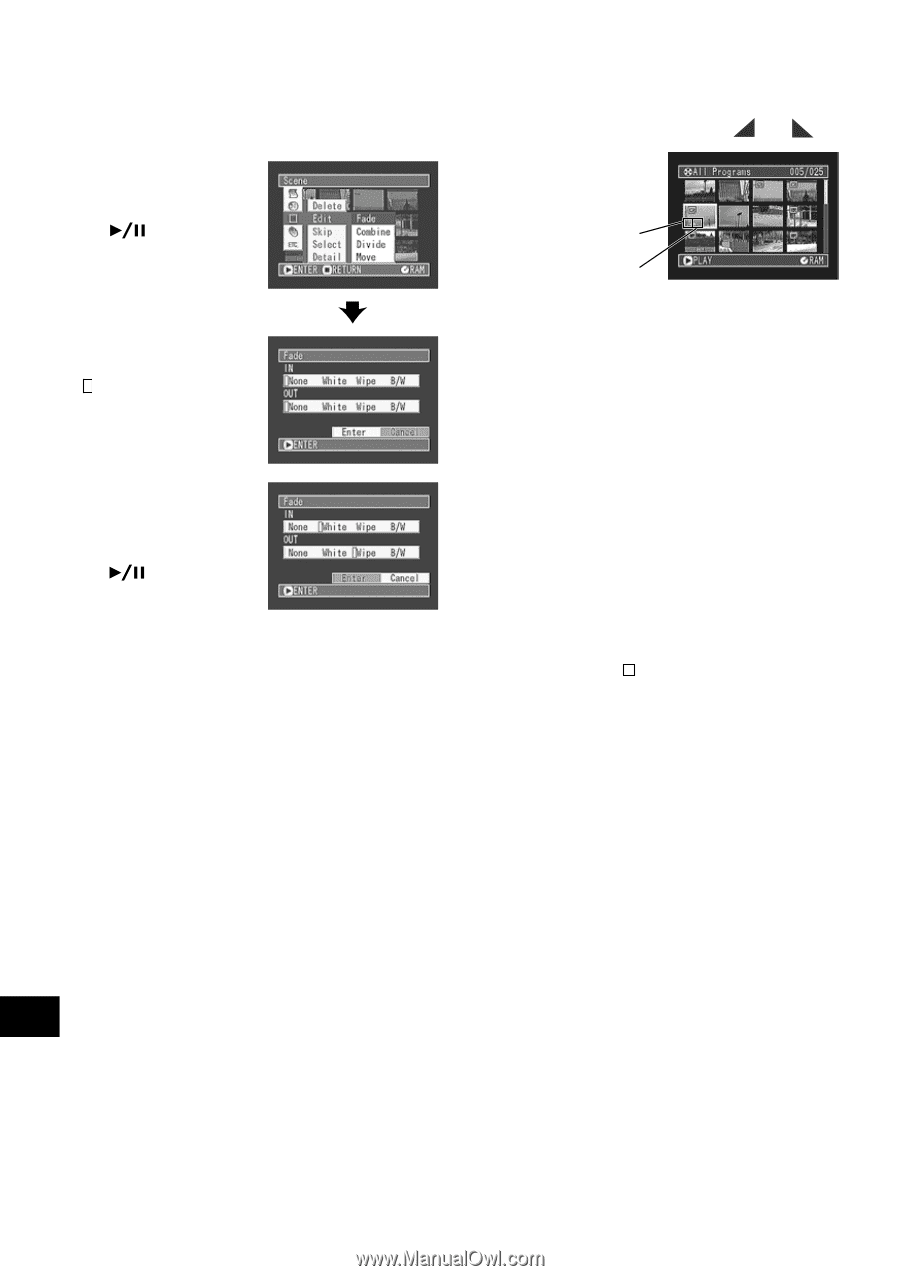
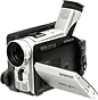
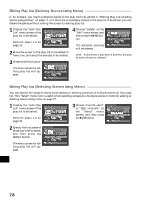
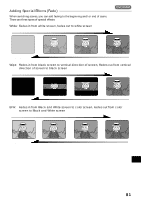
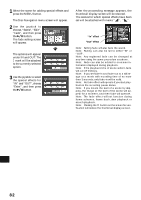
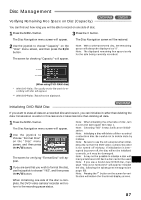
1 Select the scene for adding special effects and press the MENU button. The Disc Navigation menu screen will appear. 2 Use the joystick to choose, "Scene", "Edit", "Fade", and then press the button. The fade setting screen will appear. The options will appear under IN and OUT: The mark will be attached to the currently selected option. 3 Use the joystick to select the special effects for "IN" and "OUT", choose "Enter", and then press the button. After the proceeding message appears, the thumbnail display screen will be restored. The scenes for which special effects have been set will be attached with marks " ", " ". "In" effect "Out" effect Note: Setting fade will also fade the sound. Note: Fading can also be set to either "IN" or "OUT". Note: Any registered fade can be changed at any time using the same procedure as above. Note: Fade can also be added to on-screen information displayed during playback. Note: If the playback time of scene is short, fade will cut off midway. Note: If you set fade-in and fade-out to a still image or a movie with recording time of no more than 3 seconds, only fade-in will be valid. Note: No fade effect will operate if you start playback in the recording pause status. Note: If you locate the start of a scene by skipping, the image at the start of the scene will appear for a moment, and then fade will operate. Note: The fade effect will not function during frame advance, frame back, slow playback or search playback. Note: Pressing the button on the screen for verification will restore the thumbnail display screen. English 82
-
 1
1 -
2
-
3
-
4
-
5
-
6
-
7
-
8
-
9
-
10
-
11
-
12
-
13
-
14
-
15
-
16
-
17
-
18
-
19
-
20
-
21
-
22
-
23
-
24
-
25
-
26
-
27
-
28
-
29
-
30
-
31
-
32
-
33
-
34
-
35
-
36
-
37
-
38
-
39
-
40
-
41
-
42
-
43
-
44
-
45
-
46
-
47
-
48
-
49
-
50
-
51
-
52
-
53
-
54
-
55
-
56
-
57
-
58
-
59
-
60
-
61
-
62
-
63
-
64
-
65
-
66
-
67
-
68
-
69
-
70
-
71
-
72
-
73
-
74
-
75
-
76
-
 77
77 -
 78
78 -
 79
79 -
 80
80 -
 81
81 -
 82
82 -
 83
83 -
 84
84 -
 85
85 -
 86
86 -
 87
87 -
88
-
89
-
90
-
91
-
92
-
93
-
94
-
95
-
96
-
97
-
98
-
99
-
100
-
101
-
102
-
103
-
104
-
105
-
106
-
107
-
108
-
109
-
110
-
111
-
112
-
113
-
114
 |
 |