Hitachi DZ-MV270A Owners Guide - Page 38
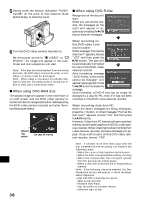
When using DVD-RAM disc, When using DVD-R disc
 |
View all Hitachi DZ-MV270A manuals
Add to My Manuals
Save this manual to your list of manuals |
Page 38 highlights
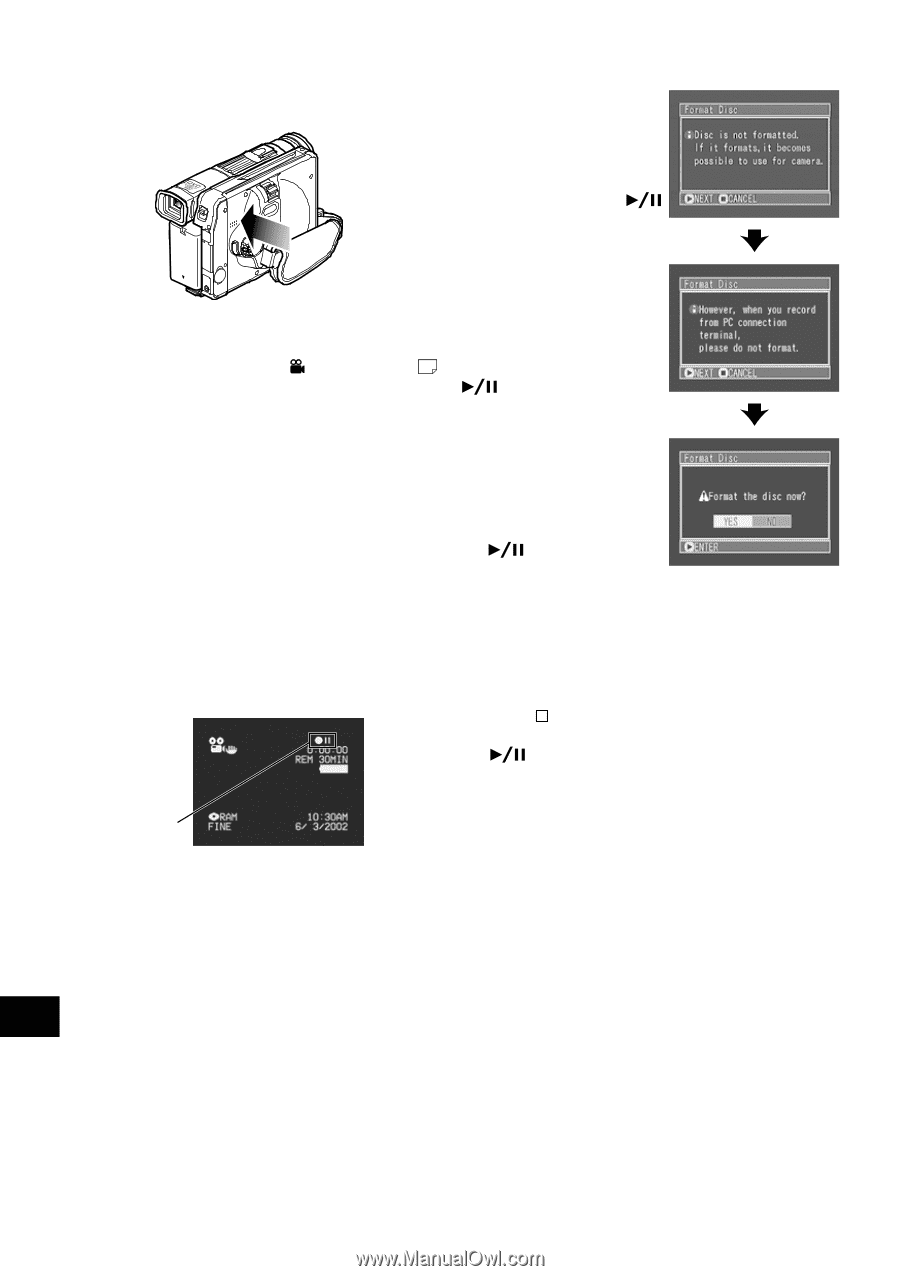
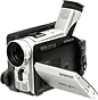
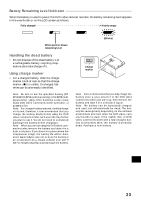
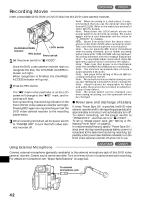
5 Gently push the section indicated "PUSH/ CLOSE" on the cover of disc insertion block (hand strap), to close the cover. G When using DVD-R disc Recognition of the disc will start. When you use a brand-new disc, the messages on the right will appear in sequence by pressing the button between messages. 6 Turn the DVD video camera/recorder on. Set the power switch to " VIDEO" or " PHOTO": An image will appear in the viewfinder and disc recognition will start. Note: If the disc is forcibly inserted from the wrong direction, the DVD video camera/recorder, or cartridge or caddy could be damaged. Note: When using a one-sided recordable disc, insert it with the recording surface facing the inside of DVD video camera/recorder. G When using DVD-RAM disc The subject image will appear in the viewfinder or on LCD screen, and the DVD video camera/recorder will start to recognize the disc. Subsequently, the DVD video camera/recorder will enter the recording pause status. Recording pause (In case of movie) When recording on this DVD video camera/recorder: When message "Format the disc now?" appears, choose "YES" and then press the button. The disc will be automatically formatted for use on this DVD video camera/recorder. After formatting, message "DVD-R disc, Video mode cannot be changed" will appear (see page 26): Press the button to erase the message. Once formatted, a DVD-R disc can no longer be changed to a disc for PC, even if it has not been recorded on this DVD video camera/recorder. When recording data from PC: While the above messages are being displayed, press the button, or when message "Format the disc now?" appears, choose "NO" and then press the button. However, if data from PC has not yet been recorded, the disc can be made usable on this DVD video cam- era/recorder. When inserting the disc into this DVD video camera/recorder, the same message will ap- pear: If you wish to use it on this DVD video cam- era/recorder, choose "YES". English 38 Note: It will take mor e time than usual after the disc is inserted befor e recording can begin in the following cases: - When the cover of disc insertion block is open - When the date changes (first recording of a day) - When the temperature has changed greatly from the previous recording status - When a disc with scratches, dirt or fingerprints is inserted Note: If the following discs are inserted, the Disc Navigation screen will appear or some message will be displayed: - Disc with little remaining free space - Write-protected disc - Finalized DVD-R disc - Disc recorded on another device - Unknown type of disc
-
 1
1 -
2
-
3
-
4
-
5
-
6
-
7
-
8
-
9
-
10
-
11
-
12
-
13
-
14
-
15
-
16
-
17
-
18
-
19
-
20
-
21
-
22
-
23
-
24
-
25
-
26
-
27
-
28
-
29
-
30
-
31
-
32
-
 33
33 -
 34
34 -
 35
35 -
 36
36 -
 37
37 -
 38
38 -
 39
39 -
 40
40 -
 41
41 -
 42
42 -
 43
43 -
44
-
45
-
46
-
47
-
48
-
49
-
50
-
51
-
52
-
53
-
54
-
55
-
56
-
57
-
58
-
59
-
60
-
61
-
62
-
63
-
64
-
65
-
66
-
67
-
68
-
69
-
70
-
71
-
72
-
73
-
74
-
75
-
76
-
77
-
78
-
79
-
80
-
81
-
82
-
83
-
84
-
85
-
86
-
87
-
88
-
89
-
90
-
91
-
92
-
93
-
94
-
95
-
96
-
97
-
98
-
99
-
100
-
101
-
102
-
103
-
104
-
105
-
106
-
107
-
108
-
109
-
110
-
111
-
112
-
113
-
114
 |
 |