Hitachi DZ-MV270A Owners Guide - Page 77
Editing Play List Adding Scenes Using Menu, Deleting Scenes from Play List
 |
View all Hitachi DZ-MV270A manuals
Add to My Manuals
Save this manual to your list of manuals |
Page 77 highlights
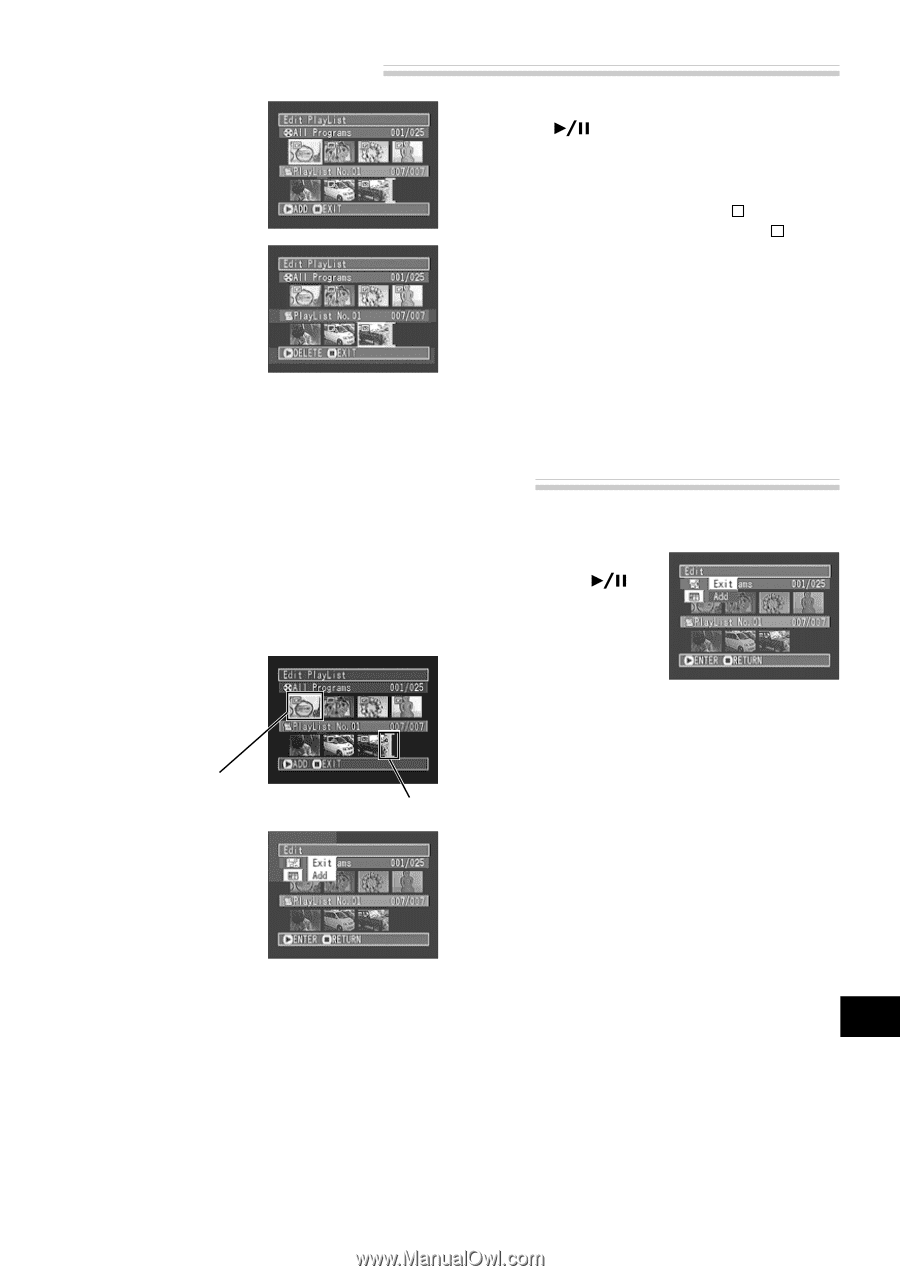
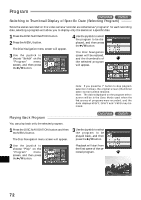
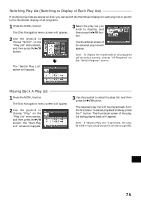
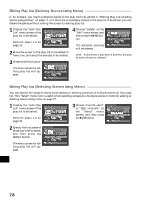
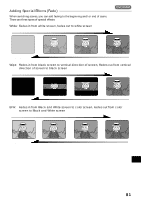
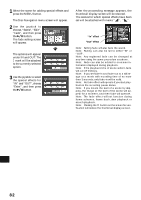
Deleting Scenes from Play List 1 Display the "Edit Play List" menu screen of the play list to be edited. 3 If you are sure that you wish to delete the scene, press the button: The screen being deleted will appear. Perform steps 1 - 3 on page 76. 2 From the play list in lower row, point the cursor to the scene you want to delete. To select multiple scenes, refer to "Selecting Consecutive scenes Together" or "Selecting Random Scenes" on page 70. When multiple scenes are being deleted, you can stop deletion midway: Press the button. The scenes up to the point where the button was pressed will be deleted. Note: Place the cursor on scene to be deleted, and then press the DELETE button on remote control: You can also delete the scene. Editing Play List (Adding Scenes Using Menu) You can use the menu screen to add scenes to a created play list. 1 Display the "Edit Play List" menu screen of the play list to be edited. Perform steps 1-3 on page 76. 2 Select the scenes to be added from the upper row. 4 Choose "Add", and then press the button. The selected scenes will be added to the end of play list to be edited. Note: The selected scenes will be added in the insertion position. Scene to be added 3 Press the MENU button. The menu screen for editing play list will appear. Insertion position English 77
-
 1
1 -
2
-
3
-
4
-
5
-
6
-
7
-
8
-
9
-
10
-
11
-
12
-
13
-
14
-
15
-
16
-
17
-
18
-
19
-
20
-
21
-
22
-
23
-
24
-
25
-
26
-
27
-
28
-
29
-
30
-
31
-
32
-
33
-
34
-
35
-
36
-
37
-
38
-
39
-
40
-
41
-
42
-
43
-
44
-
45
-
46
-
47
-
48
-
49
-
50
-
51
-
52
-
53
-
54
-
55
-
56
-
57
-
58
-
59
-
60
-
61
-
62
-
63
-
64
-
65
-
66
-
67
-
68
-
69
-
70
-
71
-
 72
72 -
 73
73 -
 74
74 -
 75
75 -
 76
76 -
 77
77 -
 78
78 -
 79
79 -
 80
80 -
 81
81 -
 82
82 -
83
-
84
-
85
-
86
-
87
-
88
-
89
-
90
-
91
-
92
-
93
-
94
-
95
-
96
-
97
-
98
-
99
-
100
-
101
-
102
-
103
-
104
-
105
-
106
-
107
-
108
-
109
-
110
-
111
-
112
-
113
-
114
 |
 |