Hitachi DZ-MV270A Owners Guide - Page 39
Removing Disc
 |
View all Hitachi DZ-MV270A manuals
Add to My Manuals
Save this manual to your list of manuals |
Page 39 highlights
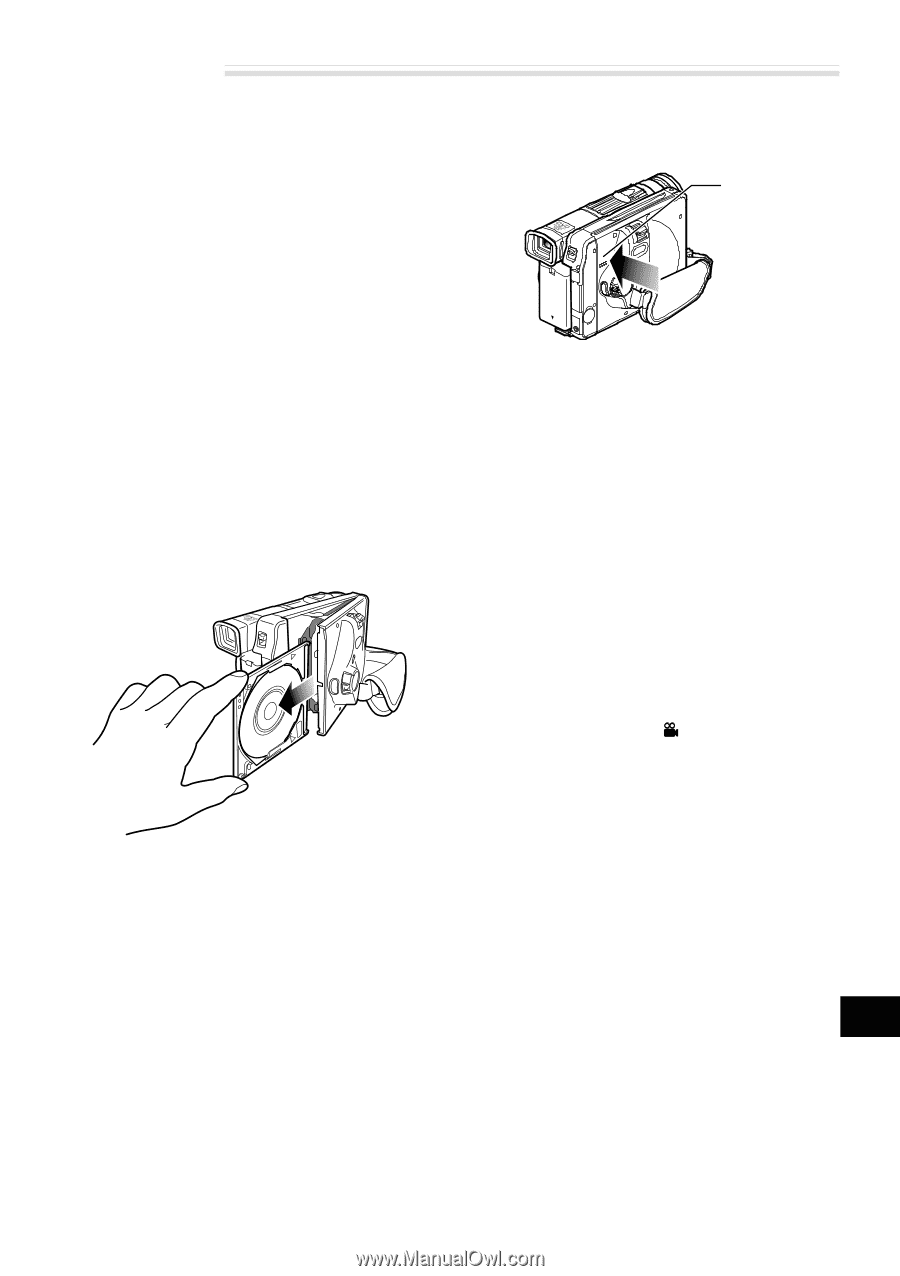
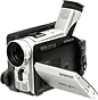
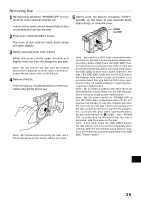
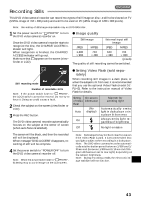
Removing Disc 1 Set the power switch to "POWER OFF" to turn the DVD video camera/recorder off. A click will be heard, which means that the disc is unlocked and can be removed. 2 Push down the DISC EJECT button. The cover of disc insertion block (hand strap) will open slightly. 5 Gently push the section indicated "PUSH/ CLOSE" on the cover of disc insertion block (hand strap), to close the cover. PUSH CLOSE 3 Gently open the cover until it stops. When the cover is fully open, the disc will slightly come out from the disc guide, and stop. Note: Do not remove the disc with the battery attachment platform of DVD video camera/recorder facing down: Disc could fall out. 4 Remove the disc. Hold the disc by its sides as shown in the illustration and gently pull it out. Note: Be careful when removing the disc, since the temperature at the shutter will be very high. Note: Even after the DVD video camera/recorder is turned on, the disc can be removed unless it is in recording status. Press down the DISC EJECT button and hold it for at least 2 seconds: A click will be heard and the disc will be unlocked. Push down the DISC EJECT button once again to er move the disc. (The DISC EJECT indicator on the LCD screen will change from white to pink at this time.) It is recommended that you turn the DVD video camera/recorder off before inserting or ejecting disc to prevent misoperation. Note: Do not insert anything other than the 8 cm DVD-RAM disc or DVD-R disc into the disc insertion block: Doing so could cause malfunctions. Note: Set the power switch to "POWER OFF" to turn the DVD video camera/recorder off. Do not remove the battery to turn the camera/recorder off: If you do so, the disc cannot be removed. If the disc cannot be removed, use the AC adapter, etc. to power the DVD video camera/er corder. Set the power switch to " VIDEO", then "POWER OFF" to make sure by the sound that the disc is unlocked, and then remove the disc. Note: If you push down the DISC EJECT button, the disc will not come out until it completely stops rotating. After the lock release sound is heard, wait for a few moments and then push down the DISC EJECT button again. English 39
-
 1
1 -
2
-
3
-
4
-
5
-
6
-
7
-
8
-
9
-
10
-
11
-
12
-
13
-
14
-
15
-
16
-
17
-
18
-
19
-
20
-
21
-
22
-
23
-
24
-
25
-
26
-
27
-
28
-
29
-
30
-
31
-
32
-
33
-
 34
34 -
 35
35 -
 36
36 -
 37
37 -
 38
38 -
 39
39 -
 40
40 -
 41
41 -
 42
42 -
 43
43 -
 44
44 -
45
-
46
-
47
-
48
-
49
-
50
-
51
-
52
-
53
-
54
-
55
-
56
-
57
-
58
-
59
-
60
-
61
-
62
-
63
-
64
-
65
-
66
-
67
-
68
-
69
-
70
-
71
-
72
-
73
-
74
-
75
-
76
-
77
-
78
-
79
-
80
-
81
-
82
-
83
-
84
-
85
-
86
-
87
-
88
-
89
-
90
-
91
-
92
-
93
-
94
-
95
-
96
-
97
-
98
-
99
-
100
-
101
-
102
-
103
-
104
-
105
-
106
-
107
-
108
-
109
-
110
-
111
-
112
-
113
-
114
 |
 |