Hitachi DZ-MV270A Owners Guide - Page 96
Connecting DVD video camera/recorder to PC via PC connection cable - drivers for
 |
View all Hitachi DZ-MV270A manuals
Add to My Manuals
Save this manual to your list of manuals |
Page 96 highlights
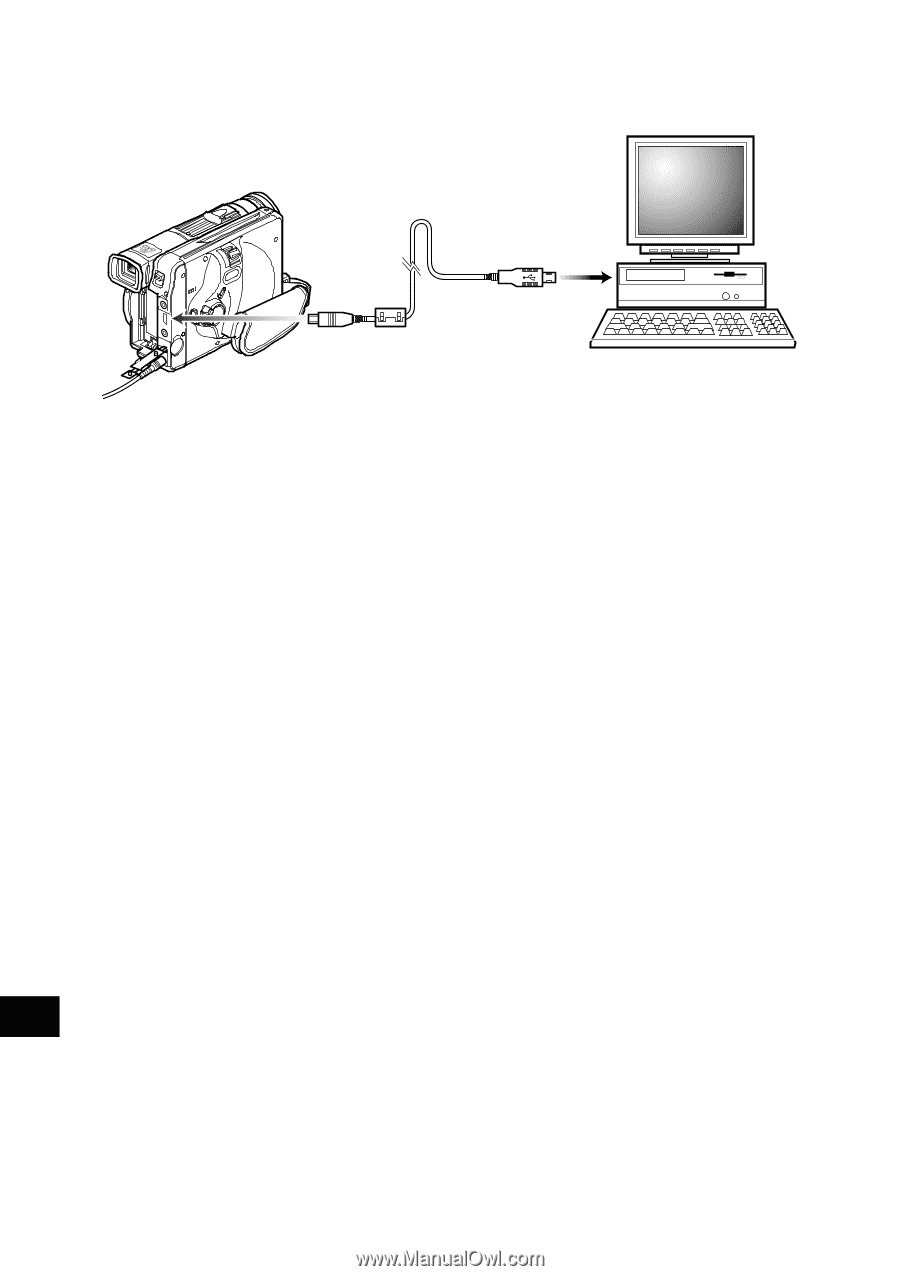
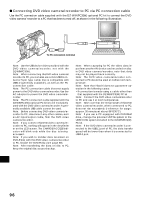
G Connecting DVD video camera/recorder to PC via PC connection cable Use the PC connection cable supplied with the DZ-WINPC3(W) optional PC kit to connect the DVD video camera/recorder to a PC that has been turned off, as shown in the following illustration: To PC connection terminal Note: Use the USB device driver provided with the DVD video camera/recorder, not with the DZ-WINPC3(W). Note: When connecting this DVD video camera/ recorder to PC, you can also use a mini-USB B connector 5-pin type cable that is compatible with USB2.0 (generally available), as well as the PC connection cable. Note: The PC connection cable does not supply power to the DVD video camera/recorder. Use the AC adapter to power the DVD video camera/er corder. Note: The PC connection cable supplied with the DZ-WINPC3(W) optional PC kit is to be exclusively used with the DVD video camera/recorder: A generally available USB cable cannot be used. Note: Before connecting DVD video camera/recorder to PC, disconnect any other cables, such as AV input/output cable, from the DVD video camera/recorder. Note: If you connect this DVD video camera/recorder to PC, nothing will appear in the viewfinder or on the LCD screen. The CHARGE/ACCESS indicator will blink only while the disc is being accessed. Note: If you wish to transfer data recorded on DVD-R disc with this DVD video camera/recorder to PC, finalize the DVD-R disc (see page 89). Note: After transferring the data on disc to PC, keep the original disc as your backup. Note: When capturing for PC the video data input from another AV device and recorded on disc in DVD video camera/recorder, note that data may not be played back correctly. Note: The DVD video camera/recorder connected to PC should be used at normal room temperature. Note: Note that Hitachi does not guarantee operation in the following cases: • If connection is made using a cable other than that supplied with the DZ-WINPC3(W) PC kit Note: Connect the DVD video camera/recorder to PC and use it at room temperature. Note: Take care that the temperature of this DVD video camera/recorder, when connected to PC, does not rise excessively (r eference for usage: approx. 30 minutes at about 86°F(30°C). Note: If you use a PC equipped with DVD-RAM drive, change the provided UDF file system to the UDF2.01 file system included in the DZ-WINPC3(W) PC kit. Note: If the DVD video camera/recorder is connected to the USB1.1 port of PC, the data transfer speed will be lower than when it is connected to USB2.0 port. English 96
-
 1
1 -
2
-
3
-
4
-
5
-
6
-
7
-
8
-
9
-
10
-
11
-
12
-
13
-
14
-
15
-
16
-
17
-
18
-
19
-
20
-
21
-
22
-
23
-
24
-
25
-
26
-
27
-
28
-
29
-
30
-
31
-
32
-
33
-
34
-
35
-
36
-
37
-
38
-
39
-
40
-
41
-
42
-
43
-
44
-
45
-
46
-
47
-
48
-
49
-
50
-
51
-
52
-
53
-
54
-
55
-
56
-
57
-
58
-
59
-
60
-
61
-
62
-
63
-
64
-
65
-
66
-
67
-
68
-
69
-
70
-
71
-
72
-
73
-
74
-
75
-
76
-
77
-
78
-
79
-
80
-
81
-
82
-
83
-
84
-
85
-
86
-
87
-
88
-
89
-
90
-
 91
91 -
 92
92 -
 93
93 -
 94
94 -
 95
95 -
 96
96 -
 97
97 -
 98
98 -
 99
99 -
 100
100 -
 101
101 -
102
-
103
-
104
-
105
-
106
-
107
-
108
-
109
-
110
-
111
-
112
-
113
-
114
 |
 |