Hitachi DZ-MV270A Owners Guide - Page 48
Focusing When Recording Movie, Focusing range, How to install conversion lens optional, Macro - dvd cam
 |
View all Hitachi DZ-MV270A manuals
Add to My Manuals
Save this manual to your list of manuals |
Page 48 highlights
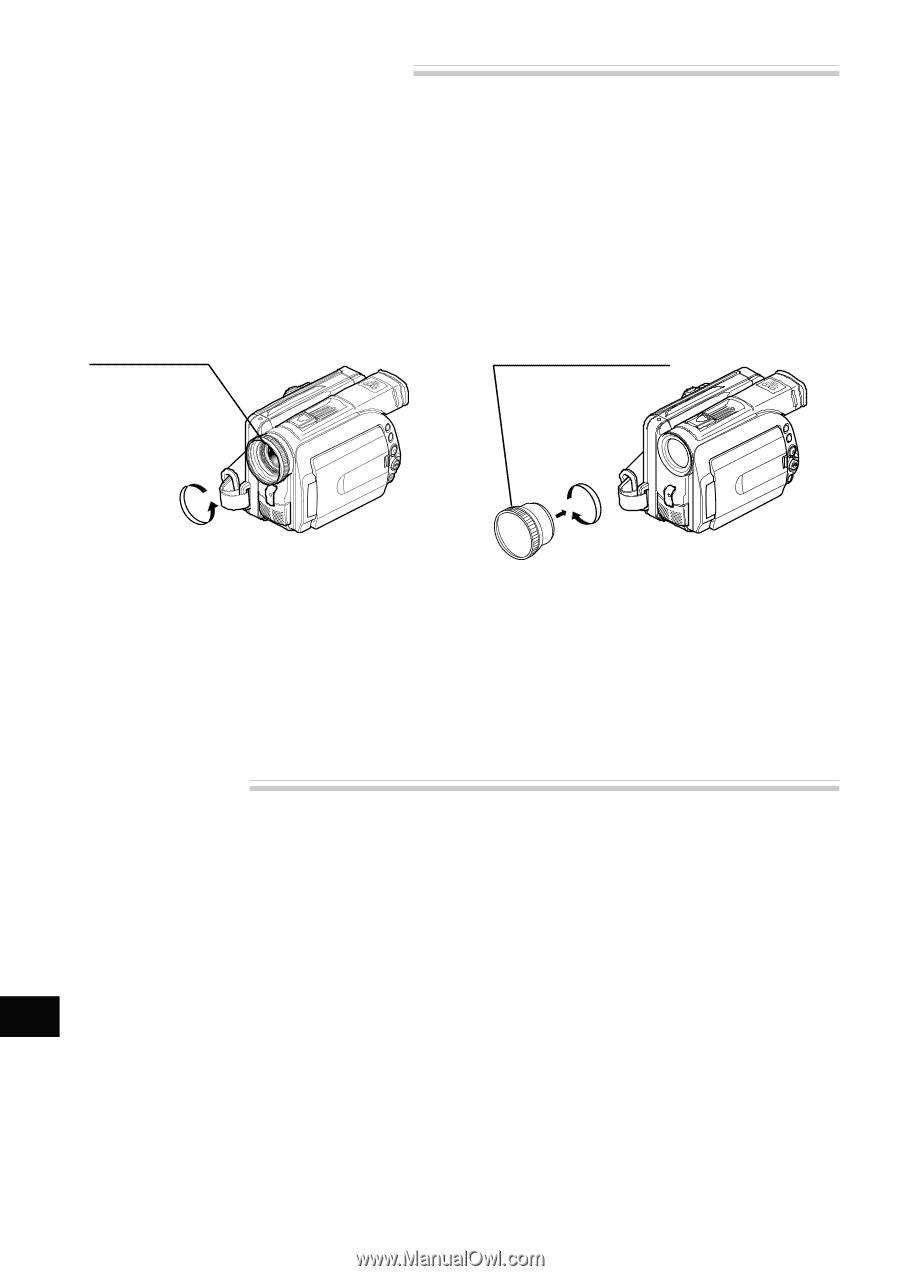
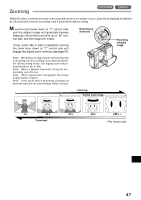
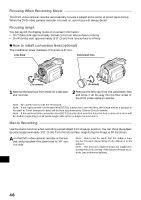
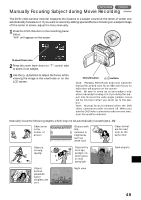
Focusing When Recording Movie This DVD video camera/recorder automatically focuses a subject at the center of screen (auto-focus). When the DVD video camera/recorder is turned on, auto-focus will always be set. Focusing range You can switch the display mode of on-screen information: • On T (tele) side: approximately 3.6 feet (1 m) from lens surface to infinity • On W (wide) side: approximately 3/8" (1 cm) from lens surface to infinity G How to install conversion lens (optional) The installation screw diameter of this lens is 37 mm. Lens hood Conversion lens (To remove) (To attach) 1 Remove the lens hood from the DVD video camera/recorder. 2 Remove the lens cap from the conversion lens and screw it all the way into the filter screw of the DVD video camera/recorder. Note: Be careful not to lose the lens hood. Note: If the optional tele-conversion lens (DZ-TL1) is attached over the lens, the range where a subject is focused at T end (telephoto side) will be from approximately 18 feet (5 m) to infinite. Note: If the optional tele-conversion lens (DZ-TL1) is attached over the lens, the four corners of screen will be darker (vignetting) on W (wide-angle) side when a subject is zoomed in. Macro Recording Use the macro function when recording a small object from close-up position: You can shoot the subject as close as approximately 3/8" (1 cm) from the lens surface, magnifying the image to fill the screen. Aim the DVD video camera/recorder at the subject, and press down the zoom lever to "W" control side. Note: Zoom can be used, but the subject may not be focused, depending on the distance to the subject. Note: The amount of light tends to be insufficient during macro recording: If the subject image is too dark, use additional lighting. English 48
-
 1
1 -
2
-
3
-
4
-
5
-
6
-
7
-
8
-
9
-
10
-
11
-
12
-
13
-
14
-
15
-
16
-
17
-
18
-
19
-
20
-
21
-
22
-
23
-
24
-
25
-
26
-
27
-
28
-
29
-
30
-
31
-
32
-
33
-
34
-
35
-
36
-
37
-
38
-
39
-
40
-
41
-
42
-
 43
43 -
 44
44 -
 45
45 -
 46
46 -
 47
47 -
 48
48 -
 49
49 -
 50
50 -
 51
51 -
 52
52 -
 53
53 -
54
-
55
-
56
-
57
-
58
-
59
-
60
-
61
-
62
-
63
-
64
-
65
-
66
-
67
-
68
-
69
-
70
-
71
-
72
-
73
-
74
-
75
-
76
-
77
-
78
-
79
-
80
-
81
-
82
-
83
-
84
-
85
-
86
-
87
-
88
-
89
-
90
-
91
-
92
-
93
-
94
-
95
-
96
-
97
-
98
-
99
-
100
-
101
-
102
-
103
-
104
-
105
-
106
-
107
-
108
-
109
-
110
-
111
-
112
-
113
-
114
 |
 |