Kyocera FS-3900DN IB-23 User's Manual in PDF Format - Page 39
Connect the Printer to the E-mail Port
 |
UPC - 674983006900
View all Kyocera FS-3900DN manuals
Add to My Manuals
Save this manual to your list of manuals |
Page 39 highlights
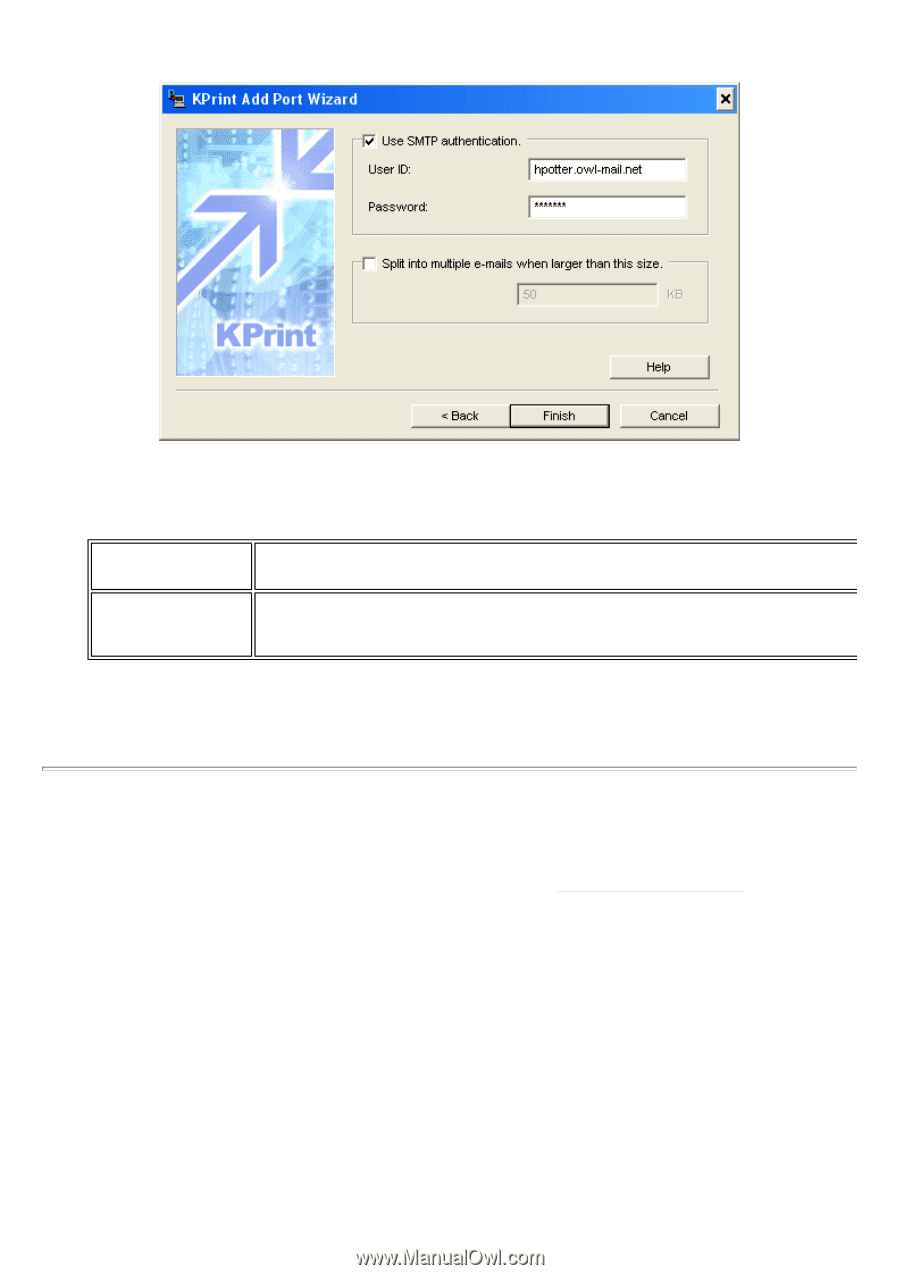
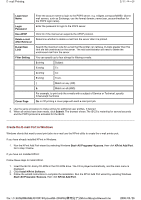
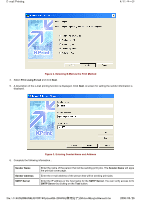
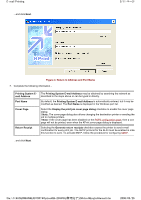
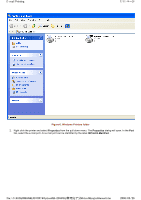
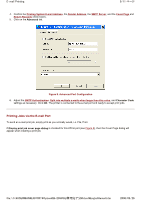
E-mail Printing 6/11 ページ Figure 5. SMTP Authentication 8. Complete the following information... SMTP Authentication If the mail server requires SMTP Authentication for sending email, select Use SMTP Authentication and enter an authorized user name and password. Split into multiple e- Splitting into multiple e-mails may be necessary on some systems which limit the size o mails when larger individual e-mails. than this value ...and click Finish to create the e-mail port. 9. Click OK when the confirmation screen is displayed. Connect the Printer to the E-mail Port In the following section, it is assumed that you have already installed the printer driver for the IB-23 printer and the printer is already created in the Windows Printers and Faxes folder from the Start menu. If you have not done so, install the printer driver from the CD-ROM supplied with the printer. For details, refer to Installing the Printer Drivers. To connect the printer to the e-mail port: 1. Open the Windows Printers and Faxes folder from the Start menu. file://F:\USERMAN\EXPORT\Option\IB-23\P6 English\email.htm 2006/05/26
-
 1
1 -
2
-
3
-
4
-
5
-
6
-
7
-
8
-
9
-
10
-
11
-
12
-
13
-
14
-
15
-
16
-
17
-
18
-
19
-
20
-
21
-
22
-
23
-
24
-
25
-
26
-
27
-
28
-
29
-
30
-
31
-
32
-
33
-
 34
34 -
 35
35 -
 36
36 -
 37
37 -
 38
38 -
 39
39 -
 40
40 -
 41
41 -
 42
42 -
 43
43 -
 44
44 -
45
-
46
-
47
-
48
-
49
-
50
-
51
-
52
-
53
-
54
-
55
-
56
-
57
-
58
-
59
-
60
-
61
-
62
-
63
-
64
-
65
-
66
-
67
-
68
-
69
-
70
-
71
-
72
-
73
-
74
-
75
-
76
-
77
-
78
-
79
-
80
-
81
-
82
-
83
-
84
-
85
-
86
-
87
-
88
-
89
-
90
-
91
-
92
-
93
-
94
-
95
-
96
-
97
-
98
-
99
-
100
-
101
-
102
-
103
-
104
 |
 |