Kyocera FS-3900DN IB-23 User's Manual in PDF Format - Page 87
ページ, E-mail Reports via SMTP Simple Mail Transfer Protocol
 |
UPC - 674983006900
View all Kyocera FS-3900DN manuals
Add to My Manuals
Save this manual to your list of manuals |
Page 87 highlights
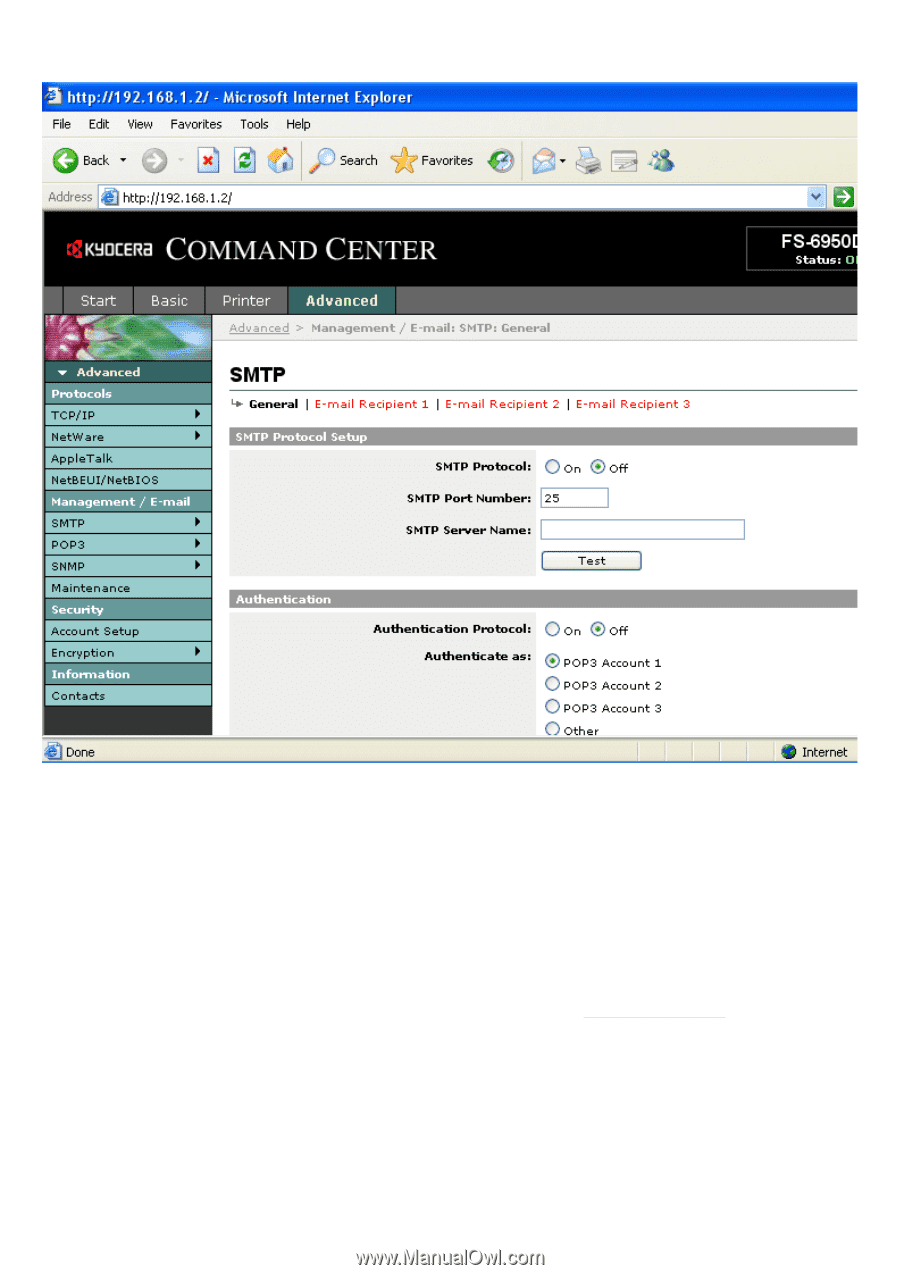
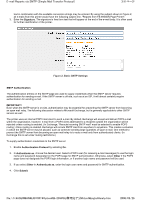
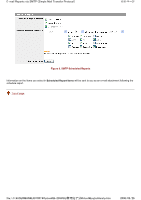
E-mail Reports via SMTP (Simple Mail Transfer Protocol) 2/6 ページ Figure 1. SMTP General Page Establish Connection to the SMTP Server 1. Enable the SMTP Protocol. 2. Set the SMTP Port Number or use the SMTP default port 25. 3. In SMTP Server Name, enter the server name or IP address. When using a server name instead of an IP address, you must designate the DNS server address. Enter it in the DNS server setting by clicking TCP/IP > General in the left menu. 4. Click the Test button to check for a successful connection to the SMTP server. If the test fails, double check the IP address or name and DNS settings. Also consider firewall issues and see SMTP Authentication below. Define Basic SMTP Settings 1. Enter the Sender Address. The sender address is often set to the address of the person responsible for the printer, such as the printer administrator, so that a reply or non-delivery report will go to a person rather than to the printer. 2. Enter the Subject. The subject is the text that will appear in the subject line of all e-mails sent from the printer. Any file://F:\USERMAN\EXPORT\Option\IB-23\P6 English\smtp.htm 2006/05/26
-
 1
1 -
2
-
3
-
4
-
5
-
6
-
7
-
8
-
9
-
10
-
11
-
12
-
13
-
14
-
15
-
16
-
17
-
18
-
19
-
20
-
21
-
22
-
23
-
24
-
25
-
26
-
27
-
28
-
29
-
30
-
31
-
32
-
33
-
34
-
35
-
36
-
37
-
38
-
39
-
40
-
41
-
42
-
43
-
44
-
45
-
46
-
47
-
48
-
49
-
50
-
51
-
52
-
53
-
54
-
55
-
56
-
57
-
58
-
59
-
60
-
61
-
62
-
63
-
64
-
65
-
66
-
67
-
68
-
69
-
70
-
71
-
72
-
73
-
74
-
75
-
76
-
77
-
78
-
79
-
80
-
81
-
 82
82 -
 83
83 -
 84
84 -
 85
85 -
 86
86 -
 87
87 -
 88
88 -
 89
89 -
 90
90 -
 91
91 -
 92
92 -
93
-
94
-
95
-
96
-
97
-
98
-
99
-
100
-
101
-
102
-
103
-
104
 |
 |