Kyocera FS-3900DN IB-23 User's Manual in PDF Format - Page 51
ページ, Macintosh Printing - fs driver
 |
UPC - 674983006900
View all Kyocera FS-3900DN manuals
Add to My Manuals
Save this manual to your list of manuals |
Page 51 highlights
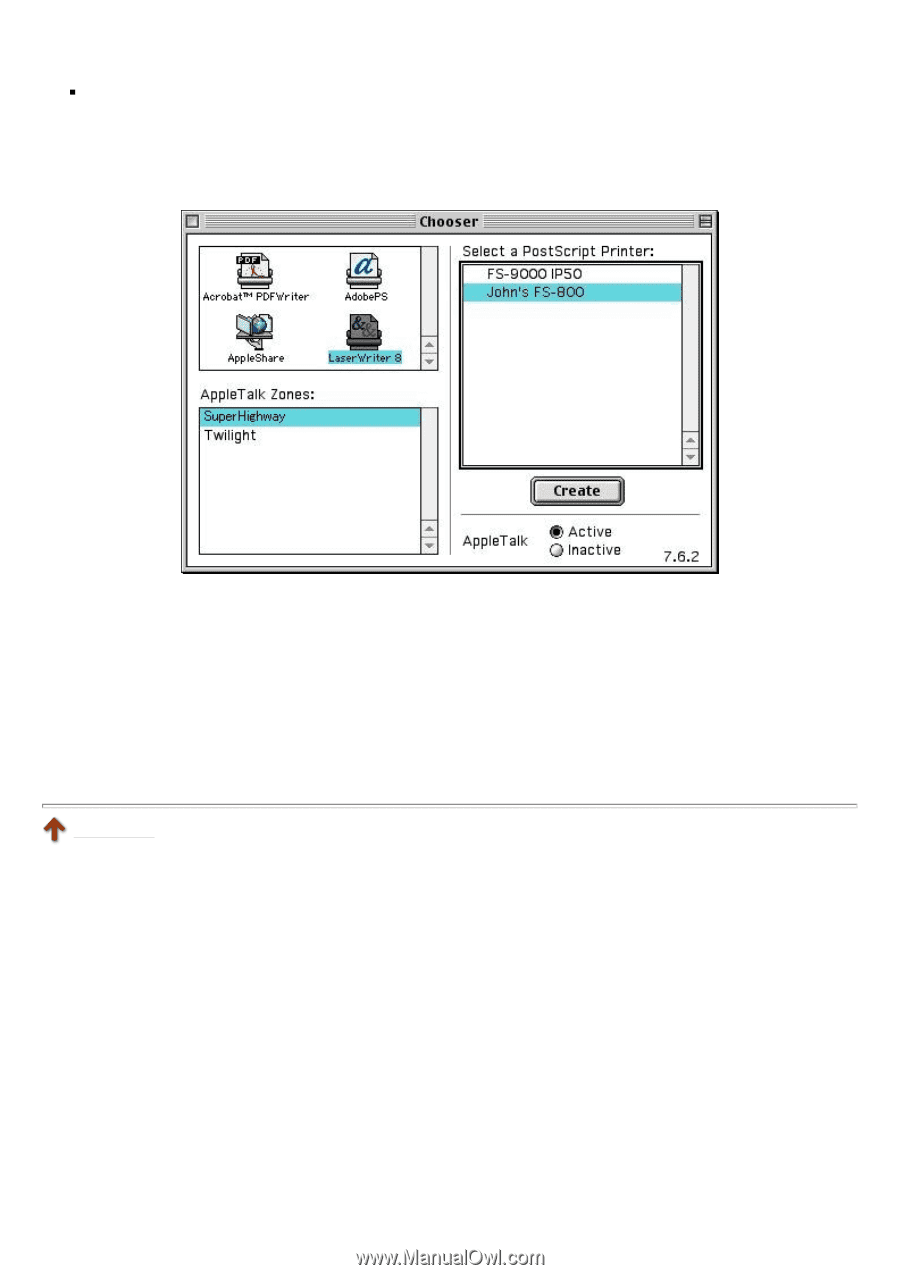
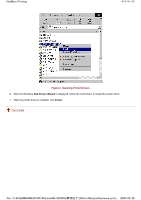
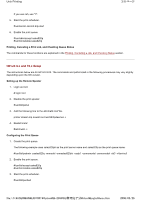
Macintosh Printing 3/3 ページ „ Follow these steps in Mac OS 8. 1. Insert the CD-ROM bundled with the printer in the CD drive. 2. Double-click on FS-Series Installer. The PPD file will be copied to the Printer Descriptions folder in the Mac OS Extensions folder. 3. From the desktop icon, select Chooser and double-click to open it. Figure 2. Chooser Settings 4. Click the LaserWriter 8 driver. 5. Select the printer's AppleTalk zone. The AppleTalk printers of the zone are listed in the window at right. 6. Click the installed printer. 7. Click Create. The PPD file is selected automatically, and a settings window for options opens. 8. Complete the settings for printer functions and options. 9. Click OK when you are finished. A desktop printer will be created. Top of page file://F:\USERMAN\EXPORT\Option\IB-23\P6 English\macintosh.htm 2006/05/26
-
 1
1 -
2
-
3
-
4
-
5
-
6
-
7
-
8
-
9
-
10
-
11
-
12
-
13
-
14
-
15
-
16
-
17
-
18
-
19
-
20
-
21
-
22
-
23
-
24
-
25
-
26
-
27
-
28
-
29
-
30
-
31
-
32
-
33
-
34
-
35
-
36
-
37
-
38
-
39
-
40
-
41
-
42
-
43
-
44
-
45
-
 46
46 -
 47
47 -
 48
48 -
 49
49 -
 50
50 -
 51
51 -
 52
52 -
 53
53 -
 54
54 -
 55
55 -
 56
56 -
57
-
58
-
59
-
60
-
61
-
62
-
63
-
64
-
65
-
66
-
67
-
68
-
69
-
70
-
71
-
72
-
73
-
74
-
75
-
76
-
77
-
78
-
79
-
80
-
81
-
82
-
83
-
84
-
85
-
86
-
87
-
88
-
89
-
90
-
91
-
92
-
93
-
94
-
95
-
96
-
97
-
98
-
99
-
100
-
101
-
102
-
103
-
104
 |
 |