Lexmark MX6500e User's Guide - Page 24
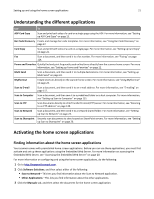
Setting up Scan to Network, Settings, Apps Management, Multi Send, Notes, Share Folder, Apply
 |
View all Lexmark MX6500e manuals
Add to My Manuals
Save this manual to your list of manuals |
Page 24 highlights
Setting up and using the home screen applications 24 1 Open a Web browser, and then type the scanner IP address in the address field. Note: View the scanner IP address on the scanner home screen. The IP address appears as four sets of numbers separated by periods, such as 123.123.123.123. 2 Click Settings > Apps > Apps Management > Multi Send. 3 From the Profiles section, click Add, and then customize the settings. Notes: • See the mouse‑over help beside each field for a description of the setting. • If you select FTP or Share Folder as a destination, then make sure the location settings of the destination are correct. Type the correct IP address of the host computer where the specified destination is located. For more information on obtaining the IP address of the host computer, see "Finding the IP address of the computer" on page 19. 4 Click Apply. To use the application, touch Multi Send on the scanner home screen, and then follow the instructions on the scanner display. Setting up Scan to Network Note: A later version of this User's Guide may contain a direct link to the Administrator's Guide of this application. To check for updates of this User's Guide, go to http://support.lexmark.com. Use To Scan a document and send it to a shared network folder. You can define up to 30 unique folder destinations. Notes: • The scanner must have permission to write to the destinations. From the computer where the destination is specified, use sharing, security, and firewall settings to allow the scanner at least a write access. For help, see the documentation that came with your operating system. • The Scan to Network icon appears only when one or more destinations are defined. 1 Open a Web browser, and then type the scanner IP address in the address field. Note: View the scanner IP address on the scanner home screen. The IP address appears as four sets of numbers separated by periods, such as 123.123.123.123. 2 Do either of the following: • Click Set up Scan to Network. • Click Settings > Apps > Apps Management > Scan to Network. 3 Specify the destinations, and then customize the settings. Notes: • See the mouse-over help beside some of the fields for a description of the setting. • To make sure the location settings of the destination are correct, type the correct IP address of the host computer where the specified destination is located. For more information on obtaining the IP address of the host computer, see "Finding the IP address of the computer" on page 19. • Make sure the scanner has access rights to the folder where the specified destination is located.
-
 1
1 -
2
-
3
-
4
-
5
-
6
-
7
-
8
-
9
-
10
-
11
-
12
-
13
-
14
-
15
-
16
-
17
-
18
-
 19
19 -
 20
20 -
 21
21 -
 22
22 -
 23
23 -
 24
24 -
 25
25 -
 26
26 -
 27
27 -
 28
28 -
 29
29 -
30
-
31
-
32
-
33
-
34
-
35
-
36
-
37
-
38
-
39
-
40
-
41
-
42
-
43
-
44
-
45
-
46
-
47
-
48
-
49
-
50
-
51
-
52
-
53
-
54
-
55
-
56
-
57
-
58
-
59
-
60
-
61
-
62
-
63
-
64
-
65
-
66
-
67
-
68
-
69
-
70
-
71
-
72
-
73
-
74
-
75
-
76
-
77
-
78
-
79
-
80
-
81
-
82
-
83
-
84
-
85
-
86
-
87
-
88
-
89
-
90
-
91
-
92
-
93
-
94
-
95
-
96
-
97
-
98
-
99
-
100
-
101
-
102
-
103
-
104
-
105
-
106
-
107
-
108
-
109
-
110
-
111
-
112
-
113
-
114
-
115
-
116
-
117
-
118
-
119
-
120
-
121
-
122
-
123
-
124
-
125
-
126
-
127
-
128
-
129
-
130
-
131
-
132
-
133
-
134
-
135
-
136
-
137
-
138
-
139
-
140
-
141
-
142
-
143
-
144
-
145
-
146
-
147
-
148
-
149
-
150
-
151
-
152
-
153
-
154
-
155
-
156
-
157
-
158
-
159
-
160
-
161
-
162
-
163
-
164
-
165
-
166
-
167
-
168
-
169
-
170
-
171
-
172
-
173
-
174
-
175
-
176
-
177
-
178
-
179
-
180
-
181
-
182
-
183
-
184
-
185
-
186
-
187
-
188
-
189
-
190
-
191
-
192
-
193
-
194
-
195
-
196
-
197
-
198
-
199
-
200
-
201
-
202
-
203
-
204
-
205
-
206
-
207
-
208
-
209
-
210
-
211
-
212
-
213
-
214
-
215
-
216
-
217
-
218
-
219
-
220
-
221
-
222
-
223
-
224
-
225
-
226
-
227
-
228
-
229
-
230
-
231
-
232
-
233
-
234
-
235
-
236
-
237
-
238
-
239
-
240
-
241
-
242
-
243
-
244
-
245
-
246
-
247
-
248
-
249
-
250
-
251
-
252
-
253
-
254
-
255
-
256
-
257
-
258
-
259
-
260
-
261
-
262
-
263
-
264
-
265
-
266
-
267
-
268
-
269
-
270
-
271
-
272
-
273
-
274
-
275
-
276
-
277
-
278
-
279
-
280
-
281
-
282
-
283
-
284
-
285
-
286
-
287
-
288
-
289
-
290
-
291
-
292
-
293
-
294
-
295
-
296
-
297
-
298
-
299
-
300
-
301
-
302
-
303
-
304
-
305
-
306
-
307
-
308
-
309
-
310
-
311
-
312
-
313
-
314
-
315
-
316
-
317
-
318
-
319
-
320
-
321
-
322
-
323
-
324
-
325
-
326
-
327
-
328
-
329
-
330
-
331
-
332
-
333
-
334
-
335
-
336
-
337
-
338
-
339
-
340
-
341
-
342
-
343
-
344
-
345
-
346
-
347
-
348
-
349
-
350
-
351
-
352
-
353
-
354
-
355
-
356
-
357
-
358
-
359
-
360
-
361
-
362
-
363
-
364
-
365
-
366
-
367
-
368
-
369
-
370
-
371
-
372
-
373
-
374
-
375
-
376
-
377
-
378
-
379
-
380
-
381
-
382
-
383
-
384
-
385
-
386
-
387
-
388
-
389
-
390
-
391
-
392
-
393
-
394
-
395
-
396
 |
 |