NEC NP1150 NP1150/2150/3150/3151W user's manual - Page 128
To turn on the projector when Security is enabled when using USB memory device as a protect
 |
UPC - 805736019568
View all NEC NP1150 manuals
Add to My Manuals
Save this manual to your list of manuals |
Page 128 highlights
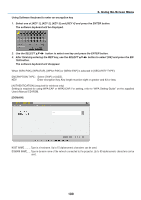
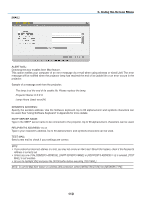
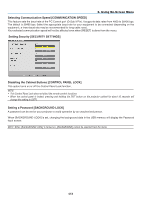
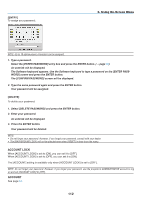
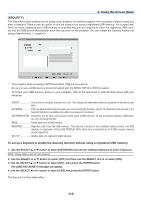
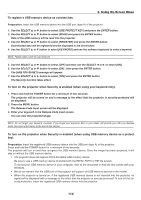
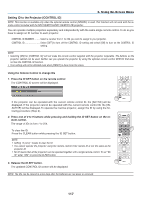
To register a USB memory device as a protect key. 6. Using On-Screen Menu Preparation: Insert the USB memory device into the USB port (type A) of the projector. 1. Use the SELECT or button to select [Use Protect Key] and press the ENTER button. 2. Use the SELECT or button to select [Read] and press the ENTER button. Data of the USB memory will be read into the projector. 3. Use the SELECT or button to select [Register] and press the ENTER button. Downloaded data will be registered and be displayed in the list window. 4. Use the SELECT or button to select [Keyword] and use the software keyboard to enter a keyword. NOTE: Please make a note of your keyword. 5. Use the SELECT or button to select [Off] and then use the SELECT or to select [On]. 6. Use the SELECT or button to select [OK] , then press the ENTER button. The [ARE YOU SURE?] message will appear. 7. Use the SELECT or button to select [Yes] and press the ENTER button. The Security function takes effect. To turn on the projector when Security is enabled (when using your keyword only). 1. Press and hold the POWER button for a minimum of two seconds. The projector will be turned on and a message to the effect that the projector is security-protected will be displayed. 2. Press the MENU button. The Release Code input screen will be displayed. 3. Enter your keyword in the Release Code input screen. You can view the projected image. NOTE: Do not forget your keyword. However, if you forget your keyword, NEC or your dealer will provide you with your Release Code. See more information at the end of this section. To turn on the projector when Security is enabled (when using USB memory device as a protect key). Preparation: Insert the registered USB memory device into the USB port (type A) of the projector. Press and hold the POWER button for a minimum of two seconds. The projector will turn on and then recognize the USB memory device. Once the image has been projected, it will stay on without the USB memory device. • The projector does not support NTFS formatted USB memory device. Be sure to use a USB memory device formatted with the FAT32, FAT16 or FAT file system. To format your USB memory device in your computer, refer to the document or help file that comes with your Windows. • We do not warrant that the USB port of the projector will support all USB memory devices in the market. • When the projector is turned on, if the registered USB memory device is not inserted into the projector, no signal will be displayed with a message to the effect that the projector is security-protected. To turn off the security protection, insert the registered USB memory device into the projector. 114
-
 1
1 -
2
-
3
-
4
-
5
-
6
-
7
-
8
-
9
-
10
-
11
-
12
-
13
-
14
-
15
-
16
-
17
-
18
-
19
-
20
-
21
-
22
-
23
-
24
-
25
-
26
-
27
-
28
-
29
-
30
-
31
-
32
-
33
-
34
-
35
-
36
-
37
-
38
-
39
-
40
-
41
-
42
-
43
-
44
-
45
-
46
-
47
-
48
-
49
-
50
-
51
-
52
-
53
-
54
-
55
-
56
-
57
-
58
-
59
-
60
-
61
-
62
-
63
-
64
-
65
-
66
-
67
-
68
-
69
-
70
-
71
-
72
-
73
-
74
-
75
-
76
-
77
-
78
-
79
-
80
-
81
-
82
-
83
-
84
-
85
-
86
-
87
-
88
-
89
-
90
-
91
-
92
-
93
-
94
-
95
-
96
-
97
-
98
-
99
-
100
-
101
-
102
-
103
-
104
-
105
-
106
-
107
-
108
-
109
-
110
-
111
-
112
-
113
-
114
-
115
-
116
-
117
-
118
-
119
-
120
-
121
-
122
-
 123
123 -
 124
124 -
 125
125 -
 126
126 -
 127
127 -
 128
128 -
 129
129 -
 130
130 -
 131
131 -
 132
132 -
 133
133 -
134
-
135
-
136
-
137
-
138
-
139
-
140
-
141
-
142
-
143
-
144
-
145
-
146
-
147
-
148
-
149
-
150
-
151
-
152
-
153
-
154
-
155
-
156
-
157
-
158
-
159
-
160
-
161
-
162
-
163
-
164
-
165
-
166
-
167
-
168
-
169
-
170
-
171
-
172
 |
 |
