NEC NP1150 NP1150/2150/3150/3151W user's manual - Page 166
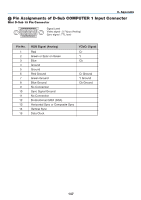
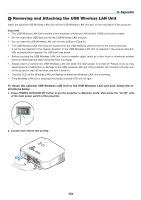
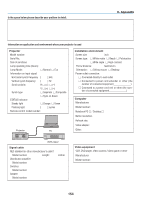
Insert the USB Wireless LAN Unit slowly into the USB port on the rear panel of the projector.
 |
UPC - 805736019568
View all NEC NP1150 manuals
Add to My Manuals
Save this manual to your list of manuals |
Page 166 highlights
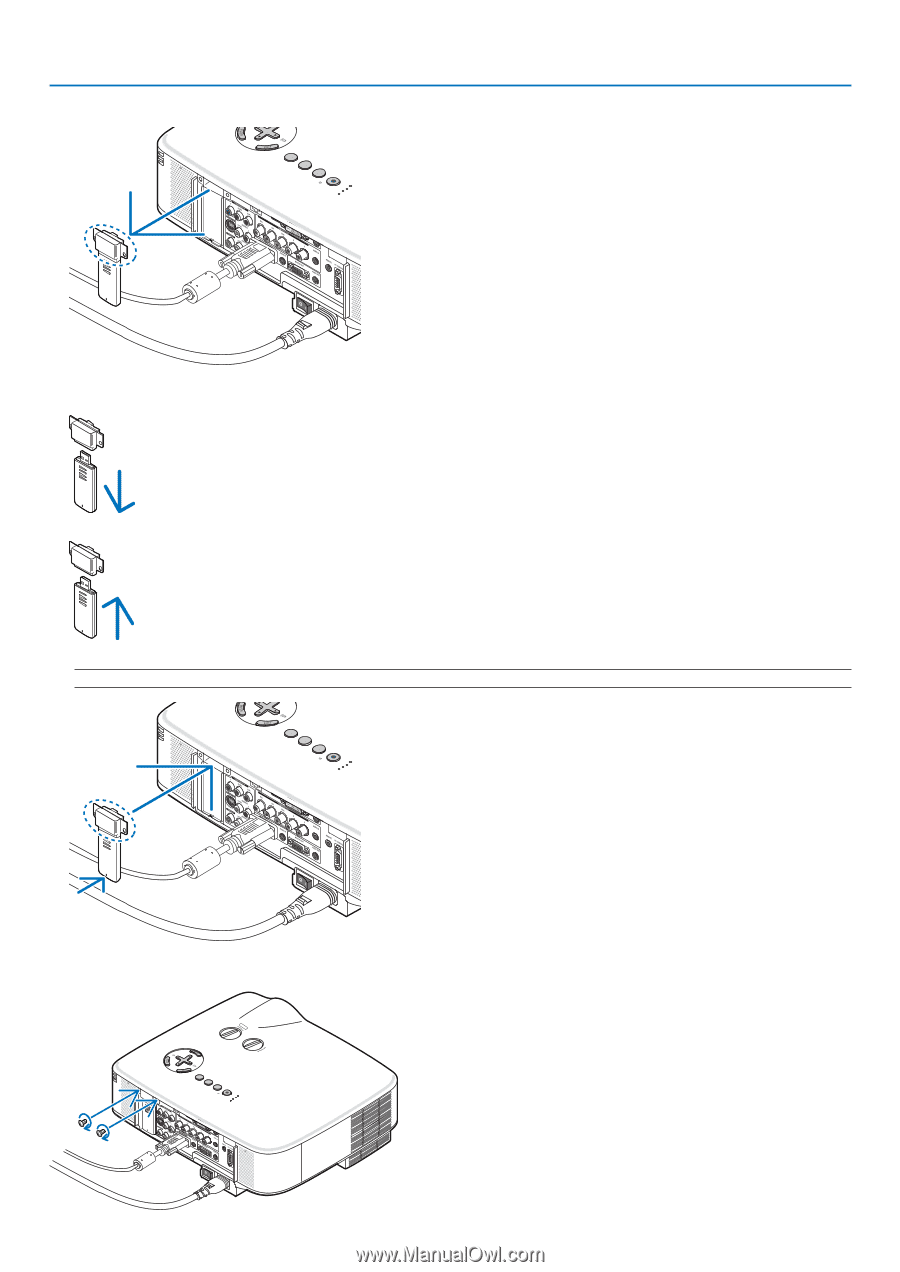
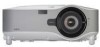
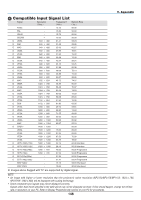
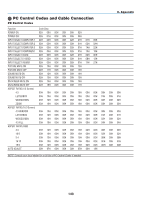
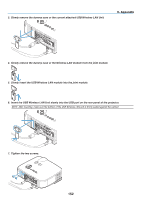
3. Slowly remove the dummy case or the current attached USB Wireless LAN Unit. SELECT 3D REFORM AUTO ADJUST SOURCE ON/STAND BY POWSETRATLUASMUPSB 9. Appendix WIRELESS WIRELESS 4. Slowly remove the dummy case or the Wireless LAN module from the joint module. WIRELESS WIRELESS 5. Slowly insert the USB Wireless LAN module into the joint module. WIRELESS WIRELESS 6. Insert the USB Wireless LAN Unit slowly into the USB port on the rear panel of the projector. NOTE: After inserting, make sure the bottom of the USB Wireless LAN unit is firmly seated against the cabinet. SELECT 3D REFORM AUTO ADJUST SOURCE ON/STAND BY POWSETRATLUASMUPSB WIRELESS WIRELESS WIRELESS WIRELESS 7. Tighten the two screws. SELECT LEFT LENS SHIFT RIGHT DOWN UP 3D REFORM AUTO ADJUST SOURCE ON/STAND BY POWSETRATLUASMUPSB 152
-
 1
1 -
2
-
3
-
4
-
5
-
6
-
7
-
8
-
9
-
10
-
11
-
12
-
13
-
14
-
15
-
16
-
17
-
18
-
19
-
20
-
21
-
22
-
23
-
24
-
25
-
26
-
27
-
28
-
29
-
30
-
31
-
32
-
33
-
34
-
35
-
36
-
37
-
38
-
39
-
40
-
41
-
42
-
43
-
44
-
45
-
46
-
47
-
48
-
49
-
50
-
51
-
52
-
53
-
54
-
55
-
56
-
57
-
58
-
59
-
60
-
61
-
62
-
63
-
64
-
65
-
66
-
67
-
68
-
69
-
70
-
71
-
72
-
73
-
74
-
75
-
76
-
77
-
78
-
79
-
80
-
81
-
82
-
83
-
84
-
85
-
86
-
87
-
88
-
89
-
90
-
91
-
92
-
93
-
94
-
95
-
96
-
97
-
98
-
99
-
100
-
101
-
102
-
103
-
104
-
105
-
106
-
107
-
108
-
109
-
110
-
111
-
112
-
113
-
114
-
115
-
116
-
117
-
118
-
119
-
120
-
121
-
122
-
123
-
124
-
125
-
126
-
127
-
128
-
129
-
130
-
131
-
132
-
133
-
134
-
135
-
136
-
137
-
138
-
139
-
140
-
141
-
142
-
143
-
144
-
145
-
146
-
147
-
148
-
149
-
150
-
151
-
152
-
153
-
154
-
155
-
156
-
157
-
158
-
159
-
160
-
 161
161 -
 162
162 -
 163
163 -
 164
164 -
 165
165 -
 166
166 -
 167
167 -
 168
168 -
 169
169 -
 170
170 -
 171
171 -
172
 |
 |