Oki B930dn User Guide (English) - Page 105
Installing Consumables, Installing the Drum Cartridge, NSTALLING, ARTRIDGE
 |
View all Oki B930dn manuals
Add to My Manuals
Save this manual to your list of manuals |
Page 105 highlights
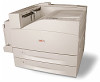
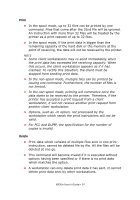
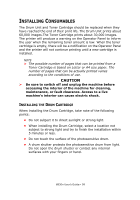
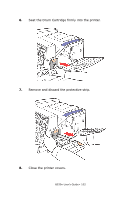
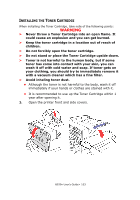
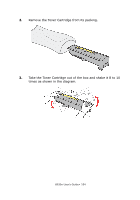
INSTALLING CONSUMABLES The Drum Unit and Toner Cartridge should be replaced when they have reached the end of their print life. The Drum Unit prints about 60,000 images.The Toner Cartridge prints about 30,000 images. The printer will produce a warning on the Operator Panel to inform the user when the remaining toner amount is low. When the toner cartridge is empty, there will be a notification on the Operator Panel and the printer will not continue printing until a new cartridge is installed. NOTE > The possible number of pages that can be printed from a Toner Cartridge is based on Letter or A4 size paper. The number of pages that can be actually printed varies according to the conditions of use. CAUTION > Be sure to switch off and unplug the machine before accessing the interior of the machine for cleaning, maintenance, or fault clearance. Access to a live machine's interior can cause electric shock. INSTALLING THE DRUM CARTRIDGE When installing the Drum Cartridge, take note of the following points: • Do not subject it to direct sunlight or strong light. • When installing the Drum Cartridge, select a location not subject to strong light and try to finish the installation within 5 minutes or less. • Do not touch the surface of the photosensitive drum. • A drum shutter protects the photosensitive drum from light. Do not open the drum shutter or contact any internal surfaces with your fingers or hand. B930n User's Guide> 99
-
 1
1 -
2
-
3
-
4
-
5
-
6
-
7
-
8
-
9
-
10
-
11
-
12
-
13
-
14
-
15
-
16
-
17
-
18
-
19
-
20
-
21
-
22
-
23
-
24
-
25
-
26
-
27
-
28
-
29
-
30
-
31
-
32
-
33
-
34
-
35
-
36
-
37
-
38
-
39
-
40
-
41
-
42
-
43
-
44
-
45
-
46
-
47
-
48
-
49
-
50
-
51
-
52
-
53
-
54
-
55
-
56
-
57
-
58
-
59
-
60
-
61
-
62
-
63
-
64
-
65
-
66
-
67
-
68
-
69
-
70
-
71
-
72
-
73
-
74
-
75
-
76
-
77
-
78
-
79
-
80
-
81
-
82
-
83
-
84
-
85
-
86
-
87
-
88
-
89
-
90
-
91
-
92
-
93
-
94
-
95
-
96
-
97
-
98
-
99
-
 100
100 -
 101
101 -
 102
102 -
 103
103 -
 104
104 -
 105
105 -
 106
106 -
 107
107 -
 108
108 -
 109
109 -
 110
110 -
111
-
112
-
113
-
114
-
115
-
116
-
117
-
118
-
119
-
120
-
121
-
122
-
123
-
124
-
125
-
126
-
127
-
128
-
129
-
130
-
131
-
132
-
133
-
134
-
135
-
136
-
137
-
138
-
139
-
140
-
141
-
142
-
143
-
144
-
145
-
146
-
147
-
148
-
149
-
150
-
151
-
152
-
153
-
154
-
155
-
156
-
157
-
158
-
159
-
160
-
161
-
162
-
163
-
164
-
165
-
166
-
167
-
168
-
169
-
170
-
171
-
172
-
173
-
174
-
175
-
176
-
177
-
178
-
179
-
180
-
181
-
182
-
183
-
184
-
185
-
186
-
187
-
188
-
189
-
190
-
191
-
192
-
193
-
194
-
195
-
196
-
197
-
198
-
199
-
200
-
201
-
202
-
203
-
204
-
205
-
206
-
207
-
208
-
209
-
210
-
211
 |
 |