Oki B930dn User Guide (English) - Page 56
Using the Hole Puncher, Emptying the Punch Waste Basket, UNCHER
 |
View all Oki B930dn manuals
Add to My Manuals
Save this manual to your list of manuals |
Page 56 highlights
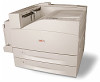
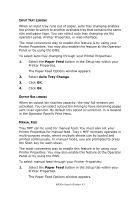
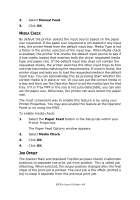
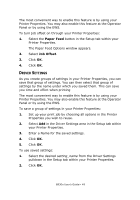
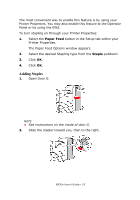
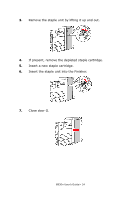
USING THE HOLE PUNCHER The optional Finisher contains the Hole Puncher. When installed, a 3-hole or 2/4-hole puncher is available. European finishers have the 2/4 hole punch while American finishers have a 3 hole punch. When hole punching is installed, it must be enabled to punch holes. When the printer detects that the punch waste box is full, a warning appears on the Operator Panel. Printing will continue, but punching will not. The most convenient way to enable this feature is by using your Printer Properties. You may also enable this feature at the Operator Panel or by using the EWS. To turn hole punching on through your Printer Properties: 1. Select the Paper Feed button in the Setup tab within your Printer Properties. The Paper Feed Options window appears. 2. Select the desired Hole Punch type from the Hole Punch pulldown. 3. Click OK. 4. Click OK. EMPTYING THE PUNCH WASTE BASKET See "Jam Area Locations" on page 140 for a decsription of door locations. 1. Open Door G. 2. Remove the Punch Waste Box and empty the contents. B930n User's Guide> 50
-
 1
1 -
2
-
3
-
4
-
5
-
6
-
7
-
8
-
9
-
10
-
11
-
12
-
13
-
14
-
15
-
16
-
17
-
18
-
19
-
20
-
21
-
22
-
23
-
24
-
25
-
26
-
27
-
28
-
29
-
30
-
31
-
32
-
33
-
34
-
35
-
36
-
37
-
38
-
39
-
40
-
41
-
42
-
43
-
44
-
45
-
46
-
47
-
48
-
49
-
50
-
 51
51 -
 52
52 -
 53
53 -
 54
54 -
 55
55 -
 56
56 -
 57
57 -
 58
58 -
 59
59 -
 60
60 -
 61
61 -
62
-
63
-
64
-
65
-
66
-
67
-
68
-
69
-
70
-
71
-
72
-
73
-
74
-
75
-
76
-
77
-
78
-
79
-
80
-
81
-
82
-
83
-
84
-
85
-
86
-
87
-
88
-
89
-
90
-
91
-
92
-
93
-
94
-
95
-
96
-
97
-
98
-
99
-
100
-
101
-
102
-
103
-
104
-
105
-
106
-
107
-
108
-
109
-
110
-
111
-
112
-
113
-
114
-
115
-
116
-
117
-
118
-
119
-
120
-
121
-
122
-
123
-
124
-
125
-
126
-
127
-
128
-
129
-
130
-
131
-
132
-
133
-
134
-
135
-
136
-
137
-
138
-
139
-
140
-
141
-
142
-
143
-
144
-
145
-
146
-
147
-
148
-
149
-
150
-
151
-
152
-
153
-
154
-
155
-
156
-
157
-
158
-
159
-
160
-
161
-
162
-
163
-
164
-
165
-
166
-
167
-
168
-
169
-
170
-
171
-
172
-
173
-
174
-
175
-
176
-
177
-
178
-
179
-
180
-
181
-
182
-
183
-
184
-
185
-
186
-
187
-
188
-
189
-
190
-
191
-
192
-
193
-
194
-
195
-
196
-
197
-
198
-
199
-
200
-
201
-
202
-
203
-
204
-
205
-
206
-
207
-
208
-
209
-
210
-
211
 |
 |