Oki B930dn User Guide (English) - Page 72
Job Accounting, Print, Properties
 |
View all Oki B930dn manuals
Add to My Manuals
Save this manual to your list of manuals |
Page 72 highlights
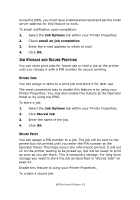
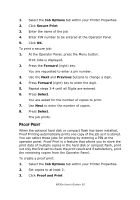
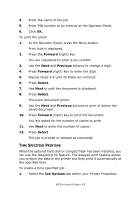
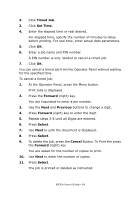
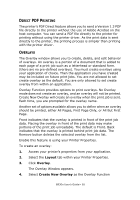
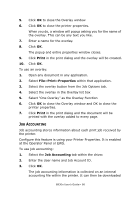
5. Click OK to close the Overlay window 6. Click OK to close the printer properties. When you do, a window will popup asking you for the name of the overlay. This can be any text you like. 7. Enter a name for the overlay. 8. Click OK. The popup and entire properties window closes. 9. Click Print in the print dialog and the overlay will be created. 10. Click OK. To use an overlay: 1. Open any document in any application. 2. Select File>Print>Properties within that application. 3. Select the overlay button from the Job Options tab. 4. Select the overlay in the Overlay list box 5. Select "One Overlay" as the Overlay Function 6. Click OK to close the Overlay window and OK to close the printer properties. 7. Click Print in the print dialog and the document will be printed with the overlay added to every page. JOB ACCOUNTING Job accounting stores information about each print job received by the printer. Configure this feature is using your Printer Properties. It is enabled at the Operator Panel or EWS. To use job accounting: 1. Select the Job Accounting tab within the driver. 2. Enter the User name and Job Account ID. 3. Click OK. The job accounting information is collected on an internal accounting file within the printer. It can then be downloaded B930n User's Guide> 66
-
 1
1 -
2
-
3
-
4
-
5
-
6
-
7
-
8
-
9
-
10
-
11
-
12
-
13
-
14
-
15
-
16
-
17
-
18
-
19
-
20
-
21
-
22
-
23
-
24
-
25
-
26
-
27
-
28
-
29
-
30
-
31
-
32
-
33
-
34
-
35
-
36
-
37
-
38
-
39
-
40
-
41
-
42
-
43
-
44
-
45
-
46
-
47
-
48
-
49
-
50
-
51
-
52
-
53
-
54
-
55
-
56
-
57
-
58
-
59
-
60
-
61
-
62
-
63
-
64
-
65
-
66
-
 67
67 -
 68
68 -
 69
69 -
 70
70 -
 71
71 -
 72
72 -
 73
73 -
 74
74 -
 75
75 -
 76
76 -
 77
77 -
78
-
79
-
80
-
81
-
82
-
83
-
84
-
85
-
86
-
87
-
88
-
89
-
90
-
91
-
92
-
93
-
94
-
95
-
96
-
97
-
98
-
99
-
100
-
101
-
102
-
103
-
104
-
105
-
106
-
107
-
108
-
109
-
110
-
111
-
112
-
113
-
114
-
115
-
116
-
117
-
118
-
119
-
120
-
121
-
122
-
123
-
124
-
125
-
126
-
127
-
128
-
129
-
130
-
131
-
132
-
133
-
134
-
135
-
136
-
137
-
138
-
139
-
140
-
141
-
142
-
143
-
144
-
145
-
146
-
147
-
148
-
149
-
150
-
151
-
152
-
153
-
154
-
155
-
156
-
157
-
158
-
159
-
160
-
161
-
162
-
163
-
164
-
165
-
166
-
167
-
168
-
169
-
170
-
171
-
172
-
173
-
174
-
175
-
176
-
177
-
178
-
179
-
180
-
181
-
182
-
183
-
184
-
185
-
186
-
187
-
188
-
189
-
190
-
191
-
192
-
193
-
194
-
195
-
196
-
197
-
198
-
199
-
200
-
201
-
202
-
203
-
204
-
205
-
206
-
207
-
208
-
209
-
210
-
211
 |
 |