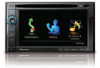
Pioneer AVIC-X930BT Owner's Manual
Pioneer AVIC-X930BT Manual
 |
UPC - 884938127097
View all Pioneer AVIC-X930BT manuals
Add to My Manuals
Save this manual to your list of manuals |
Pioneer AVIC-X930BT manual content summary:
- Pioneer AVIC-X930BT | Owner's Manual - Page 1
Operation Manual MULTIMEDIA AV NAVIGATION RECEIVER AVIC-Z130BT AVIC-X930BT AVIC-X9310BT Notice to all users: This software requires that the navigation system is properly connected to your vehicle's parking brake and depending on your vehicle, additional installation may be required. For more - Pioneer AVIC-X930BT | Owner's Manual - Page 2
overview 9 - How to use this manual 9 - Conventions used in this manual 9 - Terms used in this manual 9 Notice regarding video viewing 10 Notice regarding DVD-Video viewing 10 Notice regarding MP3 file usage 10 iPod compatibility 10 Map coverage 11 Protecting the LCD panel and screen 11 Notes on - Pioneer AVIC-X930BT | Owner's Manual - Page 3
Setting an alternative route to avoid traffic congestion 53 - Checking for traffic congestion automatically 54 - Checking traffic information manually 54 Selecting traffic information to display 55 Selecting preferred RDS-TMC service provider manually 55 Registering and connecting a Bluetooth device - Pioneer AVIC-X930BT | Owner's Manual - Page 4
Contents - Pairing from your Bluetooth devices 57 - Searching for a specified Bluetooth device 58 - Deleting a registered device 59 Connecting a registered Bluetooth device manually 59 - Setting for priority connecting 60 Using hands-free phoning Displaying the phone menu 61 Making a phone call 61 - Pioneer AVIC-X930BT | Owner's Manual - Page 5
functions 104 DVD-Video or DivX setup Displaying DVD/DivX® Setup menu 105 Setting the top-priority languages 105 Setting the angle icon display 105 Setting the aspect ratio 106 Setting the parental lock 106 - Setting the code number and level 106 Setting the auto play 107 Setting the subtitle - Pioneer AVIC-X930BT | Owner's Manual - Page 6
touch panel keys 129 Functions coupled with Aha Radio and the navigation system 130 - Displaying POIs obtained with Aha Radio 130 Using the Bluetooth audio player Starting procedure 131 Reading the screen 131 Using the touch panel keys 133 Operating by hardware buttons 133 Using advanced functions - Pioneer AVIC-X930BT | Owner's Manual - Page 7
information 159 Displaying POI on the map 159 - Displaying preinstalled POIs on the map 159 - Displaying the customized POIs 160 Changing the view mode 161 Setting the map color change between day and night 161 Changing the road color 161 Changing the setting of navigation interruption screen - Pioneer AVIC-X930BT | Owner's Manual - Page 8
208 - Compatibility 208 - Media compatibility chart 211 Bluetooth 215 About the SAT RADIO READY Logo 215 HD Radio™ Technology 216 SD and SDHC logo 216 WMA/WMV 216 DivX 216 AAC 217 Detailed information regarding connected iPod devices 217 - iPod and iPhone 217 - iTunes 217 Using App-based Connected - Pioneer AVIC-X930BT | Owner's Manual - Page 9
available and can be connected to this navigation unit will be referred to as the "Rear display". "Video image" "Video image" in this manual indicates moving images of DVD-Video, DivX®, iPod, and any equipment that is connected to this system with an RCA cable, such as general-purpose AV equipment - Pioneer AVIC-X930BT | Owner's Manual - Page 10
In this manual, iPod and iPhone will be re- ferred to as iPod. p When you use this navigation system with a Pioneer USB interface cable for iPod (CDIU51V) (sold separately), you can control an iPod compatible with this navigation system. p Operation methods may vary depending on the iPod models and - Pioneer AVIC-X930BT | Owner's Manual - Page 11
map coverage of this navigation system resulting high temperatures. p When using a cellular phone, keep the antenna of the cellular phone away from the LCD screen to prevent Be sure to read Setting items to be deleted first. = For details, refer to Setting items to be deleted on page 191. Data - Pioneer AVIC-X930BT | Owner's Manual - Page 12
Chapter 02 Basic operation Checking part names and functions This chapter gives information about the names of the parts and the main features using the buttons. 1 2 34 5 67 AVIC-Z130BT (with the LCD panel closed) 8 9 AVIC-Z130BT (with the LCD panel open) 12 En - Pioneer AVIC-X930BT | Owner's Manual - Page 13
! Press and hold to turn off the screen display. 4 MODE button ! Press to switch between the map screen and the AV operation screen. ! Press to display the map screen while the navigation function screen is displayed. ! Press and hold to display the "Picture Adjustment" screen. = For details, refer - Pioneer AVIC-X930BT | Owner's Manual - Page 14
product from theft p This function is available for AVIC-X930BT and AVIC-X9310BT. The front panel can be detached from the navigation system to discourage theft, as described below. 1 Press and hold the Detach button, and slide it down. When you release your finger, the bottom of the front panel - Pioneer AVIC-X930BT | Owner's Manual - Page 15
close the LCD panel by force. This may cause malfunction. ! Do not operate this navigation system until the LCD panel completely opens or closes. If this navigation system is operated while the LCD panel is opening or closing, the LCD panel may stop at that angle for safety. ! Do not place a glass - Pioneer AVIC-X930BT | Owner's Manual - Page 16
than a disc into the disc-loading slot. Ejecting a disc (for AVIC-X930BT and AVIC-X9310BT) 1 Press the h button. The touch panel keys for ejecting the this manual. ! If data loss or corruption occurs on the storage device for any reason, it is usually not possible to recover the data. Pioneer - Pioneer AVIC-X930BT | Owner's Manual - Page 17
Eject SD]. Chapter 02 Basic operation The LCD panel opens, and the SD card until it clicks and completely locks. The LCD panel opens. 3 Press the middle of map data, such as customized POI data, is stored on the SD memory card, the navigation system restarts. Ejecting an SD memory card (for AVIC - Pioneer AVIC-X930BT | Owner's Manual - Page 18
gently until it clicks. 4 Pull the SD memory card out straight. p If data related to map data, such as customized POI data, is stored on the SD memory card, the navigation system restarts. 18 En When the data related to map data is stored p This description is for AVIC-X930BT and AVIC-X9310BT. - Pioneer AVIC-X930BT | Owner's Manual - Page 19
. USB and mini-jack connector Basic operation The navigation system restarts, and a message prompting you to remove the SD memory card appears. USB storage device p Compatibility with all USB storage devices is not guaranteed. This navigation system may not achieve optimum performance with - Pioneer AVIC-X930BT | Owner's Manual - Page 20
02 Basic operation Connecting your iPod Using the USB interface cable for iPod enables you to connect your iPod to the navigation system. p A USB interface cable for iPod (CD-IU51V) (sold separately) is required for connection. p For details about iPod compatibility with this navigation system - Pioneer AVIC-X930BT | Owner's Manual - Page 21
no route, the disclaimer appears after the navigation system reboots. Read the disclaimer carefully, checking its details, and then touch [OK] if you agree to the conditions. p If the anti-theft function is activated, you must enter your password. Read the disclaimer carefully, checking its details - Pioneer AVIC-X930BT | Owner's Manual - Page 22
Chapter 03 How to use the navigation menu screens Screen switching overview 2 3 4 1 1 5 6 22 En - Pioneer AVIC-X930BT | Owner's Manual - Page 23
button repeatedly to display the Shortcut Menu screen. p When you use the navigation system for the first time or no items are set on shortcut, operation screen This is the screen that normally appears when you play the AV source. 5 Settings Menu You can access the screen to customize settings. 6 Map - Pioneer AVIC-X930BT | Owner's Manual - Page 24
1 Screen title The screen title appears. 2 Text box Displays the characters that are entered. If there is no text in the box, an informative guide with text appears. 3 Keyboard Touch the keys to enter the characters. 4 The previous screen returns. 5 Keys Switches the on-screen keyboard layout. 6 Sym - Pioneer AVIC-X930BT | Owner's Manual - Page 25
How to use the map How to read the map screen This example shows an example of a 2D map screen. 1 g f 2 3 e d 4 c 5 b 6 7 8 p Information with an asterisk (*) appears only when the route is set. p Depending on the conditions and settings, some items may not be displayed. 1 Name of the - Pioneer AVIC-X930BT | Owner's Manual - Page 26
. ! When "Heading up" is selected, is displayed. p The red arrow indicates north. = For details, refer to Switching the map orientation on page 28. d Current route* The route currently set is highlighted in color on the map. If a waypoint is set on the route, the route after the next waypoint - Pioneer AVIC-X930BT | Owner's Manual - Page 27
instructions Routable roads (the route displayed and highlighted in violet) have only basic data and can only be used to plot a navigable route. Pioneer Navigation will only display a navigable route on the map (only the arrival guidance for the destination or a waypoint is available). Please review - Pioneer AVIC-X930BT | Owner's Manual - Page 28
current position. p Pressing MODE button returns the map to the current position. 3 Touch or to switch the vehicle's direction. Each time you touch the key changes the setting. p If you do not operate the function for a few seconds, the touch panel keys for map display control disappear. Viewing - Pioneer AVIC-X930BT | Owner's Manual - Page 29
= For details, refer to Displaying POI on the map on page 159. = For details, refer to How to read traffic information on the map on page 52. p Touching [Call] enables you to call the position if a telephone number is available. (Pairing with cellular phone featuring Bluetooth wireless technology is - Pioneer AVIC-X930BT | Owner's Manual - Page 30
on the right side of the screen. ! 3D View: Displays a map with an antenna view (3D map). p This mode is available when the rear view camera setting is set to "On". = For details, refer to Setting for rear view camera on page 166. ! Eco Graph: Displays a graph for eco-driving on the left side of - Pioneer AVIC-X930BT | Owner's Manual - Page 31
How to use the map = For details, refer to Checking the ecofriendly driving status on the next page. Chapter 04 How to use the map En 31 - Pioneer AVIC-X930BT | Owner's Manual - Page 32
score, and the gray gauge indicates the best score to date. The "Eco Score" is updated every 5 minutes. p This is not displayed when "Eco Score" is set to "Off" or when no route is set. 2 Best Score Displays the best score to date. p This is not displayed when "Eco Score" is set to "Off" or when - Pioneer AVIC-X930BT | Owner's Manual - Page 33
be available. = For details, refer to Troubleshooting on page 193. p The display settings can be changed. = For details, refer to Changing the eco-function setting on page 155. p This is not displayed when "Eco Drive Level" is set to "Off". = For details of the operation, refer to Changing the eco - Pioneer AVIC-X930BT | Owner's Manual - Page 34
, and then shows the route on the map. j 7 Check and decide the route. = For details, refer to Setting a route to your destination on page 42. j 8 Your navigation system sets the route to your destination, and the map of your surroundings appears. j 9 Release the parking brake, drive in accordance - Pioneer AVIC-X930BT | Owner's Manual - Page 35
search result screen. 1 Display the "Destination Menu" screen. = For details of the operations, refer to Screen switching overview on page 22. country. If the destination is in another country, change the country setting. p Once the country has been selected, you only have to map screen. En 35 - Pioneer AVIC-X930BT | Owner's Manual - Page 36
selecting a location 8 Enter the street name and then touch [OK]. 1 Display the "Address Search" screen. 2 Touch [House#]. The "Enter House Number number range. The searched location appears on the map screen. = For the subsequent operations, refer to Setting a route to your destination on page 42. - Pioneer AVIC-X930BT | Owner's Manual - Page 37
Display the "Destination Menu" screen. = For details of the operations, refer to Screen switching overview on page 22. 2 Touch [POI]. 3 Touch the desired category. Preset categories Setting location appears on the map screen. = For the subsequent operations, refer to Setting a route to your - Pioneer AVIC-X930BT | Owner's Manual - Page 38
you want. The searched location appears on the map screen. = For the subsequent operations, refer to Setting a route to your destination on page 42. when the route is set. 1 Display the "Destination Menu" screen. = For details of the operations, refer to Screen switching overview on page 22. - Pioneer AVIC-X930BT | Owner's Manual - Page 39
of the operations, refer to Screen switching overview on page 22. 2 Touch [POI]. The "POI Search" screen appears. 3 Touch [Around City]. 4 Enter the city name and then touch [OK]. The "Select City" screen appears. # If you change the region to search, touch the state code key and display the "State - Pioneer AVIC-X930BT | Owner's Manual - Page 40
the oldest one. 1 Display the "Destination Menu" screen. = For details of the operations, refer to Screen switching overview on page 22. 2 Touch [History]. 3 Touch the entry you want. The searched location appears on the map screen. = For the subsequent operations, refer to Setting a route to your - Pioneer AVIC-X930BT | Owner's Manual - Page 41
. To enter N 5°1'2.5" for example, touch [North], [0], [5], [0], [1], [0], [2], and [5]. 5 Touch [OK]. The searched location appears on the map screen. = For the subsequent operations, refer to Setting a route to your destination on the next page. Chapter 06 Searching for and selecting a location - Pioneer AVIC-X930BT | Owner's Manual - Page 42
during route calculation, the calculation is canceled and the map screen appears. # If you touch [Scroll], the map display is changed to the scroll mode. In the scroll mode, you can display the location more precisely to register it, or make settings. # If you touch [Waypoint], the location is added - Pioneer AVIC-X930BT | Owner's Manual - Page 43
screen appears. 3 Touch [Route Overview]. 1 Display the "Route Overview" screen. = For details, refer to Displaying the route overview on this page. 2 Touch users can operate Settings marked with an asterisk (*) show that these are default or factory settings. Route Condition This setting controls - Pioneer AVIC-X930BT | Owner's Manual - Page 44
not set correctly, the navigation system cannot consider traffic regulations correctly. Set the time difference correctly. = For details, refer to Setting can check the route details. 1 Display the "Route Overview" screen. = For details, refer to Displaying the route overview on the previous page - Pioneer AVIC-X930BT | Owner's Manual - Page 45
locations. 5 Touch [OK]. Adding a waypoint Up to 5 waypoints can be set, and waypoints and final destination can be sorted automatically or manually. 1 Display the "Route Overview" screen. = For details, refer to Displaying the route overview on page 43. 2 Touch [Waypoints]. The "Waypoints List - Pioneer AVIC-X930BT | Owner's Manual - Page 46
appears. 3 Touch [Sort]. The "Sort Waypoints" screen appears. 4 Touch the waypoint or destination. 1 Display the "Destination Menu" screen. = For details of the operations, refer to Screen switching overview on page 22. 2 Touch [Cancel Route]. A message confirming the cancellation of the current - Pioneer AVIC-X930BT | Owner's Manual - Page 47
Touch and drag the screen to scroll the map to the position that you want to register 1 Display the "Destination Menu" screen. = For details of the operations, refer to Screen switching overview a location by scroll mode p This function is available when "Registration" is set in the "Quick Access - Pioneer AVIC-X930BT | Owner's Manual - Page 48
location by scrolling the map. 5 Touch [OK]. The registration is complete. Editing your home When you have already registered your home, you can edit the information of your home. 1 Display the "Destination Menu" screen. = For details of the operations, refer to Screen switching overview on page 22 - Pioneer AVIC-X930BT | Owner's Manual - Page 49
to an SD memory card for editing by using the utility program AVIC FEEDS which is available separately, on your PC. p If there operation, refer to Inserting and ejecting an SD memory card on page 16. 2 Display the "Destination Menu" screen. = For details of the operations, refer to Screen switching - Pioneer AVIC-X930BT | Owner's Manual - Page 50
the destination history from the list Items in "History" can be deleted. All entries in "History" can be deleted at once. 1 Display the "Destination Menu" screen. = For details of the operations, refer to Screen switching overview on page 22. 2 Touch [History]. The "Destination History List" screen - Pioneer AVIC-X930BT | Owner's Manual - Page 51
on AVIC-X930BT or AVICX9310BT will require that a separately sold Traffic tuner (ND-TMC10) be connected. You can check real-time traffic information transmitted by the Traffic Management Channel (TMC) of the receive data services (RDS) on the screen. Such traffic information is updated periodically - Pioneer AVIC-X930BT | Owner's Manual - Page 52
on screen in a list. 1 Display the "Destination Menu" screen. = For details of the operations, refer to Screen switching overview on page 22. 2 Touch [Traffic]. The "Traffic Menu" screen appears. 3 Touch [Traffic Flow]. A list with traffic flow information that has been received is shown. The list - Pioneer AVIC-X930BT | Owner's Manual - Page 53
[Refresh] while new traffic infor- mation is received, current information is chan- ged and old information is removed. The traffic information list is updated to reflect the new si- tuation. # Touch . The traffic event information displayed on the map is as follows. ! Yellow: average speed - Pioneer AVIC-X930BT | Owner's Manual - Page 54
the recommended route is displayed, the screen switches to the current route display. 2 Touch [OK]. The displayed route is set. p When no selection is made, the screen returns to the previous screen. Checking traffic information manually Touching the notification icon on the map screen allows you - Pioneer AVIC-X930BT | Owner's Manual - Page 55
among the preferred RDS-TMC service providers. If you want to set another preferred RDS-TMC service provider, you can manually select one from available RDS-TMC service providers. 1 Display the "Destination Menu" screen. = For details of the operations, refer to Screen switching overview on page 22 - Pioneer AVIC-X930BT | Owner's Manual - Page 56
technology. For details, refer to the instruction manual of your devices. 2 Display the "Settings Menu" screen. = For details of the operations, refer to Screen switching overview on page 22. 3 Touch [Bluetooth Settings]. The "Bluetooth Settings" screen appears. 4 Touch [Registration]. The "Nearby - Pioneer AVIC-X930BT | Owner's Manual - Page 57
technology. For details, refer to the instruction manual of your devices. 2 Display the "Settings Menu" screen. = For details of the operations, refer to Screen switching overview on page 22. 3 Touch [Bluetooth Settings]. The "Bluetooth Settings" screen appears. 4 Touch [Registration]. The "Nearby - Pioneer AVIC-X930BT | Owner's Manual - Page 58
technology. For details, refer to the instruction manual of your devices. 2 Display the "Settings Menu" screen. = For details of the operations, refer to Screen switching overview on page 22. 3 Touch [Bluetooth Settings]. The "Bluetooth Settings" screen appears. 4 Touch [Registration]. The "Nearby - Pioneer AVIC-X930BT | Owner's Manual - Page 59
and displays them in the list format when any devices are detected. 9 Enter the password (the default password is "1111") using the Bluetooth device. Enter the password while the message "Please follow the instructions on your mobile phone." appears. The device is registered in the navigation system - Pioneer AVIC-X930BT | Owner's Manual - Page 60
technology. For details, refer to the instruction manual of your devices. 2 Display the "Settings Menu" screen. = For details of the operations, refer to Screen switching overview on page 22. 3 Touch [Bluetooth Settings]. The "Bluetooth Settings" screen appears. 4 Touch [Connection]. The "Connection - Pioneer AVIC-X930BT | Owner's Manual - Page 61
your cellular phone to the navigation system. This section describes how to set up a Bluetooth connection and how to operate a cellular phone featuring Bluetooth technology on the navigation system. For details about the connectivity with the devices featuring Bluetooth wireless technology, refer to - Pioneer AVIC-X930BT | Owner's Manual - Page 62
book entries stored in your cellular phone to the navigation system. = For details, refer to Transferring the phone book on page 65. Searching for a contact to call on the alphabet tabs 1 Display the "Phone Menu" screen. = For details, refer to Displaying the phone menu on the previous page. 2 Touch - Pioneer AVIC-X930BT | Owner's Manual - Page 63
phone. If the number of calls exceeds 30, the oldest entry will be deleted. 1 Display the "Phone Menu" screen. = For details, refer to Displaying the phone menu on page 61. 2 Touch [Received Calls], [Dialed Calls] or [Missed Calls]. The selected call history list appears. 3 Touch an entry on the - Pioneer AVIC-X930BT | Owner's Manual - Page 64
set the system to automatically answer incoming calls. If not set to automatically answer incoming calls, you will have to answer the calls manually. service, the phone number of the received call may not be displayed. "Unknown" appears instead. 1 To answer an incoming call, touch . The operation - Pioneer AVIC-X930BT | Owner's Manual - Page 65
auto- navigation system. 1 Connect the cellular phone that has the phone book to transfer. = For details, refer to Connecting a registered Bluetooth device manually on page 59. 2 Touch [Contacts Transfer] on the "Phone Menu" screen. 3 Check that the following screen is displayed, and operate - Pioneer AVIC-X930BT | Owner's Manual - Page 66
the device name to be displayed on your cellular phone. (Default is "PIONEER NAVI".) 1 Display the "Settings Menu" screen. = For details of the operations, refer to Screen switching overview on page 22. 2 Touch [Bluetooth Settings]. The "Bluetooth Settings" screen appears. 3 Touch [Device Name - Pioneer AVIC-X930BT | Owner's Manual - Page 67
off the steering wheel. 1 Display the "Settings Menu" screen. = For details of the operations, refer to Screen switching overview on page 22. 2 Touch [Bluetooth Settings]. The "Bluetooth Settings" screen appears. 3 Touch [Auto Answer Preference]. The "Auto Answer Preference" screen appears. 4 Touch - Pioneer AVIC-X930BT | Owner's Manual - Page 68
operations, refer to Screen switching overview on page 22. 4 Touch [Bluetooth Settings]. The "Bluetooth Settings" screen appears. 5 Touch [Firmware update]. The current version is displayed. On this screen, you can select the following items: ! Contacts: Clears the registered phone book. ! Received - Pioneer AVIC-X930BT | Owner's Manual - Page 69
! Cellular phone operations vary depending on the type of cellular phone. Refer to the instruction manual that came with your cellular phone for detailed instructions. ! With cellular phones, phone book transfer may not work even though your phone is paired with the navigation system. In that - Pioneer AVIC-X930BT | Owner's Manual - Page 70
device. ! HD Radio (HD Radio tuner) (*2) ! iPod ! Pandora ! Aha Radio ! Bluetooth audio ! XM Tuner ! SIRIUS Tuner ! AV input 1 (AV1) ! AV input 2 (AV2) ! External unit 1 (EXT1) ! External unit 2 (EXT2) p (*1) A source available only on AVIC- Z130BT. p (*2) Sources available on AVIC-X930BT or AVIC - Pioneer AVIC-X930BT | Owner's Manual - Page 71
list that you want. 2 Touch the key on the right edge of the screen. The AV operation screen returns. Selecting an item 1 Scroll the list by dragging items up or down to display the item you want to select. p Flicking a list item enables you to quickly scroll through the list. To stop - Pioneer AVIC-X930BT | Owner's Manual - Page 72
is available for AVIC-X930BT and AVIC-X9310BT. You can listen to the radio by using the navigation system. This section describes operations for radio (FM). Starting procedure 1 Display the AV operation screen. = For details of the operations, refer to Displaying the AV operation screen on page - Pioneer AVIC-X930BT | Owner's Manual - Page 73
refer to Using advanced functions on the next page. 5 Switches between the AV operation screen and the preset list display You can switch the screen display according to your preference. = For details of the operation, refer to Switching between the AV operation screen and the list screen on page 70 - Pioneer AVIC-X930BT | Owner's Manual - Page 74
radio (FM) 1 Select a frequency that you want to store in memory. 2 Display the preset channel list. = For details, refer to Switches between the AV operation screen and the preset list display operations, refer to Op- erating list screens (e.g. iPod list screen) on page 70. The selected radio - Pioneer AVIC-X930BT | Owner's Manual - Page 75
is turned off. 4 Touch [cPrev] or [Nextd] to set the sensitivity. There are four levels of sensitivity for FM. Level: 1 - 2 - 3 - 4 p The level "4" setting allows reception of only the strongest stations, while lower settings let you receive weaker stations. Using the radio (FM) Chapter 14 En 75 - Pioneer AVIC-X930BT | Owner's Manual - Page 76
is available for AVIC-X930BT and AVIC-X9310BT. You can listen to the radio using this navigation system. This section describes operations for radio (AM). Starting procedure 1 Display the AV operation screen. = For details of the operations, refer to Displaying the AV operation screen on page - Pioneer AVIC-X930BT | Owner's Manual - Page 77
refer to Using advanced functions on the next page. 5 Switches between the AV operation screen and the preset list display You can switch the screen display according to your preference. = For details of the operation, refer to Switching between the AV operation screen and the list screen on page 70 - Pioneer AVIC-X930BT | Owner's Manual - Page 78
Chapter 15 Using the radio (AM) 2 Display the preset channel list. = For details, refer to Switches between the AV operation screen and the preset list display on the previous page. 3 Keep touching a preset tuning key [P1] to [P6]. Preset list display 1 2 1 Stores the strongest broadcast - Pioneer AVIC-X930BT | Owner's Manual - Page 79
tuning is turned off. 4 Touch [cPrev] or [Nextd] to set the sensitivity. There are two levels of sensitivity for AM. Level: 1 - 2 p The level "2" setting allows reception of only the strongest stations, while lower settings let you receive weaker stations. Using the radio (AM) Chapter 15 En 79 - Pioneer AVIC-X930BT | Owner's Manual - Page 80
HD Radio tuner's operation manual. p AVIC-Z130BT shows "Tuner" and AVICX930BT or AVIC-X9310BT shows "HD Radio" as the source icon. This chapter describes operation procedures for AVIC-Z130BT. HD Radio broadcasting HD Radio broadcasting is high quality audio and data services. HD Radio broadcasting - Pioneer AVIC-X930BT | Owner's Manual - Page 81
to Switching the recep- tion mode on page 85. 7 Song info reception indicator* Shows the reception status of song information. Indicator Meaning Appears when the navigation system receives song information and can store it. The icon is displayed on the operation screen of the HD Radio receiver - Pioneer AVIC-X930BT | Owner's Manual - Page 82
16 HD Radio™ reception Using the touch panel keys 1 8 7 2 65 4 1 Performs manual tuning To tune manually, touch [o] or [p] briefly. The frequencies move up or down one step at a time. Performs seek tuning To perform seek tuning, touch and hold [o] or [p] for about one second and then release - Pioneer AVIC-X930BT | Owner's Manual - Page 83
Desired information can be displayed. % Touch [Disp]. AVIC-Z130BT Touching [Disp] repeatedly switches between the following settings: Channel name - Artist name - Song title - Program type AVIC-X930BT, AVIC-X9310BT The contents and order of the setting display depend on the HD Radio tuner. En 83 - Pioneer AVIC-X930BT | Owner's Manual - Page 84
been tuned in to an HD Radio station, default display is changed into station name instead of frequency. Scrolling the detailed information You can turn the detailed information scroll mode on and off. % Touch and hold [Disp]. Storing song information to an iPod (iTunes Tagging) p This function is - Pioneer AVIC-X930BT | Owner's Manual - Page 85
16 HD Radio™ reception 1 2 3 4 1 Stores the strongest broadcast frequencies 2 Switches the seek mode 3 Tunes in strong signals 4 Switches the reception mode = For details of each function, refer to sec- tions below with the relative titles. Storing the strongest broadcast frequencies BSM (best - Pioneer AVIC-X930BT | Owner's Manual - Page 86
16 HD Radio™ reception 2 Touch [Blending] to switch the reception mode. ! Analog: Receives analog broadcasting only. ! D/A Auto: Automatically switches to the analog broadcast of the same frequency level as the digital broadcast. p If you select "Analog" on this setting while [Seek] is set to "HD - Pioneer AVIC-X930BT | Owner's Manual - Page 87
navigation system. This section describes how. Starting procedure 1 Display the AV operation screen. = For details of the operations, refer to Displaying the AV operation Plays all tracks in the current disc in random order. Setting a repeat play range Indicator Meaning Repeats the current disc. - Pioneer AVIC-X930BT | Owner's Manual - Page 88
of the operation, refer to Plays tracks in random order on the next page. 3 Sets a repeat play displayed if there is no corresponding information. = For details, refer to Operating list screens (e.g. iPod list screen) on page 70. 9 Switches the media file type played = For details, refer to Switches - Pioneer AVIC-X930BT | Owner's Manual - Page 89
Playing audio CDs Operating by hardware buttons Pressing the TRK button You can p "MODE 2" has a stronger effect than "MODE 1" and is more effective when playing back highly compressed audio data. Playing audio CDs 1 Changes the repeat range Each touch of [Repeat] changes the setting as follows - Pioneer AVIC-X930BT | Owner's Manual - Page 90
drive of the navigation system. This section describes these operations. p In the following description, the MP3, WMA, AAC files are collectively referred to as "Compressed audio file". Starting procedure 1 Display the AV operation screen. = For details of the operations, refer to Displaying the AV - Pioneer AVIC-X930BT | Owner's Manual - Page 91
Playing music files on ROM p is displayed if there is no corresponding information. 4 Current time 5 File information ! File number indicator ! File name indicator ! File type indicator Shows the type of audio files. Chapter 18 Playing music files on ROM En 91 - Pioneer AVIC-X930BT | Owner's Manual - Page 92
touching only one key. = For details of the operation, refer to Scans folders and files on the next files in random order on the next page. 3 Sets a repeat play range The repeat play range can [f] switches between playback and pause. 8 Selects a file from the list Touching the key displays the - Pioneer AVIC-X930BT | Owner's Manual - Page 93
Operating list screens (e.g. iPod list screen) on page 70. Touching displays the content of the upper folder (parent folder). If the uppermost folder is listed, cannot be used. 9 Switches turn the random play on when the repeat play range is set to "Track", the repeat play range changes to "Folder" - Pioneer AVIC-X930BT | Owner's Manual - Page 94
] changes the setting as follows: ! MODE 1: Activates "Sound Retriever" function. ! MODE 2: Activates "Sound Retriever" function. ! Off: Deactivates "Sound Retriever" function. p "MODE 2" has a stronger effect than "MODE 1" and is more effective when playing back highly compressed audio data. 94 - Pioneer AVIC-X930BT | Owner's Manual - Page 95
-Video using the built-in drive of the navigation system. This section describes operations for playing a DVD-Video. Starting procedure 1 Display the AV operation screen. = For details of the operations, refer to Displaying the AV operation screen on page 70. 2 Insert the disc you want to play into - Pioneer AVIC-X930BT | Owner's Manual - Page 96
] changes the indication on the information plate as follows: Disc information display - Repeat range and L/R select display hij 4 Switches to the next page of touch panel keys 5 Displays the DVD menu keypad = For details, refer to Using DVD menu by touch panel keys on page 98. 6 Playback and Pause - Pioneer AVIC-X930BT | Owner's Manual - Page 97
) Each touch of [Angle] switches between viewing angles. p During playback of a scene shot from multiple angles, the angle icon is displayed. Turn the angle icon display on or off using the "DVD/DivX® Setup" menu. = For details, refer to Setting the angle icon display on page 105. Resuming playback - Pioneer AVIC-X930BT | Owner's Manual - Page 98
screen directly. p This function can be used when the key is displayed on the lower right corner of the LCD screen. p This function may not work properly with some DVD disc content. In that case, use touch panel keys to operate the DVD menu. p If you touch the screen while is dis- played - Pioneer AVIC-X930BT | Owner's Manual - Page 99
slow motion playback is not possible. Operating by hardware buttons Pressing the TRK button repeat range Each touch of [Repeat] changes the setting as follows: ! Disc: Plays throughout the current disc Selects audio output When playing DVDs recorded with LPCM audio, you can switch the audio output. - Pioneer AVIC-X930BT | Owner's Manual - Page 100
Each touch of [L/R Select] changes the settings as follows: ! L+R: Left and right ! L: Left ! R: Right ! Mix: Mixing left and right p This function is not available when disc playback has been stopped. 3 DVD setup adjustments = For details, refer to Displaying DVD/ DivX® Setup menu on page 105. 100 - Pioneer AVIC-X930BT | Owner's Manual - Page 101
You can play a DivX disc using the built-in drive of the navigation system. This section describes those operations. Starting procedure 1 Display the AV operation screen. = For details of the operations, refer to Displaying the AV operation screen on page 70. 2 Insert the disc you want to play into - Pioneer AVIC-X930BT | Owner's Manual - Page 102
panel keys Playback screen (page 1) 1 a 9 8 2 3 4 5 6 7 Playback screen (page 2) f e d p With some discs, the icon 9 may be displayed, meaning that the operation is invalid. 1 Switches the media file type played When playing a disc containing a mixture of various media file types, you can - Pioneer AVIC-X930BT | Owner's Manual - Page 103
be unclear during frame-by-frame playback. = For details, refer to Operating list screens (e.g. iPod list screen) on page 70. The contents of the folder in which the currently playing file is located are displayed. Touching displays the content of the upper folder (parent folder). If the uppermost - Pioneer AVIC-X930BT | Owner's Manual - Page 104
touch and hold [Clear]. Operating by hardware buttons Pressing the TRK touch of [Repeat] changes the setting as follows: ! Disc: audio files and audio data (CD-DA), repeat play is performed within DivX videos even if "Disc" is selected. 2 DVD setup adjustments = For details, refer to Displaying DVD - Pioneer AVIC-X930BT | Owner's Manual - Page 105
in scenes where the angle can be switched. 1 Display the "DVD/DivX® Setup" screen. = For details, refer to Displaying DVD/DivX® Setup menu on this page. 2 Touch [Multi Angle]. Each time you touch the key changes the setting. ! On (default): Displays the angle icon in scenes where the angle can - Pioneer AVIC-X930BT | Owner's Manual - Page 106
number and level When you first use this function, register your code number. If you do not register a code number, parental lock will not operate. 1 Display the "DVD/DivX® Setup" screen. = For details, refer to Displaying DVD/DivX® Setup menu on the previous page. 2 Touch [Parental Level]. 3 Touch - Pioneer AVIC-X930BT | Owner's Manual - Page 107
fully operable, turn this function off and start playback. 1 Display the "DVD/DivX® Setup" screen. = For details, refer to Displaying DVD/DivX® Setup menu on page 105. 2 Touch [Auto Play]. Each touch of [Auto Play] changes the settings as follows: ! Off (default): Deactivates the auto play function - Pioneer AVIC-X930BT | Owner's Manual - Page 108
or DivX setup Language code chart for DVDs Two-letter code, input code aa, 0101 ab, 0102 af, 0106 am, 0113 ar, French Western Frisian Irish Gaelic Galician Guarani Gujarati Hausa Hindi Croatian Hungarian Armenian Two-letter code, input code ia, 0901 ie, 0905 ik, 0911 in, 0914 is, 0919 it, 0920 - Pioneer AVIC-X930BT | Owner's Manual - Page 109
to as the "external storage 1 device (USB, SD)". If it indicates the USB 5 memory device only, it is referred to as the "USB storage device". Playing music files (from USB or SD) Starting procedure 1 Display the AV operation screen. = For details of the operations, refer to Displaying the AV - Pioneer AVIC-X930BT | Owner's Manual - Page 110
Chapter 22 Playing music files (from USB or SD) Setting a repeat play range Indicator Meaning Repeats all compressed audio files in the selected external storage device (USB, SD). Repeats just the current file. Repeats the current folder. 3 Current file information ! : Folder name Shows the - Pioneer AVIC-X930BT | Owner's Manual - Page 111
track titles or folder names on an external storage device (USB, SD). Tapping a folder on the list shows its content. You can play a file on the list by tapping it. = For details, refer to Operating list screens (e.g. iPod list screen) on page 70. Touching displays the content of the upper folder - Pioneer AVIC-X930BT | Owner's Manual - Page 112
Switches the operation screen Tapping this key switches between the screen to operate music files and the screen to operate video files. This touch panel key is available only when there are both audio and video files in the external storage device (USB, SD). Operating play range is set to "Track", - Pioneer AVIC-X930BT | Owner's Manual - Page 113
referred to as the "external storage device (USB, SD)". If it indicates the USB memory device only, it is referred to as the "USB storage device". Reading the screen 123 4 8 5 6 Playing video files (from USB or SD) Starting procedure 1 Display the AV operation screen. = For details of - Pioneer AVIC-X930BT | Owner's Manual - Page 114
2 3 1 Switches the operation screen Tapping this key switches between the screen to operate music files and the screen to operate video files. This touch panel key is available only when there are both audio and video files in the external storage device (USB, SD). 2 Displays the "Function" menu - Pioneer AVIC-X930BT | Owner's Manual - Page 115
to display the "USB" or "SD" screen. = For details of the operations, refer to Displaying the AV operation screen on page 70. 2 Touch the screen to display the touch of [Repeat] changes the setting as follows: ! Media: Repeats all video files in the selected external storage device (USB, SD). ! File - Pioneer AVIC-X930BT | Owner's Manual - Page 116
actions while this indicator is displayed on the video operation screen vary depending on the connected iPod. Setting a repeat play range Indicator . When a podcast is played, the podcast title is displayed (when available). ! : Album title (release date) Shows the title of the album for the song. - Pioneer AVIC-X930BT | Owner's Manual - Page 117
playing (when available). ! Play time indicator Shows the elapsed playing time within the current file. p is displayed if there is no corresponding information. p If characters recorded on the iPod are not compatible with this navigation system, they may turn into garbled characters. Using an - Pioneer AVIC-X930BT | Owner's Manual - Page 118
Chapter 24 Using an iPod (iPod) Using the touch panel keys Music 12 3 f e d c 4 b a 987 6 5 Video f e g 9 8 i 1 Sets the shuffle play for music The shuffle play setting can be changed by touching only one key. = For details, refer to Sets the shuffle play for music on page 123. 2 - Pioneer AVIC-X930BT | Owner's Manual - Page 119
Displays the genre list 6 Switches the control mode of iPod functions Touching the key lets you control the functions of an iPod connected to the navigation system from the iPod. = For details, refer to Operating the func- tions from your iPod on page 121. 7 Displays even if you release either of - Pioneer AVIC-X930BT | Owner's Manual - Page 120
navigation system can play video if an iPod with video capabilities is connected. 1 Touch [iPod] on the left edge of the screen to display the touch panel key to switch will start. 6 Touch the screen to display the touch panel keys. = For details of the operation, refer to Using the touch panel keys - Pioneer AVIC-X930BT | Owner's Manual - Page 121
start playing the first song in the selected list and display the next hierarchy. Operating the functions from your iPod You can control the navigation system via the connected iPod. When you change the screen of the navigation system to "Application Mode", sound is output from the speakers of your - Pioneer AVIC-X930BT | Owner's Manual - Page 122
name Shows the category name in the playlist. 1 1 Switches to the AV operation screen 2 Plays the playlist Tapping a key moves the playlist the navigation system to "Application Mode". = For details, refer to Operating the functions from your iPod on the previous page. 1 2 3 4 5 1 Sets repeat - Pioneer AVIC-X930BT | Owner's Manual - Page 123
on iPod, playback speed can be changed. Each touch of [Audio Book] changes the setting as follows: ! Normal: Playback in normal speed ! Faster: Playback faster than normal speed ! Slower: Playback slower than normal speed 4 Plays video in wide screen mode If the video is compatible with wide - Pioneer AVIC-X930BT | Owner's Manual - Page 124
service through the Pioneer navigation system, including, but not limited to, creating new stations, deleting stations, emailing current stations, buying songs from iTunes, viewing additional text information, logging in to Pandora, and adjusting Cell Network Audio Quality. ! Pandora Internet radio - Pioneer AVIC-X930BT | Owner's Manual - Page 125
Using Pandora® Shows the elapsed playing time within the current song. p is displayed if there is no corresponding information. 2 Current time 3 Album artwork Album art of the current song is displayed if it is available. 4 Source icon Shows which source has been selected. Using Pandora® Chapter - Pioneer AVIC-X930BT | Owner's Manual - Page 126
Operating list screens (e.g. iPod list screen) on page 70. Scroll the list by dragging items up or down to display can sort the items in the list in order of dates the items were cre- ated. 2 Thumbs Up Touching Touching [f] switches between playback and pause. Operating by hardware buttons - Pioneer AVIC-X930BT | Owner's Manual - Page 127
Aha Radio When connecting iPod with the Aha Radio installed, you can control, view, and/or hear Aha Radio content from this navigation system. You can also display POI information from the Aha Radio application on the map screen and route to these POIs. p For details concerning operations, refer - Pioneer AVIC-X930BT | Owner's Manual - Page 128
has been selected. ! Station name Shows the name of the Aha Radio station that the navigation system is currently tuned to. ! Detailed information Shows the information on the content currently being played. p is displayed if there is no corresponding information. ! Rating information Shows the - Pioneer AVIC-X930BT | Owner's Manual - Page 129
displays the list of your available Aha Radio stations. Touch the desired Aha Radio station to change Aha sources. = For details of the list operations, refer to Operating list screens (e.g. iPod opera- tions, refer to Setting a route to your destination on page 42. Touching the key "likes" - Pioneer AVIC-X930BT | Owner's Manual - Page 130
a specified location on page 28. p The POI icons on the map will not disap- pear even when the iPod is removed. The icons will disappear with the following operations: ! Turning off the ignition switch (ACC OFF) ! Initializing user data ! Updating the display of the Aha POI icons p Aha POI icons are - Pioneer AVIC-X930BT | Owner's Manual - Page 131
are a number of Bluetooth audio players available on the market, operations with your Bluetooth audio player using this navigation system vary greatly in range. Please refer to the instruction manual that came with your Bluetooth audio player as well as this manual while operating your player on - Pioneer AVIC-X930BT | Owner's Manual - Page 132
or resumes playing: ! You connect the Bluetooth audio player compatible with AVRCP1.3, and operate the player to start playing. ! You select another file when playback is paused. 3 Current time 4 Source icon Shows which source has been selected. 5 Device name indicator 6 Connection status indicator - Pioneer AVIC-X930BT | Owner's Manual - Page 133
next page. 3 Playback and Pause Touching [d] or [e] switches between playback and pause. 4 Connects the Bluetooth audio player Touching [Connect] displays the connection standby screen and the navigation system waits for the Bluetooth wireless connection request. 5 Recalls equalizer curves 4 = For - Pioneer AVIC-X930BT | Owner's Manual - Page 134
" screen. The "Function" menu appears. 1 2 1 Changes the repeat range Each touch of [Repeat] changes the setting as follows: ! All: Repeats all audio files in the Bluetooth audio player. ! Track: Repeats just the current file. ! Off: Does not repeat. p If you skip the file forward or backward - Pioneer AVIC-X930BT | Owner's Manual - Page 135
as of September 2010. p Any changes made by XM Satellite Radio in the lineup or icon of the broadcast station in the future may not be supported by the navigation system, and may cause the unit to display incorrect icons. 1 XM band indicator Shows the XM band that has been selected. 2 Current XM - Pioneer AVIC-X930BT | Owner's Manual - Page 136
tuner Shows the title of the current song (program). p is displayed if there is no corresponding information. 3 Current time 4 XM station the category of broadcast channel. 6 XM channel select mode indicator Shows what channel select mode has been selected. You can select a channel from all channels in - Pioneer AVIC-X930BT | Owner's Manual - Page 137
Mode d 2 3 d c b a 4 9 8 76 5 1 Performs manual tuning The channels move up or down one at a time. p If you keep touching [o] or [p] you can skip the broadcasting channels. e 2 Switches between the AV operation screen and the preset list display You can switch the screen display - Pioneer AVIC-X930BT | Owner's Manual - Page 138
for selecting and listing the channel. All CH Mode : You can select a channel from all channels when you operate this function. Category Mode: You can select a channel within a selected category that you operate this function. 9 Switches to the list display of song titles = For details, refer to - Pioneer AVIC-X930BT | Owner's Manual - Page 139
store in memory. 2 Display the preset channel list. = For details, refer to Switches between the AV operation screen and the preset list display on page 137. , refer to Operating list screens (e. g. iPod list screen) on page 70. p During Category Mode, touch [c] or [d] to switch to another category - Pioneer AVIC-X930BT | Owner's Manual - Page 140
operations, refer to Setting the memorized songs on this page. When the memorized song is broadcast A beep sounds, and a message is displayed. Touch [Yes] to switch to Setting the memorized songs on this page. p Notification may not be provided depend- ing on the status of the navigation system. - Pioneer AVIC-X930BT | Owner's Manual - Page 141
tuner You can use the navigation system to control a Pioneer Sirius Satellite Radio tuner, which is sold separately. For details concerning operation, refer to the SIRIUS tuner's operation manuals. This section provides information on SIRIUS operations with navigation system which differs from that - Pioneer AVIC-X930BT | Owner's Manual - Page 142
SIRIUS tuner Using the touch panel keys All CH Mode 1 23 4 b a 5 9 87 6 Category Mode 1 23 4 b a 5 9 87 6 1 Switches the SIRIUS Instant replay mode = For details, refer to Using the "Instant Replay" function on page 144. 2 Performs manual tuning The channels move up or down one at - Pioneer AVIC-X930BT | Owner's Manual - Page 143
a channel from all channels when you operate this function. Category Mode: You can select a channel within a selected category that you operate this function. a Switches between the AV operation screen and the preset list display You can switch the screen display according to your preference. = For - Pioneer AVIC-X930BT | Owner's Manual - Page 144
of the song currently being received. When a track that matches Setting the memorized songs on the next page. p Notification may not be provided depending on the situation of the Navigation switches between playback and pause. p During "Instant Replay" mode, each touch of [Disp] changes the display - Pioneer AVIC-X930BT | Owner's Manual - Page 145
"Instant Replay" mode, you can perform setting off. Changing the alert setting delete. 3 Touch [Delete] when the song you want to delete is displayed. A message will appear asking you to confirm the deletion. 4 Touch [Yes]. Using the Game Alert function Selecting teams for Game Alert This navigation - Pioneer AVIC-X930BT | Owner's Manual - Page 146
score information that is registered. p The game score will be updated automatically. p Touch [Tune To] to switch to the channel that broadcasts the displayed game. p If you have not selected any team, "Not Set" is displayed. p When no games involving your favorite teams are currently being played - Pioneer AVIC-X930BT | Owner's Manual - Page 147
Using AV input Chapter 30 You can display the video image output by the equipment connected to the navigation system. For details of the connection method, refer to Installation Manual. CAUTION For safety reasons, video images cannot be viewed while your vehicle is in motion. To view video images, - Pioneer AVIC-X930BT | Owner's Manual - Page 148
the information that is sent by connected external units. 3 Current time 4 Auto/Manual mode indicator Shows the current mode. Starting procedure 1 Display the AV operation screen. = For details of the operations, refer to Displaying the AV operation screen on page 70. 2 Tap [EXT1] or [EXT2] on - Pioneer AVIC-X930BT | Owner's Manual - Page 149
between automatic and manual function You can turn automatic and manual function on or off. You can switch between "Auto" and "Manual" functions of the external unit connected. Initially, this function is set to "Auto". p Operating commands set for "Auto" and "Manual" operations vary depending on - Pioneer AVIC-X930BT | Owner's Manual - Page 150
to this navigation system, "NOK" is displayed. p If reception is poor, please change the installation position of the GPS antenna. 3 Parking Brake When the parking brake is applied, "On" is displayed. When the parking brake is released, "Off" is displayed. 4 Illumination When the headlights or small - Pioneer AVIC-X930BT | Owner's Manual - Page 151
switches to "High" or "Low". (One of these is displayed depending on the vehicle.) Checking sensor learning status and driving status p The navigation Display the "Navi Settings" screen. = For details, refer to Displaying the screen for navigation settings can delete the current driving mode. 6 - Pioneer AVIC-X930BT | Owner's Manual - Page 152
by entering the fuel consumption information in the navigation system. = For details, refer to Setting a route to your destination on page 42. 1 Display the "Navi Settings" screen. = For details, refer to Displaying the screen for navigation settings on page 150. 2 Touch [Gas Mileage]. The "Gas - Pioneer AVIC-X930BT | Owner's Manual - Page 153
an SD memory card into the SD card slot. = For details of the operation, refer to Inserting and ejecting an SD memory card on page 16. 2 Display the "Navi Settings" screen. = For details, refer to Displaying the screen for navigation settings on page 150. 3 Touch [Gas Mileage]. The "Gas Mileage - Pioneer AVIC-X930BT | Owner's Manual - Page 154
log" below). You can review the travel history later. p Displaying the screen for navigation settings on page 150. 2 Touch [Demo Mode]. Each time you touch the key changes the setting. ! Off (default): The demonstration guidance is set off. ! On: Repeats the demonstration guidance. 3 Display the map - Pioneer AVIC-X930BT | Owner's Manual - Page 155
location Touch the screen to adjust the current position and direction of the vehicle displayed on the map. 1 Display the "Navi Settings" screen. = For details, refer to Displaying the screen for navigation settings on page 150. 2 Touch [Modify Current Location]. 3 Scroll to the position where you - Pioneer AVIC-X930BT | Owner's Manual - Page 156
the key changes the setting. ! On (default): Switches to an enlarged map. ! Off: Does not switch to an enlarged map. Setting the detailed city map p The detailed city map and this setting are available for AVIC-Z130BT only. You can select whether to display the city map when in certain metropolitan - Pioneer AVIC-X930BT | Owner's Manual - Page 157
touch the key changes the setting. ! On (default): Automatically switches to the city map when in a city map area. ! Off: Does not show the city map. p Even if you switch "City Map" to "On", city map cannot be displayed in areas where there is no city map data. Setting the barrier graphic for city - Pioneer AVIC-X930BT | Owner's Manual - Page 158
Connected]. Each time you touch the key changes the setting. ! View (default): Displays the Bluetooth connection icon on the map. ! Hide: Hides the Bluetooth connection icon on the map. Setting the current street name display Selects whether to display or hide the street name (or city name) that - Pioneer AVIC-X930BT | Owner's Manual - Page 159
time you touch the key changes the setting. ! View (default): Displays maneuvers on the map. ! Hide: Hides maneuvers on the map. Displaying POI on the map Displays icons for the surrounding facilities (POI) on the map. p POI icons are not displayed when the map scale is 0.75 mile (1 kilometer) or - Pioneer AVIC-X930BT | Owner's Manual - Page 160
SD memory card into the SD card slot. = For details of the operation, refer to Inserting and ejecting an SD memory card on page 16. 2 Display the "Map Settings" screen. = For details, refer to Displaying the screen for map settings on page 156. 3 Touch [Overlay POI]. The "Overlay POI" screen appears - Pioneer AVIC-X930BT | Owner's Manual - Page 161
the view mode Various types of screen displays can be selected for navigation guidance. = For details of the operation, refer to Switch- ing the view mode on page 30. Setting the map color change between day and night To improve the visibility of the map during the evening, you can set the timing - Pioneer AVIC-X930BT | Owner's Manual - Page 162
AV Guide Mode]. Each time you touch the key changes the setting. ! On (default): Switches from the AV operation screen to the map screen. ! Off: Does not switch the screen. p This setting is effective only when "Close Up View" is set to "On". Selecting the "Quick Access" menu Select items to display - Pioneer AVIC-X930BT | Owner's Manual - Page 163
the time difference (+, -) from the time originally set in your navigation system. 1 Display the "System Settings" screen. = For details, refer to Displaying the screen for system settings on the previous page. 2 Touch [Regional Settings]. The "Regional Settings" screen appears. 3 Touch [Time]. The - Pioneer AVIC-X930BT | Owner's Manual - Page 164
controls the unit of distance and speed displayed on your navigation system. 1 Display the "System Settings" screen. = For details, refer to Displaying the screen for system settings on page 162. 2 Touch [Regional Settings]. The "Regional Settings" screen appears. p The estimated time of arrival - Pioneer AVIC-X930BT | Owner's Manual - Page 165
, refer to Displaying the screen for system settings on page 162. 2 Touch [Volume]. The "Volume Settings" screen appears. 3 Touch [+] or [-] to set their volume. On this screen, you can operate the following items. ! Guidance This setting controls the guidance volume of navigation. p When set to - Pioneer AVIC-X930BT | Owner's Manual - Page 166
screen automatically switches to full-screen rear view camera image. Camera for Rear view mode Rear view can be displayed at all times (e.g. when monitoring an attached trailer, etc.) as a split screen where map information is partially displayed. Please be aware that with this setting, camera image - Pioneer AVIC-X930BT | Owner's Manual - Page 167
MODE button, the adjustment is canceled. Setting the illumination color The illumination color can be selected from 8 different colors. Furthermore, the illumination color can be switched between these 8 colors in order. Selecting the color from the preset colors 1 Display the eight default colors - Pioneer AVIC-X930BT | Owner's Manual - Page 168
touch of changes the settings as follows: ! Mirror AV: The video on the front screen of the navigation unit is output to the rear display ! DISC: The video and sound of the DVDs are output to the rear display ! iPod: The video and sound of the iPod are output to the rear display ! AV1: The video and - Pioneer AVIC-X930BT | Owner's Manual - Page 169
video files on the external storage device (USB, SD), the video image is not output. p When "DISC" is selected, the following restriction is applied to rear display. - When a CD or MP3/WMA/AAC disc is set in the built-in DVD drive, only the sound is output. p When "iPod" is selected, the following - Pioneer AVIC-X930BT | Owner's Manual - Page 170
/ROM/iPod(Music)/SD (audio)/USB(audio)/Bluetooth audio/XM/SIRIUS/HD Radio/EXT1 (audio), EXT2(audio)/source off screen/menu screens/others ! Video source - AV1 and iPod(Video) - DVD-V and DivX - SD(Video) and USB(Video) - AV2(Video) and EXT1(Video), EXT2 (Video) - Rear view camera image ! Map screen - Pioneer AVIC-X930BT | Owner's Manual - Page 171
video component is connected. ! EXT: Pioneer external unit connected with the RCA video cable ! Video: External video component Changing the wide screen mode p You can only adjust "Wide Mode" when selecting an AV source with video. 1 Display the "AV System Settings" screen. = For details, refer to - Pioneer AVIC-X930BT | Owner's Manual - Page 172
voice recognition mode is activated. ! Off: The volume does not change. AVIC-X930BT, AVIC-X9310BT ! Guide/Tel: The volume is muted or attenuated according to the following conditions. - When the navigation outputs the guidance voice. - When you use a cellular phone via Bluetooth technology (dialing - Pioneer AVIC-X930BT | Owner's Manual - Page 173
available when "Change Control Mode" is set to "Navi". p If you do not use iPod, this setting is un- necessary. p During transfer, the following iPod opera- tions are not available. - Setting the shuffle play for music - Displaying the top category menu - Switching the operation screen p Once the - Pioneer AVIC-X930BT | Owner's Manual - Page 174
activate or deactivate "VR Catalog Mode". # If you touch [Pause], the cataloging of iPod stops. If you want to restart the cataloging of iPod, touch [Restart]. Displaying your DivX VOD registration code In order to play DivX VOD (video on demand) content on this navigation system, you first need to - Pioneer AVIC-X930BT | Owner's Manual - Page 175
[b], the front/rear speaker balance moves towards the front or the rear. "Front: 15" to "Rear: 15" is displayed as the front/rear speaker balance moves from front to rear. Set "Front:" and "Rear:" to "0" when using a two-speaker system. 4 Touch [c] or [d] to adjust left/right speaker balance. Each - Pioneer AVIC-X930BT | Owner's Manual - Page 176
switching alternatively between "Flat" and a set equalizer curve. p You cannot select "Custom1" and "Custom2" when "Auto EQ" is "On". = For details, refer to Using the auto-adjusted equalizer on the next page. 1 Display the "AV Sound Settings the "Custom2" curve will be updated. ! The "Custom1" curve - Pioneer AVIC-X930BT | Owner's Manual - Page 177
= For details of the operations, refer to Adjust- ing the equalizer curve automatically (Auto EQ) on this page. p To manually adjust the equalizer curve, set "Auto EQ" to "Off". 1 Display the "AV Sound Settings" screen. = For details, refer to Displaying the screen for AV sound settings on page 174 - Pioneer AVIC-X930BT | Owner's Manual - Page 178
on page 175. ! The equalizer curve switches to "Flat". = For details, refer to Using the equalizer on page 175. ! The front and rear speakers will automatically be adjusted to a high pass filter setting. p Previous settings for Auto EQ will be overwritten. p For AVIC-Z130BT users Do not press the - Pioneer AVIC-X930BT | Owner's Manual - Page 179
switch to ON or ACC. If the vehicle's air conditioner or heater is turned on, turn it off. Noise from the fan in the air conditioner or heater may prevent correct Auto EQ. 4 Turn off the AV source. = For details of the operations, refer to Displaying the AV operation screen on page 70. 5 Set - Pioneer AVIC-X930BT | Owner's Manual - Page 180
subwoofer output The navigation system is equipped with a subwoofer output mechanism, which can be turned on or off. p This function is not available when "Sub Woofer" is "Off". 1 Display the "AV Sound Settings" screen. = For details, refer to Displaying the screen for AV sound settings on page 174 - Pioneer AVIC-X930BT | Owner's Manual - Page 181
to display the "Top Menu" screen. 4 Touch [Settings]. The "Settings Menu" screen appears. 5 Touch [Setting Replicator]. A message confirming whether to update the settings appears. 6 Touch [Yes]. Update starts. After the settings are updated, a message confirming whether to restart the navigation - Pioneer AVIC-X930BT | Owner's Manual - Page 182
! Setting the route to the selected POI ! Hands-free phoning ! Switching the AV source ! Operating the iPod p This function is not available while catalo- ging of iPod is in progress. Flow of the voice operation You can start the voice operation any time even when the map screen is displayed or - Pioneer AVIC-X930BT | Owner's Manual - Page 183
case, touch the item you want to select from the list. 1 Press the MODE button to display the map screen or the AV operation screen. 2 Press the button to activate voice operations. A list of commands for the voice operation appears. After a message, the beep indicates that the system is ready to - Pioneer AVIC-X930BT | Owner's Manual - Page 184
details, refer to Acquiring/Cataloging iPod music information on page 173. Examples of voice operation of the iPod are shown below. (A method for playing the album title named "Pioneer" is described here, along with an operational example.) 1 Press the MODE button to display the map screen or the AV - Pioneer AVIC-X930BT | Owner's Manual - Page 185
operation. Help d Outputs the brief operating instruction by voice. Next page, Previous page d Switches the page. Last page, First page d Switches to the last or first page. Voice operation for the iPod from the top of "Songs". Play artists d Displays the artist list d Say the artist name that you - Pioneer AVIC-X930BT | Owner's Manual - Page 186
the AV source to USB. Change Source to iPod d Switches the AV source to iPod. Change Source to Bluetooth Audio d Switches the AV source to Audio (Bluetooth audio). Built-in DVD drive, external storage device (USB, SD) Voice commands and operations Shuffle play d Plays all songs randomly. Pause - Pioneer AVIC-X930BT | Owner's Manual - Page 187
system with voice Chapter 33 Operating your navigation system with voice Voice commands related to hands-free phoning p You can make a phone call by voice dialing if the cellular phone featuring Bluetooth wireless technology is being paired with the navigation system. p For - Pioneer AVIC-X930BT | Owner's Manual - Page 188
Chapter 33 Operating your navigation system with voice Tips for the voice operation For your voice commands to be the vehicle window or miscellaneous noise from outside the vehicle can interfere with voice operation. Position the microphone carefully For optimum pick-up, the microphone should be - Pioneer AVIC-X930BT | Owner's Manual - Page 189
, and then touch and hold Area3. Area1 Area2 Area3 4 Touch [Set Password]. The password setting screen appears. p When the AVIC-X930BT or AVIC-X9310BT is being installed and a password has not been set up, the password setting screen is displayed when the front panel is detached and re-attached - Pioneer AVIC-X930BT | Owner's Manual - Page 190
the default setting Resets various settings registered to the navigation system and restores them to the default or factory settings. p Be sure to read "Setting items to be deleted" before you perform this operation. = For details, refer to Setting items to be deleted on the next page. 1 Display the - Pioneer AVIC-X930BT | Owner's Manual - Page 191
! Method 2: Touch [Restore Factory Settings] ! Method 3: Touch [Clear user information] on the "Select Items to Reset" screen ! Method 4: Touch [Reset] on the "Select Items to Reset" screen Navigation functions Method 1 View mode and scale setting on the map - Map function Direction of the - Pioneer AVIC-X930BT | Owner's Manual - Page 192
is deleted. Method 1 - - - Method 2 1 1 - Method 3 1 1 - Method 4 1 1 - AV functions Method 1 Method 2 Volume 1 - AV Settings Wide Mode, Mute, VR Cata- log Menu 1 - Other settings 1 - AV Sound All settings 1 - CD, ROM, DVD-V, DivX, FM, AM, Audio (Bluetooth audio) All settings - Pioneer AVIC-X930BT | Owner's Manual - Page 193
Appendix Troubleshooting If you have problems operating your navigation system, refer to this section. The most common problems are listed below, along with likely causes and solutions. If a solution to your problem cannot be found here, contact your dealer or the nearest authorized Pioneer service - Pioneer AVIC-X930BT | Owner's Manual - Page 194
in a safe place, turn off the navigation system and turn the power to the navigation system back on. The map color does not switch "Day/Night Display" is set to automatically between daytime "Day". and nighttime. Check "Day/Night Display" setting and make sure "Automatic" is selected. (Page - Pioneer AVIC-X930BT | Owner's Manual - Page 195
the LCD panel is turned off. Turn on the backlight. (Page 181) Rear display picture disappears. The source disc being listened to in Before ejecting the disc, switch the source. the navigation system has been This problem may occur when certain con- ejected. nection methods are used. There is - Pioneer AVIC-X930BT | Owner's Manual - Page 196
kind of protection signal is viewed on some displays. This does not mean the na- vigation system is malfunctioning. iPod cannot be operated. The iPod is frozen. ! Reconnect the iPod with the USB interface cable for iPod. ! Update the iPod software version. An error has occurred. ! Reconnect - Pioneer AVIC-X930BT | Owner's Manual - Page 197
are inactive. Your phone is out of range for ser- Retry after re-entering the range for service. vice. The connection between the cellular Perform the connection process. phone and the navigation system cannot be established now. If the screen becomes frozen... Park your vehicle in a safe place - Pioneer AVIC-X930BT | Owner's Manual - Page 198
instructions given on the display. Messages for navigation functions Message Cause Action (Reference) Route calculation was not possible. Route calculation has failed be- ! Change the destination. cause of a malfunction in map data, ! Consult the Pioneer external storage device. to set an image - Pioneer AVIC-X930BT | Owner's Manual - Page 199
phone is paired (con- Cancel the pairing (connection) and retry. nected) with another device. Rejection has been received from the cellular phone. Operate the target phone and accept the connection request from the navigation system. (Furthermore, check the connection settings on your cellular - Pioneer AVIC-X930BT | Owner's Manual - Page 200
below to identify the problem, then take the suggested corrective action. If the error persists, record the error message and contact your dealer or your nearest Pioneer service center. The messages in "( )" will appear on the rear display. Built-in DVD drive Message Cause Action (Reference - Pioneer AVIC-X930BT | Owner's Manual - Page 201
the inserted external Store playable files. storage device are secured iPod is The iPod is not compatible with this Use an iPod of a compatible version. not connected. navigation system. Communication failure ! Disconnect the cable from iPod. Once iPod main menu is displayed, connect the cable - Pioneer AVIC-X930BT | Owner's Manual - Page 202
model. For details, consult your authorized Pioneer dealer or an installation professional. p Some types of vehicles displayed correctly while in traffic congestion or in a parking lot. How do GPS and dead reckoning work together? For maximum accuracy, your navigation system continually compares GPS - Pioneer AVIC-X930BT | Owner's Manual - Page 203
and map matching. However, in some situations, these functions may not work properly, and the error may become bigger. When driving among high buildings When driving through a dense forest or tall trees ! If a car phone or cellular phone is used near the GPS antenna, GPS reception may be lost - Pioneer AVIC-X930BT | Owner's Manual - Page 204
on and the reception status of the GPS signal, the actual position of your vehicle may differ from the position displayed on the map screen. ! If you make a slight ferry. ! If you take a recently opened road that is not on the map. ! If you are driving on a long, straight road or a gently - Pioneer AVIC-X930BT | Owner's Manual - Page 205
Appendix Appendix ! If you are on a steep mountain road with many height changes. ! If trees or other obstacles block the GPS signals for a considerable period. ! If you enter or exit a multi-storey parking lot or similar structure using a spiral ramp. ! If you drive very slowly, or - Pioneer AVIC-X930BT | Owner's Manual - Page 206
navigation system sets a route to your destination by applying certain built-in rules to the map data. This section provides some useful information about how a route is set you are instructed to turn display, but voice guidance will continue. Auto reroute function ! If you deviate from the set - Pioneer AVIC-X930BT | Owner's Manual - Page 207
instructions and operation may appear on the disc surface as a result of mechanical wear, ambient conditions for use or handling of the disc. This is not a sign of the malfunction of this product. Consider it to be normal wear and tear. Playable discs DVD-Video and CD DVD and CD discs that display - Pioneer AVIC-X930BT | Owner's Manual - Page 208
are two-sided discs that have a recordable CD for audio on one side and a recordable DVD for video on the other. ! Playback of the DVD side is possible with this navigation system. However, since the CD side of DualDiscs is not physically compatible with the general CD standard, it may not be - Pioneer AVIC-X930BT | Owner's Manual - Page 209
on the radio. ! Do not connect anything other than the USB storage device. The sequence of audio files on USB storage device For USB storage device, the sequence is different from that of USB storage device. SD memory card and SDHC memory card = For details about SD memory card compat- ibility with - Pioneer AVIC-X930BT | Owner's Manual - Page 210
1 590 minutes 43 seconds. Search operations beyond this time limit are prohibited. ! DivX VOD file playback requires supplying the ID code of this navigation system to the DivX VOD provider. Regarding the ID code, refer to Displaying your DivX VOD registration code on page 174. ! Plays all versions - Pioneer AVIC-X930BT | Owner's Manual - Page 211
audio file stored in the external storage device (USB, SD): 7.5 h (450 minutes) MP3 compatibility Media CD-R/-RW DVD-R/-RW/-R DL USB storage device when both Ver. 1.x and Ver. 2.x exist. ! The navigation system is not compatible with the following: MP3i (MP3 interactive), mp3 PRO, m3u playlist - Pioneer AVIC-X930BT | Owner's Manual - Page 212
8 kHz to 48 kHz Note: The navigation system is not compatible with the following: Windows Media™ Audio 9 Professional, Lossless, Voice USB storage device SD memory card WAV compatibility Media CD-R/-RW DVD-R/-RW/-R DL USB storage device SD memory card File extension .wav Format - Pioneer AVIC-X930BT | Owner's Manual - Page 213
(32 kHz, 44.1 kHz, 48 kHz for emphasis) DivX files on the external storage device (USB, SD) cannot be played. Maximum image size 720 pixels × 576 pixels Maximum file size 4 GB Notes: ! The navigation system is not compatible with the following: DivX Ultra format, DivX files without video data - Pioneer AVIC-X930BT | Owner's Manual - Page 214
minutes Common notes ! The navigation system may not operate correctly, depending on the application displayed. ! There may be a slight delay when starting playback of audio files encoded with image data. ! The navigation system is not compatible with packet write data transfer. ! This navigation - Pioneer AVIC-X930BT | Owner's Manual - Page 215
are trademarks of Sirius Satellite Radio inc., and XM Satellite Radio Inc. Appendix Bluetooth is a short-range wireless radio connectivity technology that is developed as a cable replacement for cellular phones, handheld PCs and other devices. Bluetooth operates in 2.4 GHz frequency range and - Pioneer AVIC-X930BT | Owner's Manual - Page 216
license from iBiquity Digital Corporation. U.S. and Foreign Patents. HD Radio™ and the HD, HD Radio, and "Arc" logos are proprietary trademarks of iBiquity Digital Corp. ! AVIC-X930BT, AVIC-X9310BT HD Radio™, HD Radio Ready™ and HD Radio Ready logos are proprietary trademarks of iBiquity Digital - Pioneer AVIC-X930BT | Owner's Manual - Page 217
to access app-based connected content services such as Pandora internet radio and Aha Radio using the Pioneer navigation system: ! Apple iPhone (first generation), iPhone 3G, iPhone 3GS, or iPhone 4 with firmware version 3.0 or later. ! Latest version of the Pioneer compatible connected content - Pioneer AVIC-X930BT | Owner's Manual - Page 218
content service provider for additional information. ! Ability of the Pioneer navigation system to access connected contents is subject to change without notice and could be affected by any of the following: compatibility issues with future firmware versions of iPhone; compatibility issues with - Pioneer AVIC-X930BT | Owner's Manual - Page 219
Appendix LED (light-emitting diode) backlight A light emitting diode is used inside the display to illuminate the LCD screen. ! At low temperatures, using the LED back- be visible. In that case, please consult your dealer or the nearest authorized Pioneer Service Station. Appendix Appendix En 219 - Pioneer AVIC-X930BT | Owner's Manual - Page 220
Name Near Me Near Destination Around City AVIC FEEDS Favorites History Cancel Route Traffic Coordinates Route Overview Page 35 37 37 37 38 38 38 40 39, 47 40, 50 46 51 40 43 Dial Pad Call Home Contacts Contacts Transfer Received Calls Dialed Calls Missed Calls Page 61 62 62 65 63 - Pioneer AVIC-X930BT | Owner's Manual - Page 221
Navi Settings menu Appendix Navi Settings System Settings AV Settings AV Sound Map Settings Bluetooth Settings Setting Replicator Page 150 162 170 174 156 66 181 Connection Status 3D Calibration Status Gas Mileage Drive Log Settings Demo Mode Set Home Modify Current Location Eco Settings Page - Pioneer AVIC-X930BT | Owner's Manual - Page 222
Factory Settings Page 163 163 164 164 165 165 166 167 167 168 190 Displayed Info Close Up View City Map City Map Barrier Show Traffic Incident Bluetooth Connected Current Street Name Favorites Icon 3D Land Mark Show Maneuver Show Eco Meter Quick Access Selection Overlay POI View Mode Day/Night - Pioneer AVIC-X930BT | Owner's Manual - Page 223
Appendix Bluetooth Settings menu Appendix AV System Settings menu Appendix Connection Registration Device Name Password Bluetooth On/Off Echo Cancel Auto Answer Preference Refuse All Calls Clear Memory Firmware update Page 59 56 66 66 67 67 AV1 Input AV2 Input Wide Mode Auto EQ Meas. Mute Mute - Pioneer AVIC-X930BT | Owner's Manual - Page 224
Appendix Appendix AV Sound Settings menu FAD/BAL (Balance) EQ Loudness Sub Woofer HPF SLA Bass Booster Sonic Center Control Page 175 175 180 180 180 180 181 179 224 En - Pioneer AVIC-X930BT | Owner's Manual - Page 225
release audio CD). In this manual, this word is sometime used for a distinction between data CDs (which include compressed audio files) and general music CDs. Chapter Titles of DVD allow easy routing. GPS Global Positioning System. A network of satellites that provides navigation signals for a - Pioneer AVIC-X930BT | Owner's Manual - Page 226
MPEG Audio Layer 3. It is an audio compression standard established by a working hard disks. Parental lock Some DVD-Video discs with violent or adult-oriented scenes feature parental lock which prevents children from viewing such scenes. With this kind of disc, if you set the unit's parental lock - Pioneer AVIC-X930BT | Owner's Manual - Page 227
a destination. Set route The route marked out by the system to your destination. It is highlighted in bright color on the map. Title DVD-Video discs have needs of audio compression, it is possible to produce compressionpriority data. Voice guidance The giving of directions by navigation voice while - Pioneer AVIC-X930BT | Owner's Manual - Page 228
mm (6-3/4 in. × 3-3/4 in. × 1/2 in.) Weight: AVIC-Z130BT 2.27 kg (5.0 lbs) AVIC-X930BT 1.98 kg (4.4 lbs) AVIC-X9310BT 1.98 kg (4.4 lbs) NAND flash memory 4 GB Navigation GPS receiver: System L1, C/Acode GPS SPS (Standard Positioning Service) Reception system .......... 32-channel multi-channel - Pioneer AVIC-X930BT | Owner's Manual - Page 229
MP3/WMA/AAC/WAVE/ H.264/MPEG4/WMV SD (AVIC-X930BT and AVIC-X9310BT) microSD card, microSDHC card Compatible physical format Version 2.00 File system FAT16, FAT32 Decoding format MP3/WMA/AAC/WAVE/ H.264/MPEG4/WMV Bluetooth Version Bluetooth 2.0+EDR Output power 4 dBm Max. (Power class 2) FM - Pioneer AVIC-X930BT | Owner's Manual - Page 230
Appendix Appendix Signal-to-noise ratio ..... 80 dB (digital broadcasting) (IEC-A network) 62 dB (analog broadcasting) (IEC-A network) AVIC-X930BT, AVIC-X9310BT Frequency range 530 kHz to 1 710 kHz (10 kHz) Usable sensitivity 25 µV (S/N: 20 dB) Signal-to-noise ratio ..... 62 dB (IEC-A network) - Pioneer AVIC-X930BT | Owner's Manual - Page 231
En 231 - Pioneer AVIC-X930BT | Owner's Manual - Page 232
-shi, Kanagawa 212-0031, JAPAN PIONEER ELECTRONICS (USA) INC. P.O. Box 1540, Long Beach, California 90801-1540, U.S.A. TEL: (800) 421-1404 PIONEER EUROPE NV Haven 1087, Keetberglaan 1, B-9120 Melsele, Belgium/Belgique TEL: (0) 3/570.05.11 PIONEER ELECTRONICS ASIACENTRE PTE. LTD. 253 Alexandra
-
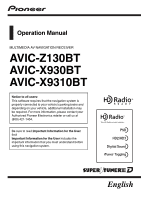 1
1 -
 2
2 -
 3
3 -
 4
4 -
 5
5 -
 6
6 -
 7
7 -
8
-
9
-
10
-
11
-
12
-
13
-
14
-
15
-
16
-
17
-
18
-
19
-
20
-
21
-
22
-
23
-
24
-
25
-
26
-
27
-
28
-
29
-
30
-
31
-
32
-
33
-
34
-
35
-
36
-
37
-
38
-
39
-
40
-
41
-
42
-
43
-
44
-
45
-
46
-
47
-
48
-
49
-
50
-
51
-
52
-
53
-
54
-
55
-
56
-
57
-
58
-
59
-
60
-
61
-
62
-
63
-
64
-
65
-
66
-
67
-
68
-
69
-
70
-
71
-
72
-
73
-
74
-
75
-
76
-
77
-
78
-
79
-
80
-
81
-
82
-
83
-
84
-
85
-
86
-
87
-
88
-
89
-
90
-
91
-
92
-
93
-
94
-
95
-
96
-
97
-
98
-
99
-
100
-
101
-
102
-
103
-
104
-
105
-
106
-
107
-
108
-
109
-
110
-
111
-
112
-
113
-
114
-
115
-
116
-
117
-
118
-
119
-
120
-
121
-
122
-
123
-
124
-
125
-
126
-
127
-
128
-
129
-
130
-
131
-
132
-
133
-
134
-
135
-
136
-
137
-
138
-
139
-
140
-
141
-
142
-
143
-
144
-
145
-
146
-
147
-
148
-
149
-
150
-
151
-
152
-
153
-
154
-
155
-
156
-
157
-
158
-
159
-
160
-
161
-
162
-
163
-
164
-
165
-
166
-
167
-
168
-
169
-
170
-
171
-
172
-
173
-
174
-
175
-
176
-
177
-
178
-
179
-
180
-
181
-
182
-
183
-
184
-
185
-
186
-
187
-
188
-
189
-
190
-
191
-
192
-
193
-
194
-
195
-
196
-
197
-
198
-
199
-
200
-
201
-
202
-
203
-
204
-
205
-
206
-
207
-
208
-
209
-
210
-
211
-
212
-
213
-
214
-
215
-
216
-
217
-
218
-
219
-
220
-
221
-
222
-
223
-
224
-
225
-
226
-
227
-
228
-
229
-
230
-
231
-
232
 |
 |
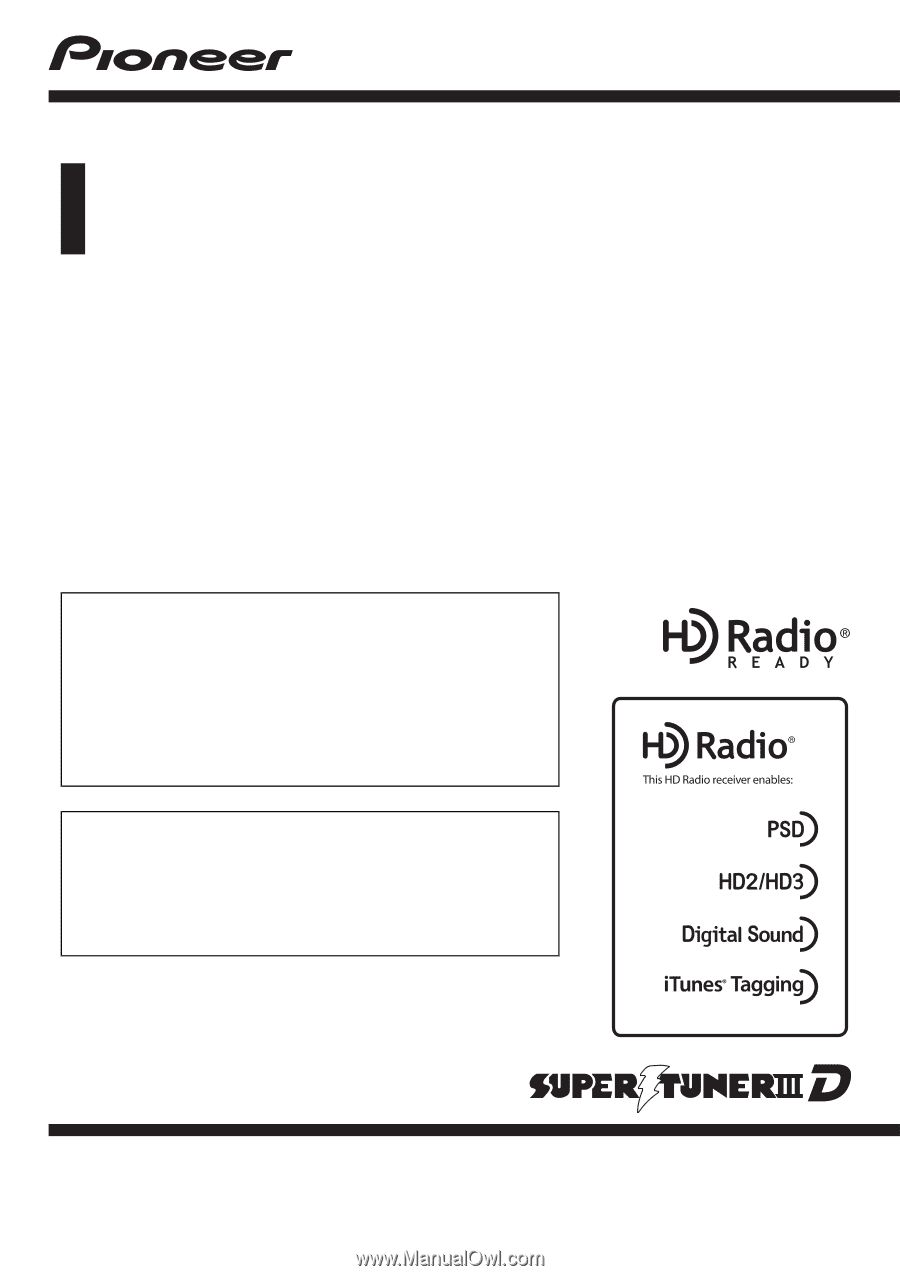
Operation Manual
MULTIMEDIA AV NAVIGATION RECEIVER
AVIC-Z130BT
AVIC-X930BT
AVIC-X9310BT
Notice to all users:
This software requires that the navigation system is
properly connected to your vehicle
’
s parking brake and
depending on your vehicle, additional installation may
be required. For more information, please contact your
Authorized Pioneer Electronics retailer or call us at
(800) 421-1404.
Be sure to read
Important Information for the User
first!
Important Information for the User
includes the
important information that you must understand before
using this navigation system.
English