Samsung SCH-R720 User Manual (user Manual) (ver.f4) (English(north America)) - Page 48
Configuring Email Accounts, Composing and Sending Email, Pictures, Capture picture, Videos
 |
View all Samsung SCH-R720 manuals
Add to My Manuals
Save this manual to your list of manuals |
Page 48 highlights
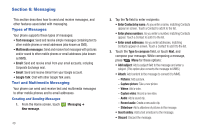
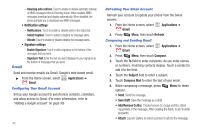
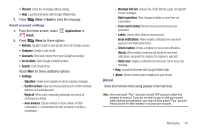
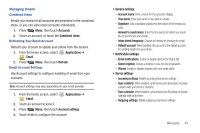
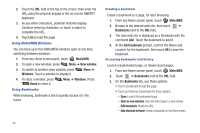
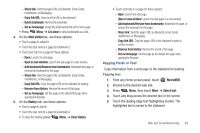
Configuring Email Accounts You can configure Email for most accounts in just a few steps. Configuring the first email account 1. From the Home screen, select Applications ➔ Email. The Set up email screen appears. 2. Touch Email address to enter your email address, then touch Password or touch Next to enter your password. 3. For an account with a public Email provider, your phone contacts the Email server and continues account set up automatically. For a business Email account, For more information, refer to "Adding a Corporate Exchange account" on page 31. 4. Follow the prompts to complete account set-up, then touch Done. Tip: For more information on setting up your email, contact your Wireless Provider. Configuring additional email accounts To add additional Email accounts, see "Adding a Corporate Exchange account" on page 31. Composing and Sending Email 1. From the Home screen, select Email. Applications ➔ 44 2. Touch and hold on an account, then touch Compose. 3. Touch the To field to enter recipients. As you enter names or numbers, matching contacts display. Touch a contact to add it to the field. 4. Touch the Subject field to enter a subject. 5. Touch Compose Mail to enter the text of your email. 6. While composing a message, press the these options: Menu Key for • Add Cc/Bcc: Create Cc (copy) and Bcc (blind copy) fields to the message. After creating the fields, touch to enter recipients. • Send: Send the message. • Save as draft: Close the message and save it in Drafts. • Discard: Close the message without saving. • Add attachment: the follow options are available: - Pictures: Add a picture. - Capture picture: Take a new picture. - Videos: Add a video. - Capture video: Record a new video. - Audio: Add a sound clip. - Record audio: Create a new audio clip. - File: Add a file. 7. Touch Send to send the message.
-
 1
1 -
2
-
3
-
4
-
5
-
6
-
7
-
8
-
9
-
10
-
11
-
12
-
13
-
14
-
15
-
16
-
17
-
18
-
19
-
20
-
21
-
22
-
23
-
24
-
25
-
26
-
27
-
28
-
29
-
30
-
31
-
32
-
33
-
34
-
35
-
36
-
37
-
38
-
39
-
40
-
41
-
42
-
 43
43 -
 44
44 -
 45
45 -
 46
46 -
 47
47 -
 48
48 -
 49
49 -
 50
50 -
 51
51 -
 52
52 -
 53
53 -
54
-
55
-
56
-
57
-
58
-
59
-
60
-
61
-
62
-
63
-
64
-
65
-
66
-
67
-
68
-
69
-
70
-
71
-
72
-
73
-
74
-
75
-
76
-
77
-
78
-
79
-
80
-
81
-
82
-
83
-
84
-
85
-
86
-
87
-
88
-
89
-
90
-
91
-
92
-
93
-
94
-
95
-
96
-
97
-
98
-
99
-
100
-
101
-
102
-
103
-
104
-
105
-
106
-
107
-
108
-
109
-
110
-
111
-
112
-
113
-
114
-
115
-
116
-
117
-
118
-
119
-
120
-
121
-
122
-
123
-
124
-
125
-
126
-
127
-
128
-
129
-
130
-
131
-
132
-
133
-
134
-
135
-
136
 |
 |
