Samsung SM-P905V User Manual Verizon Wireless Sm-p905v Galaxy Note Pro 12.2 Kk - Page 147
Accounts, Settings, Backup and reset, Factory data reset, Reset device, Reset settings, Add account
 |
View all Samsung SM-P905V manuals
Add to My Manuals
Save this manual to your list of manuals |
Page 147 highlights
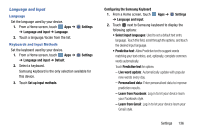
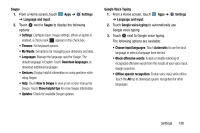
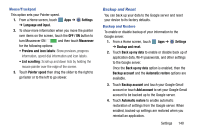
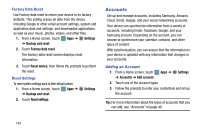
Factory Data Reset Use Factory data reset to return your device to its factory defaults. This setting erases all data from the device, including Google or other email account settings, system and application data and settings, and downloaded applications, as well as your music, photos, videos, and other files. 1. From a Home screen, touch Apps ➔ Settings ➔ Backup and reset. 2. Touch Factory data reset. The Factory data reset screen displays reset information. 3. Touch Reset device, then follow the prompts to perform the reset. Reset Settings To reset system settings back to their default values: 1. From a Home screen, touch Apps ➔ ➔ Backup and reset. Settings 2. Touch Reset settings. Accounts Set up and manage accounts, including Samsung, Amazon, Cloud, Email, Google, and your social networking accounts. Your device can synchronize information from a variety of accounts, including Email, Facebook, Google, and your Samsung account. Depending on the account, you can choose to synchronize your calendar, contacts, and other types of content. With synchronization, you can ensure that the information on your device is updated with any information that changes in your accounts. Adding an Account 1. From a Home screen, touch ➔ Accounts ➔ Add account. Apps ➔ Settings 2. Touch one of the account types. 3. Follow the prompts to enter your credentials and set up the account. Tip: For more information about the types of accounts that you can add, see "Accounts" on page 40. 141
-
 1
1 -
2
-
3
-
4
-
5
-
6
-
7
-
8
-
9
-
10
-
11
-
12
-
13
-
14
-
15
-
16
-
17
-
18
-
19
-
20
-
21
-
22
-
23
-
24
-
25
-
26
-
27
-
28
-
29
-
30
-
31
-
32
-
33
-
34
-
35
-
36
-
37
-
38
-
39
-
40
-
41
-
42
-
43
-
44
-
45
-
46
-
47
-
48
-
49
-
50
-
51
-
52
-
53
-
54
-
55
-
56
-
57
-
58
-
59
-
60
-
61
-
62
-
63
-
64
-
65
-
66
-
67
-
68
-
69
-
70
-
71
-
72
-
73
-
74
-
75
-
76
-
77
-
78
-
79
-
80
-
81
-
82
-
83
-
84
-
85
-
86
-
87
-
88
-
89
-
90
-
91
-
92
-
93
-
94
-
95
-
96
-
97
-
98
-
99
-
100
-
101
-
102
-
103
-
104
-
105
-
106
-
107
-
108
-
109
-
110
-
111
-
112
-
113
-
114
-
115
-
116
-
117
-
118
-
119
-
120
-
121
-
122
-
123
-
124
-
125
-
126
-
127
-
128
-
129
-
130
-
131
-
132
-
133
-
134
-
135
-
136
-
137
-
138
-
139
-
140
-
141
-
 142
142 -
 143
143 -
 144
144 -
 145
145 -
 146
146 -
 147
147 -
 148
148 -
 149
149 -
 150
150 -
 151
151 -
 152
152 -
153
-
154
-
155
-
156
-
157
-
158
 |
 |
