Sony HDR-FX1 Operating Instructions - Page 104
To attach the shoe adaptor, To remove the lens hood, SEL/PUSH EXEC dial p. 51
 |
UPC - 027242654815
View all Sony HDR-FX1 manuals
Add to My Manuals
Save this manual to your list of manuals |
Page 104 highlights
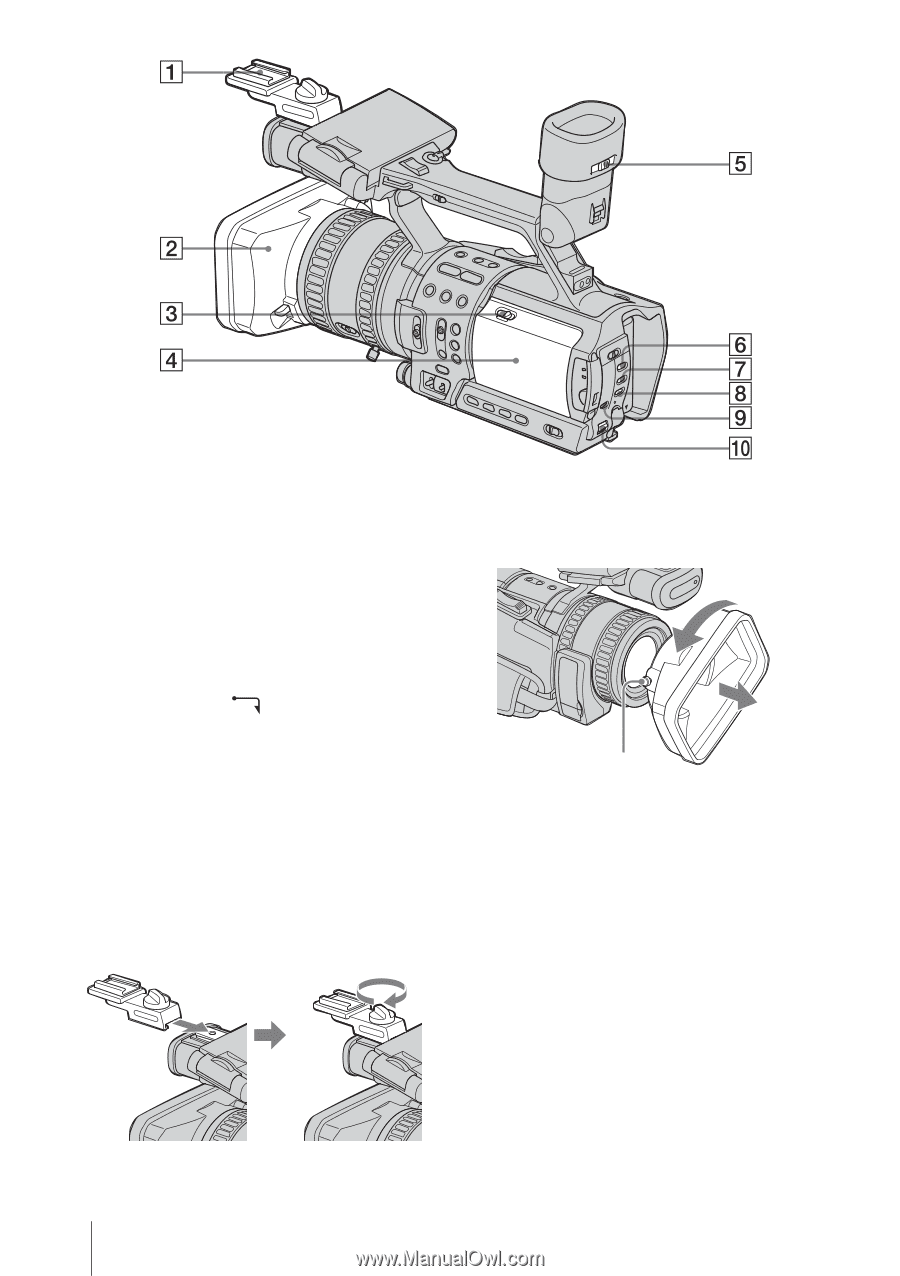
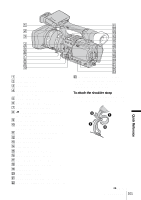
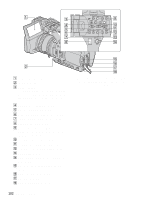
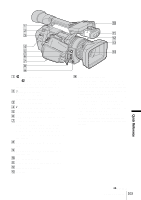
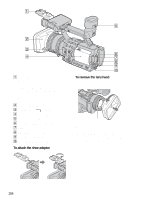
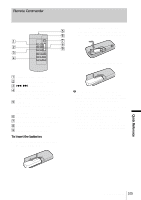
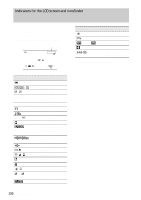
A Shoe adaptor To connect an accessory, press down and push it to the end, and then tighten the screw. To remove an accessory, loosen the screw, and then press down and pull out the accessory. When you attach the shoe adaptor, be careful not to damage the LCD panel. B Lens hood (p. 20) C OPEN/EJECT lever (p. 17) D Cassette compartment lid (p. 17) E Viewfinder lens adjustment lever (p. 15) F PICTURE PROFILE button (p. 34) G MENU button (p. 51) H P-MENU button (p. 65) I STATUS CHECK button (p. 24, 45) J SEL/PUSH EXEC dial (p. 51) To attach the shoe adaptor To remove the lens hood Loosen the lens hood fixing screw, then turn the lens hood in the direction of the arrow. Hood fixing screw To attach the lens hood Align the marks on the lens hood to those on the camcorder, and turn the lens hood in the opposite direction of the arrow in the figure above. Tighten the lens hood fixing screw. 104 Quick Reference
-
 1
1 -
2
-
3
-
4
-
5
-
6
-
7
-
8
-
9
-
10
-
11
-
12
-
13
-
14
-
15
-
16
-
17
-
18
-
19
-
20
-
21
-
22
-
23
-
24
-
25
-
26
-
27
-
28
-
29
-
30
-
31
-
32
-
33
-
34
-
35
-
36
-
37
-
38
-
39
-
40
-
41
-
42
-
43
-
44
-
45
-
46
-
47
-
48
-
49
-
50
-
51
-
52
-
53
-
54
-
55
-
56
-
57
-
58
-
59
-
60
-
61
-
62
-
63
-
64
-
65
-
66
-
67
-
68
-
69
-
70
-
71
-
72
-
73
-
74
-
75
-
76
-
77
-
78
-
79
-
80
-
81
-
82
-
83
-
84
-
85
-
86
-
87
-
88
-
89
-
90
-
91
-
92
-
93
-
94
-
95
-
96
-
97
-
98
-
 99
99 -
 100
100 -
 101
101 -
 102
102 -
 103
103 -
 104
104 -
 105
105 -
 106
106 -
 107
107 -
 108
108 -
 109
109 -
110
-
111
-
112
 |
 |