Sony HDR-FX1 Operating Instructions - Page 29
Adjusting the shutter speed
 |
UPC - 027242654815
View all Sony HDR-FX1 manuals
Add to My Manuals
Save this manual to your list of manuals |
Page 29 highlights
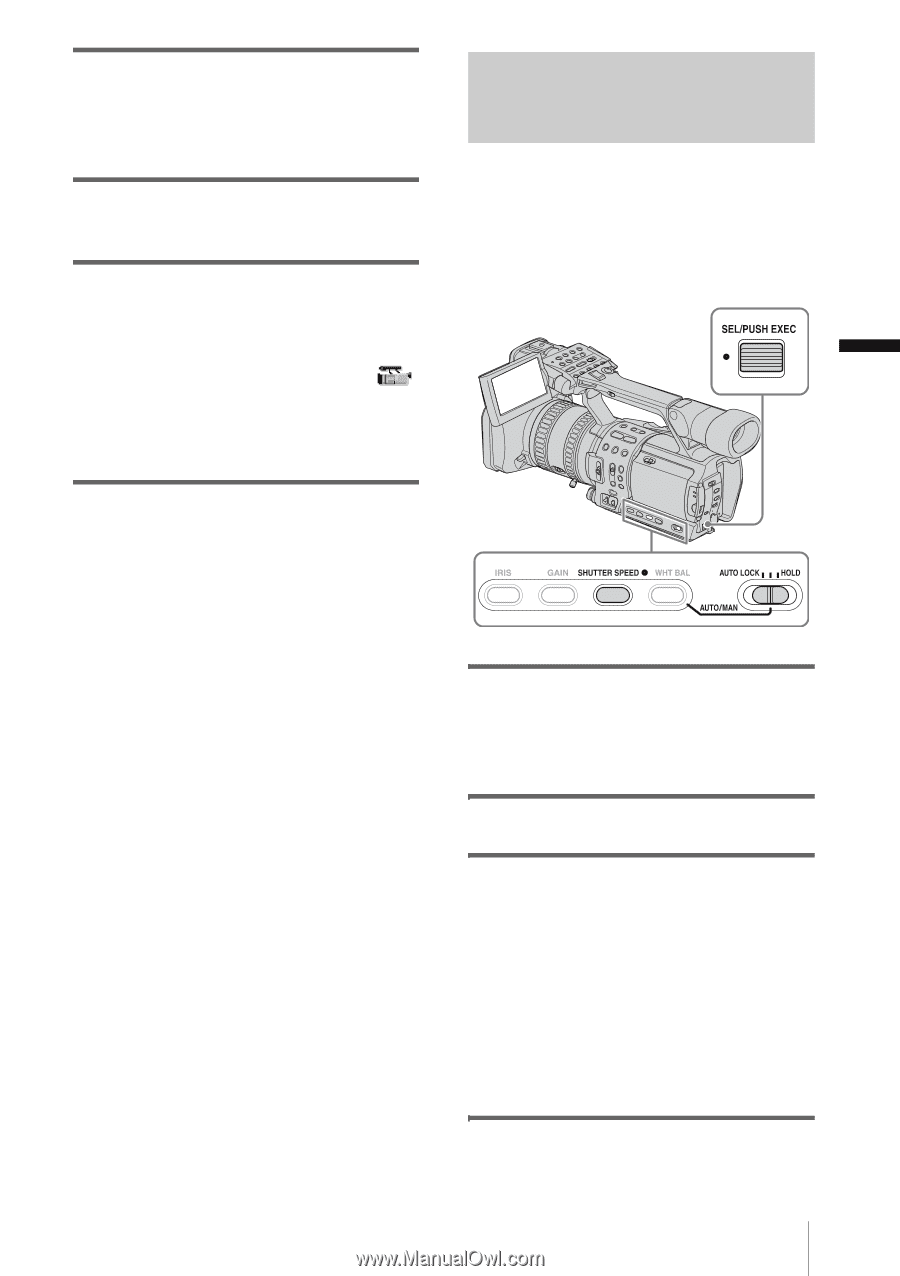
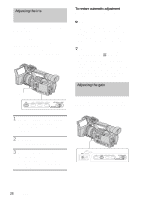
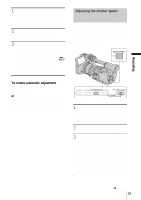
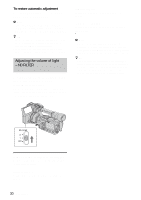
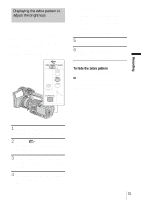
Recording 1 During recording or in the standby mode, set the AUTO LOCK switch to the center position to release the auto lock mode. 2 Press GAIN. The current gain value appears. 3 Set the GAIN switch to the desired position. 3 gain levels (H, M, L) are available. You can set the value for the respective positions with [GAIN SETUP] on the (CAMERA SET) menu (p. 52). The default settings for each position are 18 dB (H), 9 dB (M) and 0 dB (L). The larger the number, the greater the gain. Adjusting the shutter speed You can manually adjust and fix the shutter speed for your convenience. Depending on the shutter speed, you can make the subject look still, or on the contrary, emphasize the fluidity of movement. To restore automatic adjustment Press GAIN, or set the AUTO LOCK switch to AUTO LOCK. b Note • If you set the AUTO LOCK switch to AUTO LOCK, other manually adjusted items (iris, shutter speed, white balance) also become temporarily automatic. 1 During recording or in the standby mode, set the AUTO LOCK switch to the center position to release the auto lock mode. 2 Press SHUTTER SPEED. 3 Adjust the shutter speed by turning the SEL/PUSH EXEC dial. You can select a shutter speed between 1/4 second and 1/10000 second. The selected shutter speed appears on the screen. For example, if you select 1/100 second, [100] appears. The larger the number that appears on the screen, the faster the shutter speed. The smaller the number that appears on the screen, the slower the shutter speed. ,continued Recording 29
-
 1
1 -
2
-
3
-
4
-
5
-
6
-
7
-
8
-
9
-
10
-
11
-
12
-
13
-
14
-
15
-
16
-
17
-
18
-
19
-
20
-
21
-
22
-
23
-
 24
24 -
 25
25 -
 26
26 -
 27
27 -
 28
28 -
 29
29 -
 30
30 -
 31
31 -
 32
32 -
 33
33 -
 34
34 -
35
-
36
-
37
-
38
-
39
-
40
-
41
-
42
-
43
-
44
-
45
-
46
-
47
-
48
-
49
-
50
-
51
-
52
-
53
-
54
-
55
-
56
-
57
-
58
-
59
-
60
-
61
-
62
-
63
-
64
-
65
-
66
-
67
-
68
-
69
-
70
-
71
-
72
-
73
-
74
-
75
-
76
-
77
-
78
-
79
-
80
-
81
-
82
-
83
-
84
-
85
-
86
-
87
-
88
-
89
-
90
-
91
-
92
-
93
-
94
-
95
-
96
-
97
-
98
-
99
-
100
-
101
-
102
-
103
-
104
-
105
-
106
-
107
-
108
-
109
-
110
-
111
-
112
 |
 |