Sony HDR-FX1 Operating Instructions - Page 28
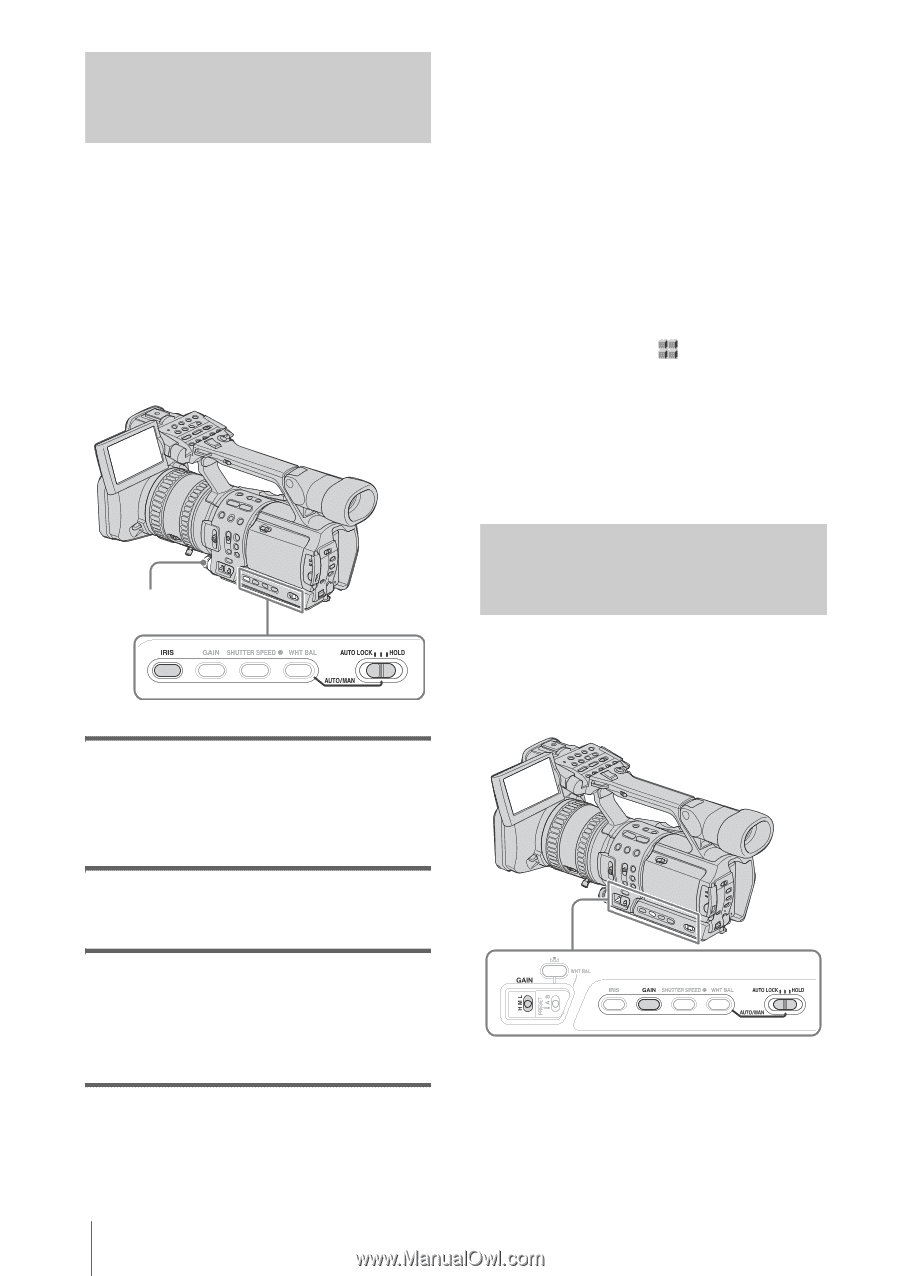
Adjusting the iris
 |
UPC - 027242654815
View all Sony HDR-FX1 manuals
Add to My Manuals
Save this manual to your list of manuals |
Page 28 highlights
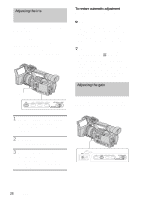
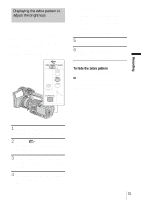
Adjusting the iris You can manually adjust the light volume entering the lens. As the iris is opened (smaller aperture values), the light volume increases. The range of focus narrows and only the subject appears in sharp focus. As the iris is closed (larger aperture values), the light volume decreases and the range of focus widens. IRIS dial 1 During recording or in the standby mode, set the AUTO LOCK switch to the center position to release the auto lock mode. 2 Press IRIS. The current aperture value (F) appears. 3 Rotate the IRIS dial to a desired aperture value. The aperture value (F) varies from F1.6 to F11, and Close, and the corresponding value appears. To restore automatic adjustment Press IRIS, or set the AUTO LOCK switch to AUTO LOCK. b Note • If you set the AUTO LOCK switch to AUTO LOCK, other manually adjusted items (gain, shutter speed, white balance) also become temporarily automatic. • As you shift the zoom from W (wide) to T (telephoto), the aperture value varies from F1.6 to F2.8. z Tip • You can select the rotation direction of the iris dial with [IRIS DIAL] on the (OTHERS) menu (p. 63). • The iris has an important effect on the "depth of field," that is, the focused range. An open iris makes the depth of field shallower (shorter focused range), and a closed iris makes the depth of field deeper (longer focused range). Use the iris effectively according to your purpose of recording. Adjusting the gain Adjust the gain manually when shooting blackish or dark objects if you do not want the AGC (auto gain control) to be activated. 28 Recording
-
 1
1 -
2
-
3
-
4
-
5
-
6
-
7
-
8
-
9
-
10
-
11
-
12
-
13
-
14
-
15
-
16
-
17
-
18
-
19
-
20
-
21
-
22
-
 23
23 -
 24
24 -
 25
25 -
 26
26 -
 27
27 -
 28
28 -
 29
29 -
 30
30 -
 31
31 -
 32
32 -
 33
33 -
34
-
35
-
36
-
37
-
38
-
39
-
40
-
41
-
42
-
43
-
44
-
45
-
46
-
47
-
48
-
49
-
50
-
51
-
52
-
53
-
54
-
55
-
56
-
57
-
58
-
59
-
60
-
61
-
62
-
63
-
64
-
65
-
66
-
67
-
68
-
69
-
70
-
71
-
72
-
73
-
74
-
75
-
76
-
77
-
78
-
79
-
80
-
81
-
82
-
83
-
84
-
85
-
86
-
87
-
88
-
89
-
90
-
91
-
92
-
93
-
94
-
95
-
96
-
97
-
98
-
99
-
100
-
101
-
102
-
103
-
104
-
105
-
106
-
107
-
108
-
109
-
110
-
111
-
112
 |
 |