Sony HDR-FX1 Operating Instructions - Page 37
Recording a picture using various features, Developing scenes smoothly - Shot transition, Recording
 |
UPC - 027242654815
View all Sony HDR-FX1 manuals
Add to My Manuals
Save this manual to your list of manuals |
Page 37 highlights
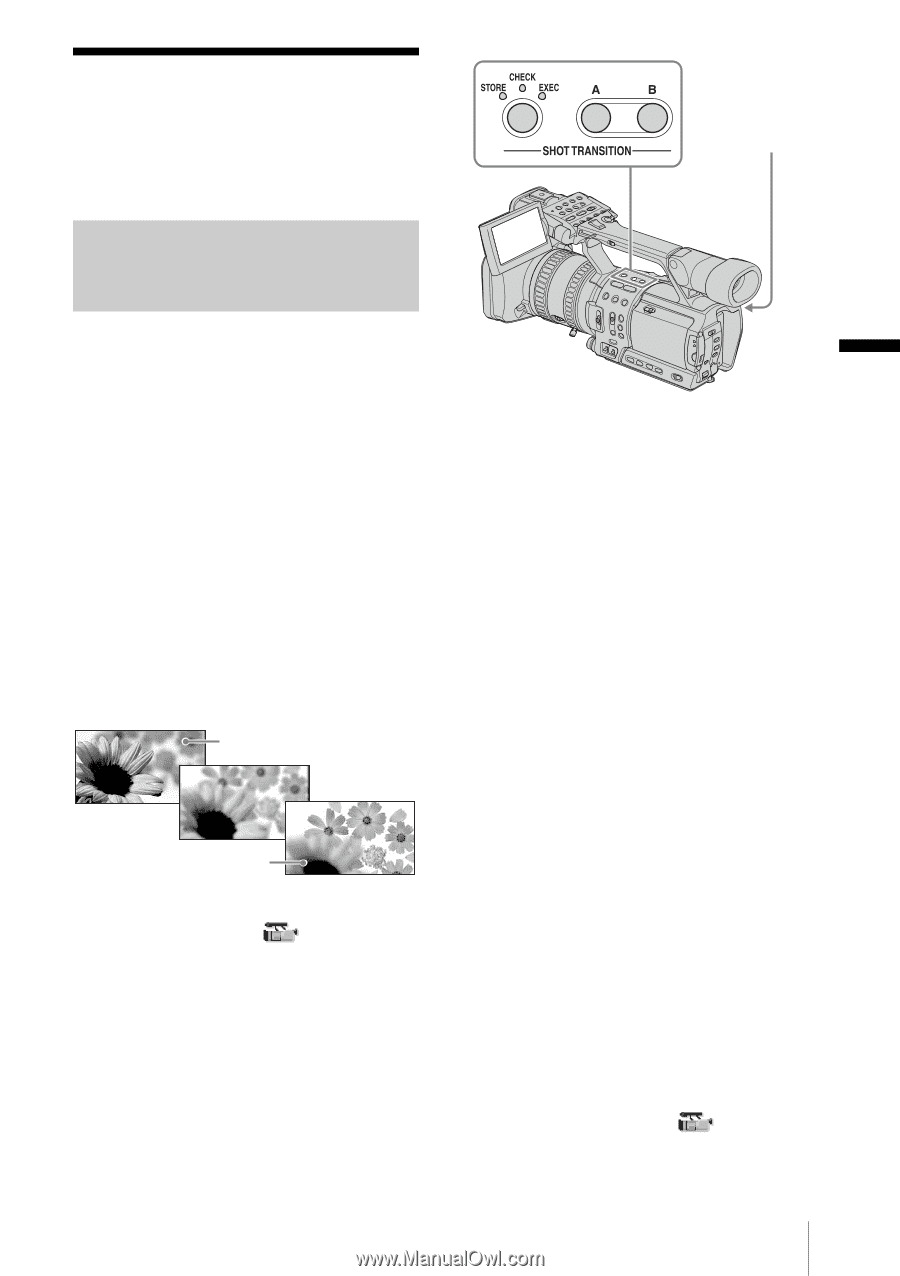
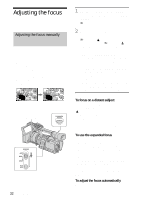
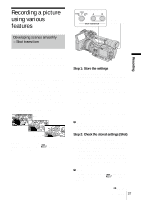
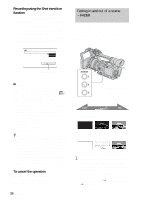
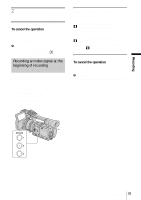
Recording a picture using various features Developing scenes smoothly - Shot transition REC START/STOP Recording You can register the settings of focus, zoom, iris, gain, shutter speed, and white balance, and then change the recording setting from the current one to the registered one, resulting in a smooth transition of scenes (Shot transition). For example, you can shift the focus from closer objects to farther objects, or change the depth of field by adjusting the iris. In addition, you can develop scenes under different recording conditions smoothly. If you register the manual adjustment function of the white balance, the scenes will develop smoothly between objects indoor and those outdoor. Use a tripod to avoid camera-shake. SHOT A SHOT B Set the transition curve and duration using [SHOT TRANS] on the (CAMERA SET) menu (p. 53). Step 1: Store the settings 1 Press STORE/CHECK/EXEC repeatedly to turn on the STORE lamp. 2 Adjust the desired items manually. To adjust the camera setup items such as iris manually, set the AUTO LOCK switch to the center position to release the auto lock mode. See pages 26 to 29 for details on adjustment. 3 Press a button (A or B) to select the storage location. The setting is stored in the selected button. The settings are called Shot A and Shot B respectively. b Note • If you set the POWER switch to OFF (CHG), the settings stored in Shot A and B are deleted. Step 2: Check the stored settings (Shot) 1 Press STORE/CHECK/EXEC repeatedly to turn on the CHECK lamp. 2 Press the button (A or B) in which the setting was stored. The selected setting will take effect on the picture on the screen. The focus, zoom, and so on, are automatically adjusted as stored in the setting. b Note • You cannot check the transition time and curve set using [SHOT TRANS] on the (CAMERA SET) menu. ,continued Recording 37
-
 1
1 -
2
-
3
-
4
-
5
-
6
-
7
-
8
-
9
-
10
-
11
-
12
-
13
-
14
-
15
-
16
-
17
-
18
-
19
-
20
-
21
-
22
-
23
-
24
-
25
-
26
-
27
-
28
-
29
-
30
-
31
-
 32
32 -
 33
33 -
 34
34 -
 35
35 -
 36
36 -
 37
37 -
 38
38 -
 39
39 -
 40
40 -
 41
41 -
 42
42 -
43
-
44
-
45
-
46
-
47
-
48
-
49
-
50
-
51
-
52
-
53
-
54
-
55
-
56
-
57
-
58
-
59
-
60
-
61
-
62
-
63
-
64
-
65
-
66
-
67
-
68
-
69
-
70
-
71
-
72
-
73
-
74
-
75
-
76
-
77
-
78
-
79
-
80
-
81
-
82
-
83
-
84
-
85
-
86
-
87
-
88
-
89
-
90
-
91
-
92
-
93
-
94
-
95
-
96
-
97
-
98
-
99
-
100
-
101
-
102
-
103
-
104
-
105
-
106
-
107
-
108
-
109
-
110
-
111
-
112
 |
 |