Sony HDR-FX1 Operating Instructions - Page 83
Troubleshooting - problems
 |
UPC - 027242654815
View all Sony HDR-FX1 manuals
Add to My Manuals
Save this manual to your list of manuals |
Page 83 highlights
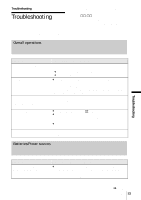
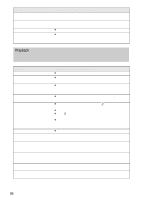
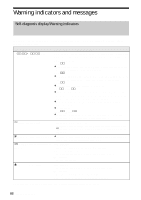
Troubleshooting Troubleshooting If you run into any problem using your camcorder, use the following table to troubleshoot the problem. If the problem Overall operations persists, remove the power source and contact your Sony dealer. If "C:ss:ss" is displayed on the LCD screen or the viewfinder, the self-diagnosis display function is activated. See page 88 for details. Troubleshooting Symptom Cause and/or Corrective Actions The power does not turn on. • The battery pack is discharged, running low, or not attached to the camcorder. cAttach a charged battery pack to the camcorder (p. 11). cUse the AC Adaptor to connect to the wall outlet (p. 14). The camcorder does not operate even when the power is set to on. cDisconnect the AC Adaptor from the wall outlet or remove the battery pack, then reconnect it after about 1 minute. If the functions still do not work, press the RESET button using a sharp-pointed object. If you press the RESET button, all settings including the clock setting (except the Personal Menu and Picture Profile settings) are reset. A clattering noise is heard when the camcorder is handled with the POWER switch set to OFF (CHG) or VCR. • This is because some lens functions on the camcorder use a linear mechanism. This is not a malfunction. The supplied Remote Commander does not function. cSet [REMOTE CTRL] on the (OTHERS) menu to [ON] (p. 64). cInsert batteries into the battery compartment with the + - polarities correctly matching the + - marks. If this still does not solve the problem, insert new batteries since the batteries are dead (p. 105). cRemove any obstructions between the Remote Commander and the remote sensor. The camcorder gets warm. • This is because the power has been turned on for a long time. This is not a malfunction. Batteries/Power sources Symptom The CHG (charge) lamp does not light while the battery pack is being charged. Cause and/or Corrective Actions cAttach the battery pack to the camcorder correctly. If the lamp still does not light up, then it indicates that no power is supplied from the wall outlet. • The battery charge is completed (p. 11). ,continued Troubleshooting 83
-
 1
1 -
2
-
3
-
4
-
5
-
6
-
7
-
8
-
9
-
10
-
11
-
12
-
13
-
14
-
15
-
16
-
17
-
18
-
19
-
20
-
21
-
22
-
23
-
24
-
25
-
26
-
27
-
28
-
29
-
30
-
31
-
32
-
33
-
34
-
35
-
36
-
37
-
38
-
39
-
40
-
41
-
42
-
43
-
44
-
45
-
46
-
47
-
48
-
49
-
50
-
51
-
52
-
53
-
54
-
55
-
56
-
57
-
58
-
59
-
60
-
61
-
62
-
63
-
64
-
65
-
66
-
67
-
68
-
69
-
70
-
71
-
72
-
73
-
74
-
75
-
76
-
77
-
 78
78 -
 79
79 -
 80
80 -
 81
81 -
 82
82 -
 83
83 -
 84
84 -
 85
85 -
 86
86 -
 87
87 -
 88
88 -
89
-
90
-
91
-
92
-
93
-
94
-
95
-
96
-
97
-
98
-
99
-
100
-
101
-
102
-
103
-
104
-
105
-
106
-
107
-
108
-
109
-
110
-
111
-
112
 |
 |