Sony HDR-FX1 Operating Instructions - Page 70
Dubbing/Editing, Dubbing to another tape
 |
UPC - 027242654815
View all Sony HDR-FX1 manuals
Add to My Manuals
Save this manual to your list of manuals |
Page 70 highlights
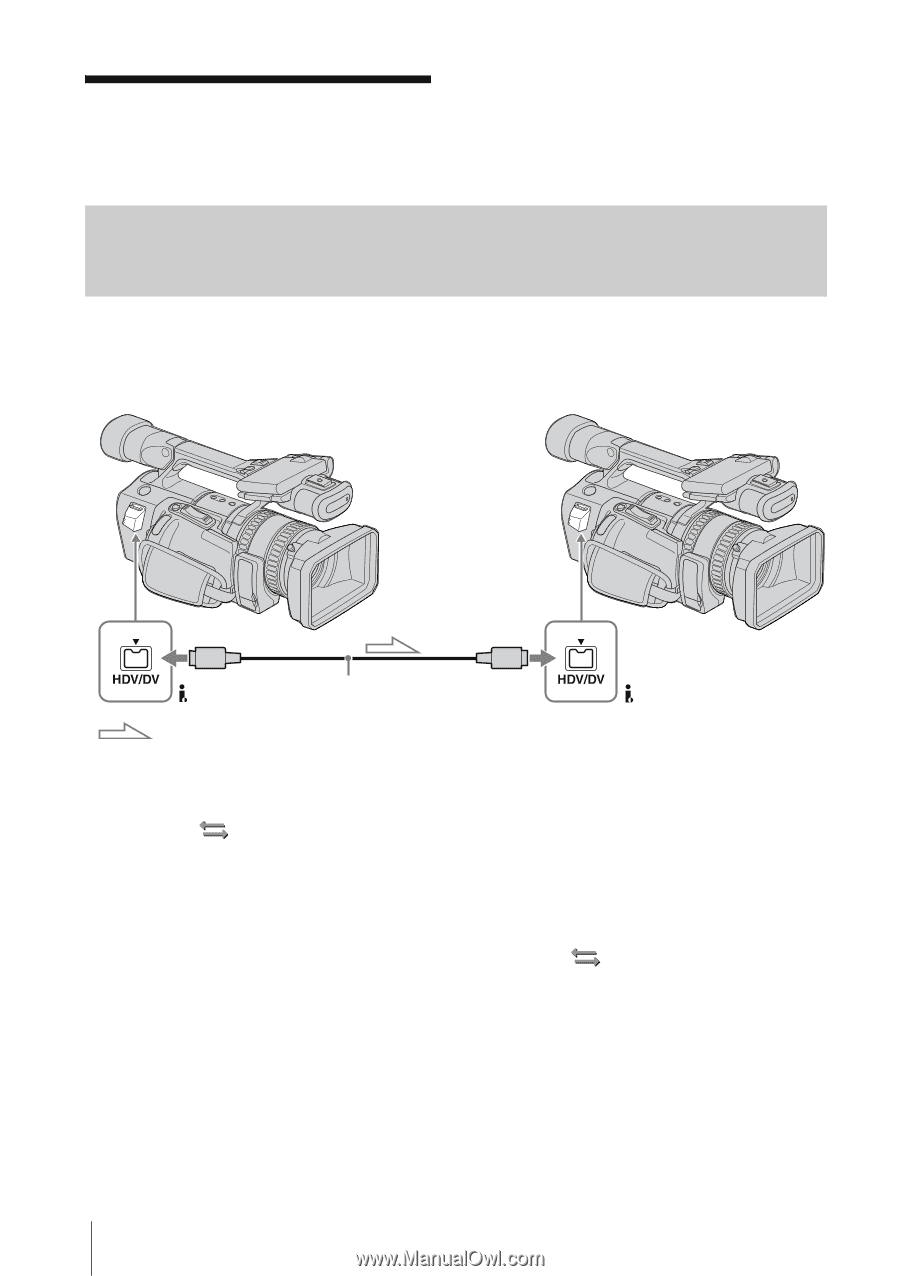
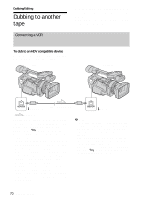
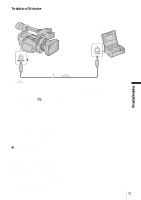
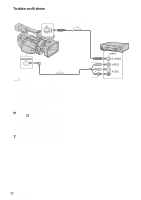
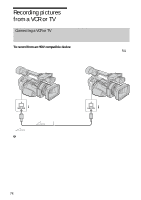
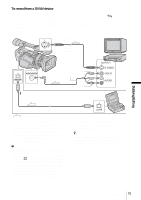
Dubbing/Editing Dubbing to another tape Connecting a VCR You can copy a picture played back on your camcorder to other recording devices (such as VCRs). Connect your camcorder to a VCR as shown in the following illustration. To dub to an HDV compatible device Connect your camcorder to an HDV compatible device using an i.LINK cable (optional). Player Recorder i.LINK cable (optional) HDV/DV jack HDV/DV jack Signal flow To select the video format to be dubbed The video format to be dubbed depends on the settings of [VCR HDV/DV] and [i.LINK CONV] on the (IN/OUT REC) menu. Before setting these menu items, disconnect the i.LINK cable. • Pictures will be dubbed in the recorded format when [VCR HDV/DV] is set to [AUTO] and [i.LINK CONV] is set to [OFF]. • Pictures, including those recorded in the HDV format, will be dubbed in the DV format when [VCR HDV/DV] is set to [AUTO], and [i.LINK CONV] is set to [ON]. • Only pictures in the selected format will be dubbed when [VCR HDV/DV] is set to [HDV] or [DV]. Other pictures will be dubbed as blank portions, so neither picture nor sound will be dubbed. b Note • If you change the settings of [VCR HDV/DV] and [i.LINK CONV] with the i.LINK cable connected, the video device may not be able to recognize the video signal from the camcorder at the time of dubbing. • When [VCR HDV/DV] is set to [AUTO] and the signal switches between HDV and DV, the picture and sound disappear temporarily. • When the recorder is an HDR-FX1, set [VCR HDV/ DV] on the (IN/OUT REC) menu to [AUTO] on the recording HDR-FX1 (p. 74). 70 Dubbing/Editing
-
 1
1 -
2
-
3
-
4
-
5
-
6
-
7
-
8
-
9
-
10
-
11
-
12
-
13
-
14
-
15
-
16
-
17
-
18
-
19
-
20
-
21
-
22
-
23
-
24
-
25
-
26
-
27
-
28
-
29
-
30
-
31
-
32
-
33
-
34
-
35
-
36
-
37
-
38
-
39
-
40
-
41
-
42
-
43
-
44
-
45
-
46
-
47
-
48
-
49
-
50
-
51
-
52
-
53
-
54
-
55
-
56
-
57
-
58
-
59
-
60
-
61
-
62
-
63
-
64
-
 65
65 -
 66
66 -
 67
67 -
 68
68 -
 69
69 -
 70
70 -
 71
71 -
 72
72 -
 73
73 -
 74
74 -
 75
75 -
76
-
77
-
78
-
79
-
80
-
81
-
82
-
83
-
84
-
85
-
86
-
87
-
88
-
89
-
90
-
91
-
92
-
93
-
94
-
95
-
96
-
97
-
98
-
99
-
100
-
101
-
102
-
103
-
104
-
105
-
106
-
107
-
108
-
109
-
110
-
111
-
112
 |
 |