Sony HDR-FX1 Operating Instructions - Page 51
Using the Menu, Selecting menu items
 |
UPC - 027242654815
View all Sony HDR-FX1 manuals
Add to My Manuals
Save this manual to your list of manuals |
Page 51 highlights
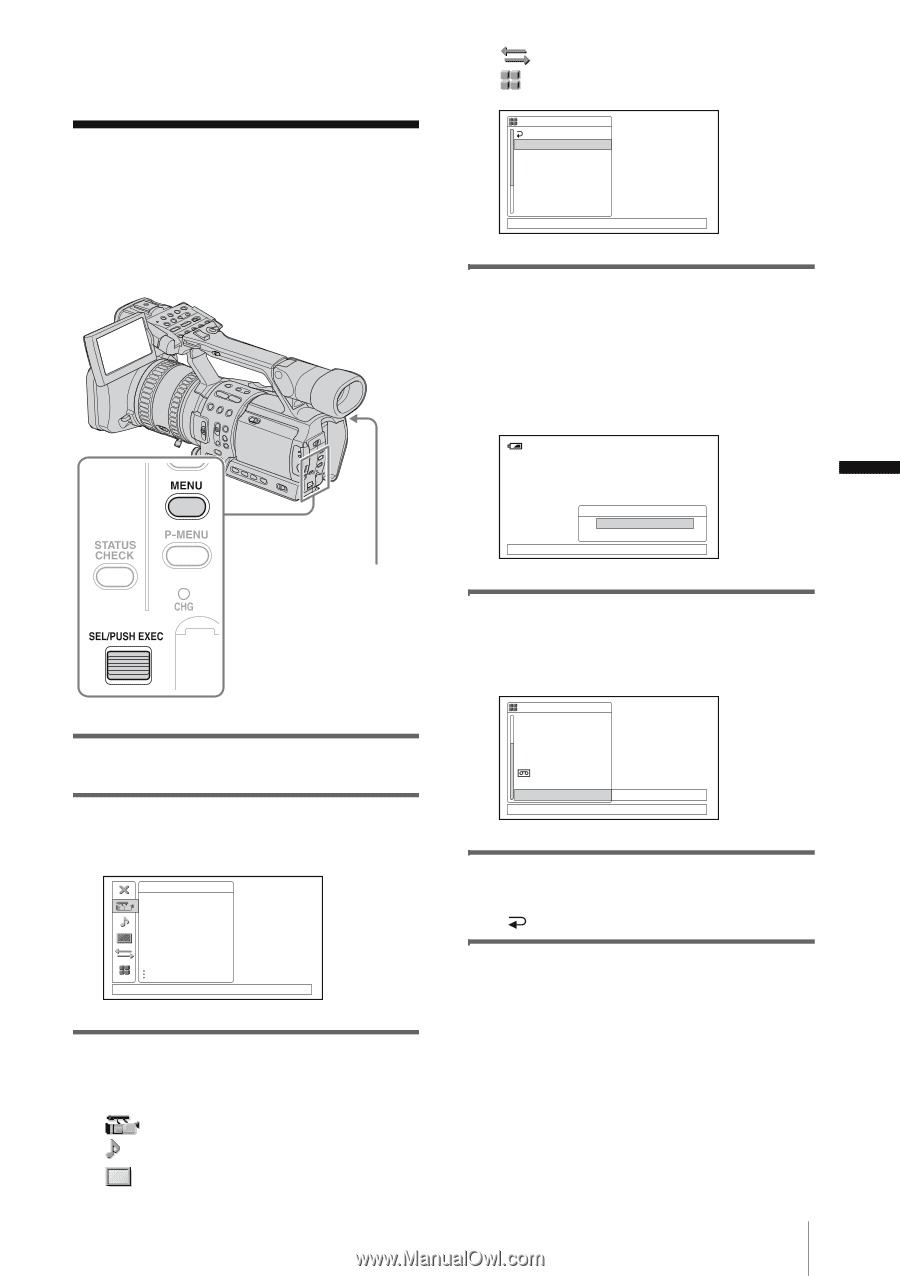
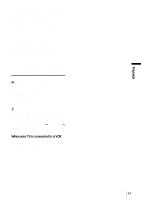
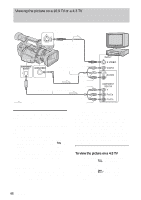
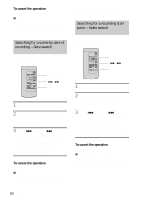
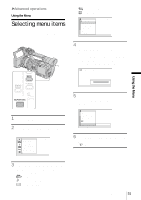
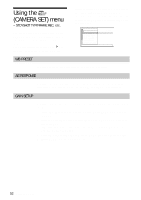
BAdvanced operations Using the Menu Selecting menu items You can change various settings or make detailed adjustments using the menu items displayed on the screen. IN/OUT REC (p. 59) OTHERS (p. 62) OTHERS RETURN ASS I GN BTN CLOCK SET WORLD T I ME LANGUAGE BEEP REC LAMP FORMAT LAMP [ MENU ] : END STBY 4 Select the desired item by turning the SEL/PUSH EXEC dial, then press the dial. The available menu items vary depending on the power mode of your camcorder. Unavailable items will be grayed out. 1 2 0min STBY 0:00:00 Using the Menu POWER switch 1 Turn on the power (p. 14). 2 Press MENU to display the menu index screen. CAMERA SET WB PRESET AE RESPONSE GA I N SETUP SHOT TRANS STEADYSHOT STDYSHOT TYP FLCKR REDUCE [ MENU ] : END STBY 3 Select the icon of the desired menu by turning the SEL/PUSH EXEC dial, then press the dial. CAMERA SET (p. 52) AUDIO SET (p. 56) LCD/VF SET (p. 58) REMOTE CTRL ON OFF [ MENU ] : END 5 Select the desired setting by turning the SEL/PUSH EXEC dial, then press the dial. OTHERS BEEP REC LAMP FORMAT LAMP I R I S D I AL LETTER S I ZE REMA I N I NG D I SP OUTPUT REMOTE CTRL [ MENU ] : END OFF STBY 6 Press MENU to hide the menu screen. To return to the previous screen, select [ RETURN]. Using the Menu 51
-
 1
1 -
2
-
3
-
4
-
5
-
6
-
7
-
8
-
9
-
10
-
11
-
12
-
13
-
14
-
15
-
16
-
17
-
18
-
19
-
20
-
21
-
22
-
23
-
24
-
25
-
26
-
27
-
28
-
29
-
30
-
31
-
32
-
33
-
34
-
35
-
36
-
37
-
38
-
39
-
40
-
41
-
42
-
43
-
44
-
45
-
 46
46 -
 47
47 -
 48
48 -
 49
49 -
 50
50 -
 51
51 -
 52
52 -
 53
53 -
 54
54 -
 55
55 -
 56
56 -
57
-
58
-
59
-
60
-
61
-
62
-
63
-
64
-
65
-
66
-
67
-
68
-
69
-
70
-
71
-
72
-
73
-
74
-
75
-
76
-
77
-
78
-
79
-
80
-
81
-
82
-
83
-
84
-
85
-
86
-
87
-
88
-
89
-
90
-
91
-
92
-
93
-
94
-
95
-
96
-
97
-
98
-
99
-
100
-
101
-
102
-
103
-
104
-
105
-
106
-
107
-
108
-
109
-
110
-
111
-
112
 |
 |