Sony HDR-FX1 Operating Instructions - Page 27
Recording using manual adjustments - video
 |
UPC - 027242654815
View all Sony HDR-FX1 manuals
Add to My Manuals
Save this manual to your list of manuals |
Page 27 highlights
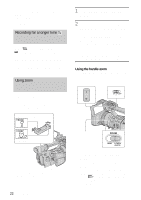
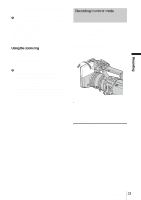
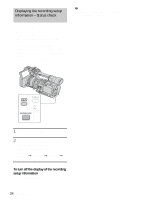
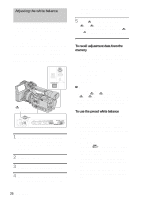
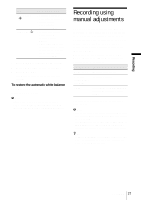
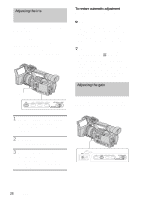
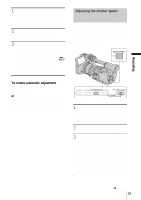
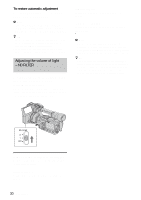
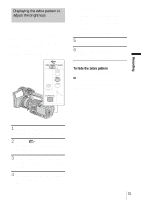
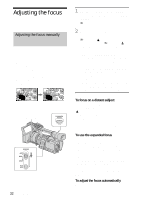
Recording Item [OUTDOOR] () [INDOOR] (n) Recording scene • general night views, neon signs, or fireworks • sunset, sunrise • under daylight fluorescent lamps • at party or in studios where lighting conditions change quickly • under video lamps such as those in a studio, under sodium lamps, mercury lamps, or warm white fluorescent lamps 6 Press MENU to hide the menu screen. 7 Set the WHT BAL switch to PRESET. 8 Press WHT BAL. The white balance is set to the selected setting. To restore the automatic white balance Press WHT BAL, or set the AUTO LOCK switch to AUTO LOCK. b Note • If you set the AUTO LOCK switch to AUTO LOCK, other manually adjusted items (iris, gain, shutter speed) also become temporarily automatic. Recording using manual adjustments You can manually adjust the iris, gain, etc. according to the brightness of the recording scene or in order to obtain desired effects. Adjust the iris, gain, shutter speed, and white balance after setting the AUTO LOCK switch to the center position to release the auto lock mode. Depending on the position of the AUTO LOCK switch, you can hold or release the settings of these functions. Position Purpose AUTO LOCK To adjust automatically. Center (to To adjust manually. release the auto lock mode) HOLD Select this position after adjusting the settings manually to retain them. See page 26 for details on how to adjust the white balance. b Note • If you want to set the exposure intentionally to other than a proper level, adjust the iris, gain, and shutter speed manually. • If you adjust only one of either iris, shutter speed, or gain manually, you can record with iris priority, shutter speed priority, or gain priority, respectively. z Tip • To adjust the brightness of pictures, set all of the iris, gain, and shutter speed to the manual adjustment mode, then rotate the iris dial. Recording 27
-
 1
1 -
2
-
3
-
4
-
5
-
6
-
7
-
8
-
9
-
10
-
11
-
12
-
13
-
14
-
15
-
16
-
17
-
18
-
19
-
20
-
21
-
 22
22 -
 23
23 -
 24
24 -
 25
25 -
 26
26 -
 27
27 -
 28
28 -
 29
29 -
 30
30 -
 31
31 -
 32
32 -
33
-
34
-
35
-
36
-
37
-
38
-
39
-
40
-
41
-
42
-
43
-
44
-
45
-
46
-
47
-
48
-
49
-
50
-
51
-
52
-
53
-
54
-
55
-
56
-
57
-
58
-
59
-
60
-
61
-
62
-
63
-
64
-
65
-
66
-
67
-
68
-
69
-
70
-
71
-
72
-
73
-
74
-
75
-
76
-
77
-
78
-
79
-
80
-
81
-
82
-
83
-
84
-
85
-
86
-
87
-
88
-
89
-
90
-
91
-
92
-
93
-
94
-
95
-
96
-
97
-
98
-
99
-
100
-
101
-
102
-
103
-
104
-
105
-
106
-
107
-
108
-
109
-
110
-
111
-
112
 |
 |