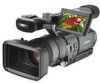
Sony HDR-FX1 Operating Instructions - Page 63
Rec Lamp, Format Lamp, Iris Dial, Data Code, Letter Size
 |
UPC - 027242654815
View all Sony HDR-FX1 manuals
Add to My Manuals
Save this manual to your list of manuals |
Page 63 highlights
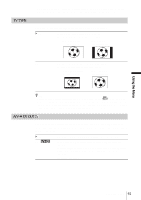
REC LAMP GON OFF FORMAT LAMP Select to turn on the camera recording lamps on the front and rear of your camcorder during recording. Select this setting in the following recording situations. The camera recording lamps on the front and rear will not light up during recording. • When you do not want the subject to be nervous about being recorded. • When you are recording close to the subject. • When the subject reflects the light of the recording lamp. Using the Menu GON OFF Select to turn on the format lamp. The lamp of the format that is selected in [REC FORMAT] lights up when the POWER switch is set to CAMERA. The lamp of the format that is selected in [VCR HDV/ DV] lights up when the POWER switch is set to VCR. Select when you do not want to turn on the format lamp. The i.LINK lamp also does not light up. b Note • The format lamp lights up according to the format of the playback or of an input signal from another device when [VCR HDV/DV] on the (IN/OUT REC) menu is set to [AUTO]. IRIS DIAL You can select the rotation direction of the iris dial to open or close the iris. GNORMAL OPPOSITE Select to rotate clockwise when looked at from the lens side to close the iris and decrease the light volume. Select to rotate counter clockwise when looked at from the lens side to close the iris and decrease the light volume. DATA CODE Select the item to be displayed when you press DATA CODE (p. 44). GDATE/CAM DATE Select to display the date and time, or the camera settings data during playback. Select to display the date and time during playback. LETTER SIZE GNORMAL 2x Select to display the menu screen at normal size. Select to display the selected menu item at double the normal height. ,continued Using the Menu 63
-
 1
1 -
2
-
3
-
4
-
5
-
6
-
7
-
8
-
9
-
10
-
11
-
12
-
13
-
14
-
15
-
16
-
17
-
18
-
19
-
20
-
21
-
22
-
23
-
24
-
25
-
26
-
27
-
28
-
29
-
30
-
31
-
32
-
33
-
34
-
35
-
36
-
37
-
38
-
39
-
40
-
41
-
42
-
43
-
44
-
45
-
46
-
47
-
48
-
49
-
50
-
51
-
52
-
53
-
54
-
55
-
56
-
57
-
 58
58 -
 59
59 -
 60
60 -
 61
61 -
 62
62 -
 63
63 -
 64
64 -
 65
65 -
 66
66 -
 67
67 -
 68
68 -
69
-
70
-
71
-
72
-
73
-
74
-
75
-
76
-
77
-
78
-
79
-
80
-
81
-
82
-
83
-
84
-
85
-
86
-
87
-
88
-
89
-
90
-
91
-
92
-
93
-
94
-
95
-
96
-
97
-
98
-
99
-
100
-
101
-
102
-
103
-
104
-
105
-
106
-
107
-
108
-
109
-
110
-
111
-
112
 |
 |
