Sony HDR-FX1 Operating Instructions - Page 21
Recording, To record from a low-angle, Indicators displayed during recording, battery time. - microphones
 |
UPC - 027242654815
View all Sony HDR-FX1 manuals
Add to My Manuals
Save this manual to your list of manuals |
Page 21 highlights
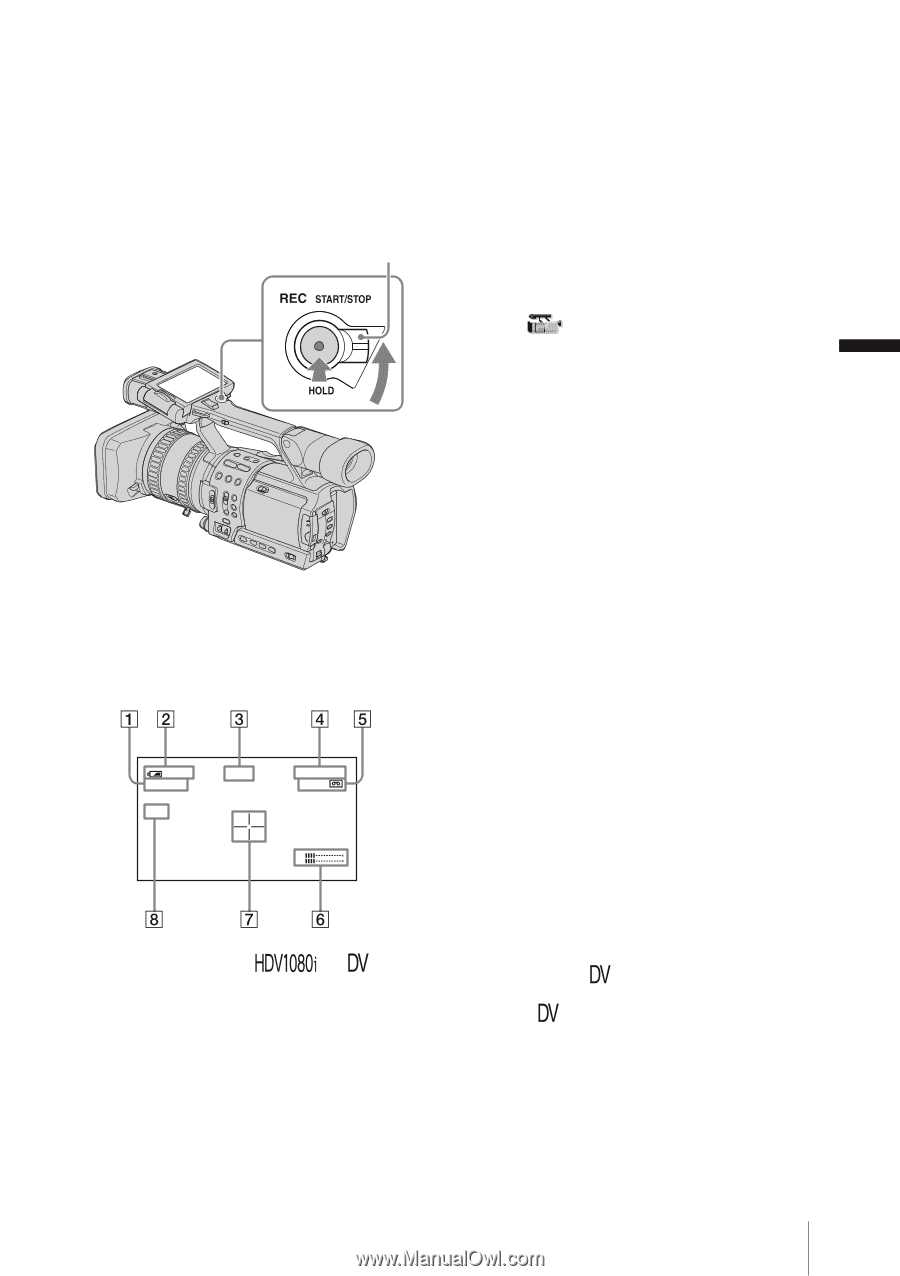
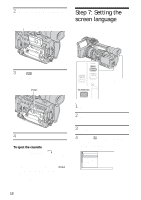
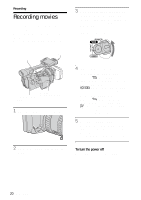
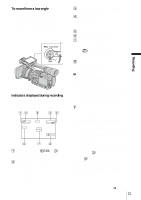
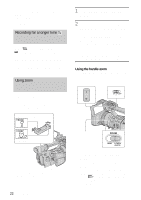
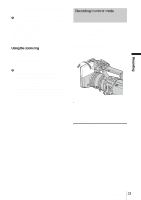
To record from a low-angle Use the REC START/STOP button on the handle after releasing the HOLD lever. To view the picture during recording, face the LCD panel or the viewfinder upward, or face the LCD screen down, then close and restore the LCD panel to the original position with the LCD screen facing out. HOLD lever Indicators displayed during recording The indicators will not be recorded on the tape. Date/time and the camera settings data (p. 44) will not be displayed during recording. 6 0min HDV1080i ND 1 REC 0:00:00 6 0min L R A Recording format ( or ) Recording mode (SP or LP) is also displayed in the DV format. B Remaining battery The indicated time may not be correct, depending on the environment where you are using your camcorder. When you open or close the LCD panel, it takes about 1 minute to display the correct remaining battery time. C Recording status ([STBY] (standby) or [REC] (recording)) D Time code or tape counter (hour: minute: second) The time code of this camcorder utilizes the drop-frame system. E Recording capacity of the tape (p. 64) F Microphone volume level (p. 36) G Center marker (p. 55) The center marker appears at the center of the screen when [CENTER MARKR] on the (CAMERA SET) menu is set to [ON]. It helps composing pictures on the screen. H ND filter If [ND1] or [ND2] flashes on the screen, activate the ND filter (p. 30). b Note • Before changing the battery pack, set the POWER switch to OFF (CHG). • When the camcorder is left in recording standby for more than about 5 minutes, your camcorder exits the recording standby mode (the drum stops rotating) to prevent tape wear and battery loss. Since the power does not turn off, you can restart recording by pressing REC START/STOP again. It takes some time to restart recording, but this not a malfunction. z Tip • You can record the color bars on a tape. If you record movies including the color bars, you can adjust the color while observing the color bars when you are viewing the pictures on a TV or monitor. To display the color bars, press BARS. Press BARS again to hide the color bars. • To ensure smooth transition on a tape from the last recorded scene to the next, note the following. - Do not remove the cassette. (The picture will be recorded continuously without a break even when you turn the power off). - Do not record pictures in the HDV format and the DV format on the same tape. - Do not record pictures in SP mode and LP mode on the same tape. - Avoid stopping then recording a movie in the LP mode. • The recording time, date, and the camera settings data are recorded automatically on the tape without being displayed on the screen. You can view this information during playback by pressing DATA CODE (p. 44). ,continued Recording 21 Recording
-
 1
1 -
2
-
3
-
4
-
5
-
6
-
7
-
8
-
9
-
10
-
11
-
12
-
13
-
14
-
15
-
 16
16 -
 17
17 -
 18
18 -
 19
19 -
 20
20 -
 21
21 -
 22
22 -
 23
23 -
 24
24 -
 25
25 -
 26
26 -
27
-
28
-
29
-
30
-
31
-
32
-
33
-
34
-
35
-
36
-
37
-
38
-
39
-
40
-
41
-
42
-
43
-
44
-
45
-
46
-
47
-
48
-
49
-
50
-
51
-
52
-
53
-
54
-
55
-
56
-
57
-
58
-
59
-
60
-
61
-
62
-
63
-
64
-
65
-
66
-
67
-
68
-
69
-
70
-
71
-
72
-
73
-
74
-
75
-
76
-
77
-
78
-
79
-
80
-
81
-
82
-
83
-
84
-
85
-
86
-
87
-
88
-
89
-
90
-
91
-
92
-
93
-
94
-
95
-
96
-
97
-
98
-
99
-
100
-
101
-
102
-
103
-
104
-
105
-
106
-
107
-
108
-
109
-
110
-
111
-
112
 |
 |