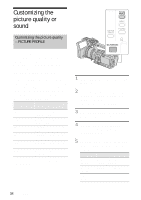
Sony HDR-FX1 Operating Instructions - Page 36
Adjusting the audio recording level - Microphone volume level, Adjusting the audio recording
 |
UPC - 027242654815
View all Sony HDR-FX1 manuals
Add to My Manuals
Save this manual to your list of manuals |
Page 36 highlights
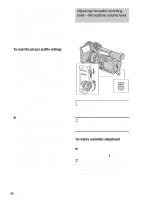
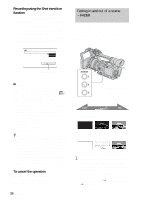
4 Select [COPY] by turning the SEL/ PUSH EXEC dial, then press the dial. 5 Select the number of the picture profile to be copied to by turning the SEL/PUSH EXEC dial, then press the dial. 6 Select [YES] again by turning the SEL/ PUSH EXEC dial, then press the dial. If you decide not to copy the settings, select [NO]. 7 Press PICTURE PROFILE. To reset the picture profile settings You can reset the picture profile settings by picture profile number. You cannot reset all picture profile settings at once. 1 Press PICTURE PROFILE. 2 Select the number of the picture profile to be reset by turning the SEL/PUSH EXEC dial, then press the dial. 3 Select [SETTING] by turning the SEL/ PUSH EXEC dial, then press the dial. 4 Select [RESET] by turning the SEL/ PUSH EXEC dial, then press the dial. 5 Select [YES] by turning the SEL/PUSH EXEC dial, then press the dial. If you decide not to reset the picture profile, select [NO]. 6 Press PICTURE PROFILE. b Note • If you adjust all of the iris, shutter speed and gain manually, you cannot obtain the effect of [AE SHIFT]. • If you adjust the iris manually, you cannot obtain the effect of [AT IRIS LMT]. • If the object is so bright that the aperture value set in [AT IRIS LMT] is not appropriate, the shutter speed may reach 1/2000 automatically. • If you adjust the gain manually, you cannot obtain the effect of [AGC LIMIT]. • If you select [CINEFRAME 24] when the shutter speed is slower than 1/30, the shutter speed is automatically set to 1/60. • If you select [CINEFRAME 30] when the shutter speed is slower than 1/15, the shutter speed is automatically set to 1/30. Adjusting the audio recording level - Microphone volume level You can adjust the microphone volume when recording. Checking the volume with headphones is recommended. 1 Open the cover and set the AUTO/ MAN switch to MAN. The audio level meter appears. 2 During recording or in the standby mode, adjust the volume by turning the AUDIO LEVEL dial. To restore automatic adjustment Set the AUTO/MAN switch to AUTO. b Note • You cannot adjust the volume of audio input from the AUDIO/VIDEO jack or the HDV/DV jack. z Tip • To check the audio setting information in greater detail, press STATUS CHECK (p. 24). You can also check the microphone volume during automatic adjustment. 36 Recording
-
 1
1 -
2
-
3
-
4
-
5
-
6
-
7
-
8
-
9
-
10
-
11
-
12
-
13
-
14
-
15
-
16
-
17
-
18
-
19
-
20
-
21
-
22
-
23
-
24
-
25
-
26
-
27
-
28
-
29
-
30
-
 31
31 -
 32
32 -
 33
33 -
 34
34 -
 35
35 -
 36
36 -
 37
37 -
 38
38 -
 39
39 -
 40
40 -
 41
41 -
42
-
43
-
44
-
45
-
46
-
47
-
48
-
49
-
50
-
51
-
52
-
53
-
54
-
55
-
56
-
57
-
58
-
59
-
60
-
61
-
62
-
63
-
64
-
65
-
66
-
67
-
68
-
69
-
70
-
71
-
72
-
73
-
74
-
75
-
76
-
77
-
78
-
79
-
80
-
81
-
82
-
83
-
84
-
85
-
86
-
87
-
88
-
89
-
90
-
91
-
92
-
93
-
94
-
95
-
96
-
97
-
98
-
99
-
100
-
101
-
102
-
103
-
104
-
105
-
106
-
107
-
108
-
109
-
110
-
111
-
112
 |
 |
