Canon PIXMA iP5200R iP5200R Setup Guide - Page 12
Open the Paper Output Tray and
 |
View all Canon PIXMA iP5200R manuals
Add to My Manuals
Save this manual to your list of manuals |
Page 12 highlights
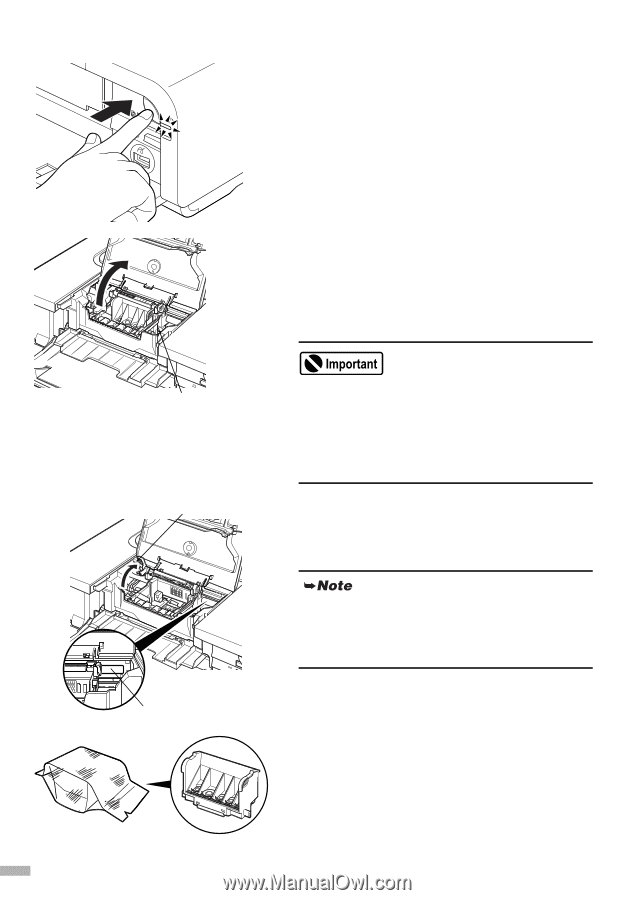
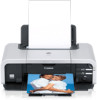
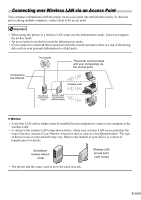
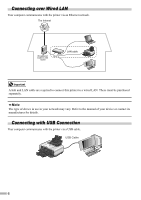
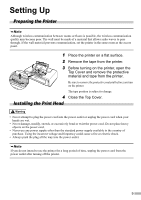
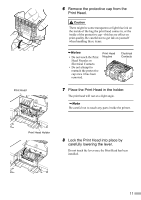
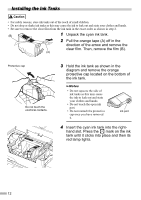
1 Plug the printer in. 2 Turn on the printer. Do NOT turn on the computer yet. The POWER lamp flashes green and the printer begins to operate. Wait until the POWER lamp remains lit green. 3 Open the Paper Output Tray and the Top Cover, and then pull down the Inner Cover. Push the Open Button above the Paper Output Tray. The Paper Output Tray automatically opens. Print Head Holder • The Print Head Holder moves to the center when the Top Cover is opened. Be careful not to touch it while it is moving. • If the Top Cover is opened more than ten minutes, the Print Head Holder moves to the right side. If this occurs, close the Top Cover, and open it again. Print Head Lock Lever 4 Raise the Print Head Lock Lever. Do not touch internal parts other than the Print Head Lock Lever. For the customers in the United States Write down the serial number located inside the printer. You will need this later to register the product. Serial number location 5 Remove the print head from its package. 10
-
 1
1 -
2
-
3
-
4
-
5
-
6
-
 7
7 -
 8
8 -
 9
9 -
 10
10 -
 11
11 -
 12
12 -
 13
13 -
 14
14 -
 15
15 -
 16
16 -
 17
17 -
18
-
19
-
20
-
21
-
22
-
23
-
24
-
25
-
26
-
27
-
28
-
29
-
30
-
31
-
32
-
33
-
34
-
35
-
36
-
37
-
38
-
39
-
40
-
41
-
42
-
43
-
44
-
45
-
46
-
47
-
48
-
49
-
50
-
51
-
52
-
53
-
54
-
55
-
56
-
57
-
58
-
59
-
60
-
61
-
62
-
63
-
64
-
65
-
66
-
67
-
68
-
69
-
70
-
71
-
72
-
73
-
74
-
75
-
76
 |
 |