Canon PIXMA iP5200R iP5200R Setup Guide - Page 38
Setup automatically detects the printer.
 |
View all Canon PIXMA iP5200R manuals
Add to My Manuals
Save this manual to your list of manuals |
Page 38 highlights
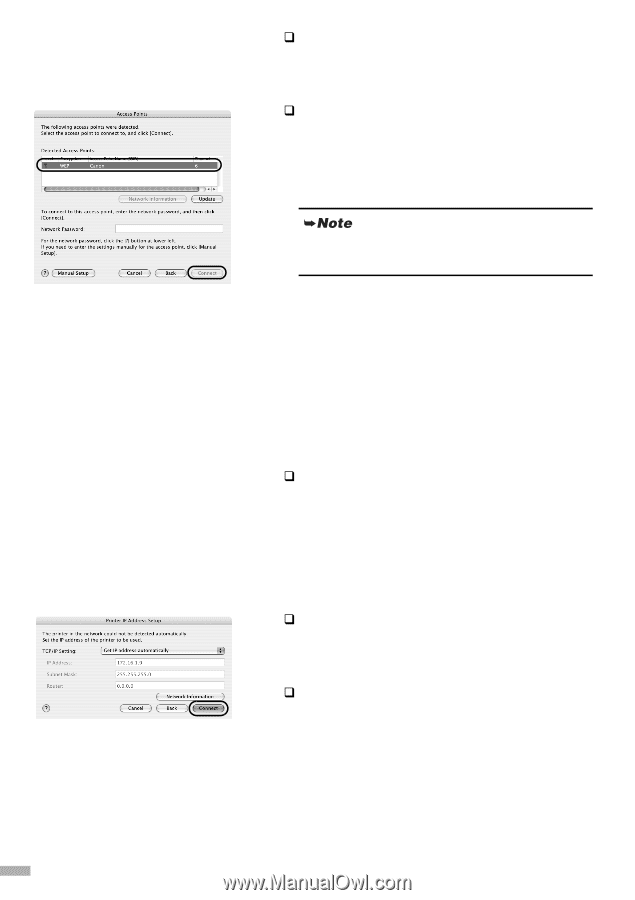
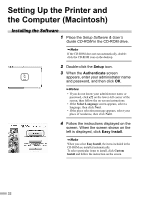
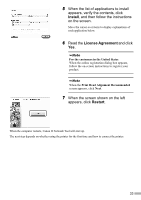
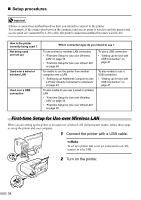
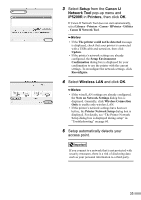
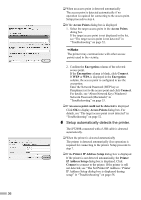
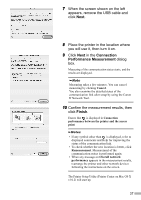
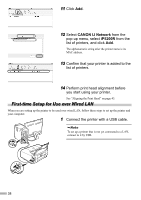
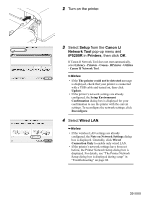
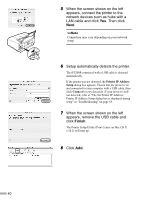
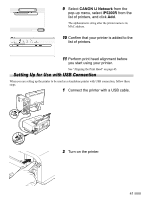
‰ When an access point is detected automatically The access point is detected automatically if no operation is required for connecting to the access point. Setup proceeds to step 6. ‰ If the Access Points dialog box is displayed 1. Select the target access point in the Access Points dialog box. If the target access point is not displayed in the list, see "The target access point is not detected" in "Troubleshooting" on page 52. The printer may communicate with other access points used in the vicinity. 2. Confirm the Encryption column of the selected access point. If the Encryption column is blank, click Connect. If WEP or WPA is displayed in the Encryption column, the access point is configured to use the encryption. Enter the Network Password (WEP key or Passphrase) set to the access point and click Connect. For details, see "About Network Key (Windows)/ Network Password (Macintosh)" in "Troubleshooting" on page 53. ‰ If An access point could not be detected is displayed Click OK to display Access Points dialog box. For details, see "The target access point is not detected" in "Troubleshooting" on page 52. 6 Setup automatically detects the printer. The iP5200R connected with a USB cable is detected automatically. ‰ When the printer is detected automatically The printer is detected automatically if no operation is required for connecting to the printer. Setup proceeds to step 7. ‰ If the Printer IP Address Setup dialog box is displayed If the printer is not detected automatically, the Printer IP Address Setup dialog box is displayed. Click Connect to connect to the printer. If the printer is still not detected, see "The Set Printer IP Address / Printer IP Address Setup dialog box is displayed during setup" in "Troubleshooting" on page 58. 36
-
 1
1 -
2
-
3
-
4
-
5
-
6
-
7
-
8
-
9
-
10
-
11
-
12
-
13
-
14
-
15
-
16
-
17
-
18
-
19
-
20
-
21
-
22
-
23
-
24
-
25
-
26
-
27
-
28
-
29
-
30
-
31
-
32
-
 33
33 -
 34
34 -
 35
35 -
 36
36 -
 37
37 -
 38
38 -
 39
39 -
 40
40 -
 41
41 -
 42
42 -
 43
43 -
44
-
45
-
46
-
47
-
48
-
49
-
50
-
51
-
52
-
53
-
54
-
55
-
56
-
57
-
58
-
59
-
60
-
61
-
62
-
63
-
64
-
65
-
66
-
67
-
68
-
69
-
70
-
71
-
72
-
73
-
74
-
75
-
76
 |
 |