Canon PIXMA iP5200R iP5200R Setup Guide - Page 43
Perform print head alignment before
 |
View all Canon PIXMA iP5200R manuals
Add to My Manuals
Save this manual to your list of manuals |
Page 43 highlights
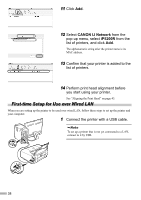
9 Select CANON IJ Network from the pop-up menu, select iP5200R from the list of printers, and click Add. The alphanumeric string after the printer name is its MAC address. 10 Confirm that your printer is added to the list of printers. 11 Perform print head alignment before you start using your printer. See "Aligning the Print Head" on page 45. Setting Up for Use with USB Connection When you are setting up the printer to be used as a standalone printer with USB connection, follow these steps. 1 Connect the printer with a USB cable. 2 Turn on the printer. 41
-
 1
1 -
2
-
3
-
4
-
5
-
6
-
7
-
8
-
9
-
10
-
11
-
12
-
13
-
14
-
15
-
16
-
17
-
18
-
19
-
20
-
21
-
22
-
23
-
24
-
25
-
26
-
27
-
28
-
29
-
30
-
31
-
32
-
33
-
34
-
35
-
36
-
37
-
 38
38 -
 39
39 -
 40
40 -
 41
41 -
 42
42 -
 43
43 -
 44
44 -
 45
45 -
 46
46 -
 47
47 -
 48
48 -
49
-
50
-
51
-
52
-
53
-
54
-
55
-
56
-
57
-
58
-
59
-
60
-
61
-
62
-
63
-
64
-
65
-
66
-
67
-
68
-
69
-
70
-
71
-
72
-
73
-
74
-
75
-
76
 |
 |
41
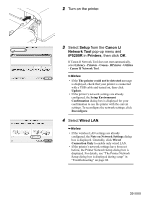
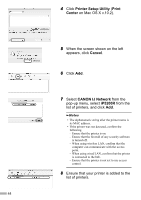
9
Select
CANON IJ Network
from the
pop-up menu, select
iP5200R
from the
list of printers, and click
Add
.
The alphanumeric string after the printer name is its
MAC address.
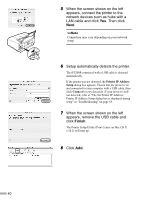
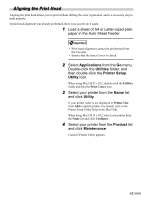
10
Confirm that your printer is added to the
list of printers.
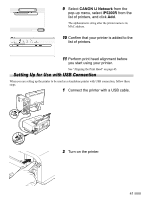
11
Perform print head alignment before
you start using your printer.
See “Aligning the Print Head” on page 45.
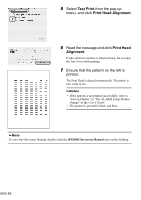
Setting Up for Use with USB Connection
When you are setting up the printer to be used as a standalone printer with USB connection, follow these
steps.
1
Connect the printer with a USB cable.
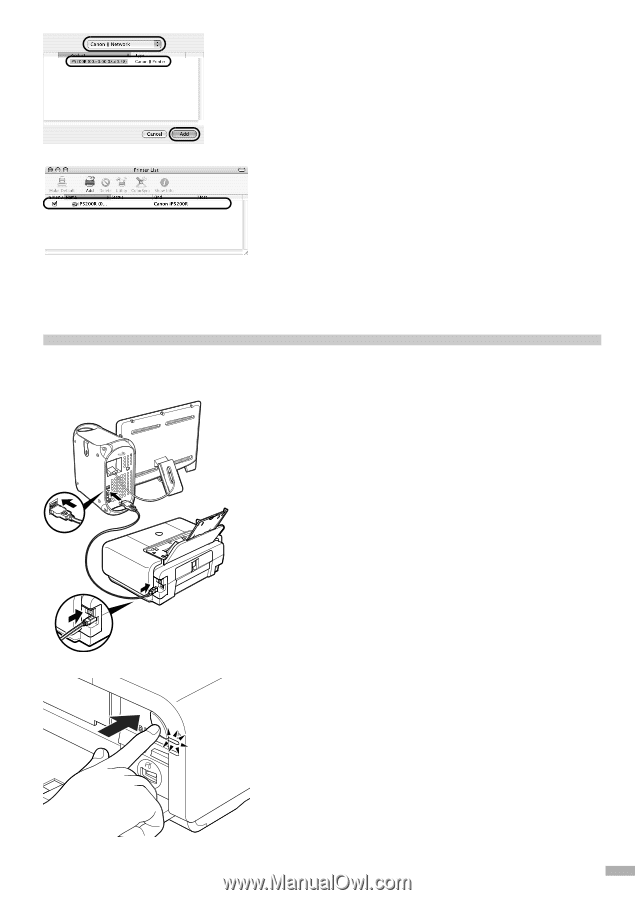
2
Turn on the printer.