Canon PIXMA iP5200R iP5200R Setup Guide - Page 27
Setup Preparations
 |
View all Canon PIXMA iP5200R manuals
Add to My Manuals
Save this manual to your list of manuals |
Page 27 highlights
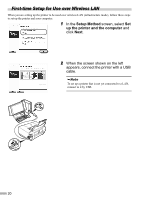
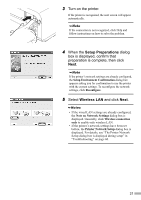
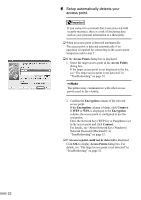
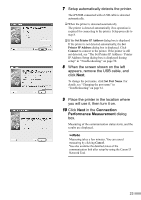
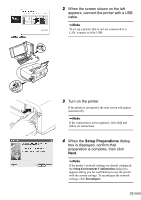
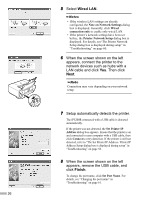
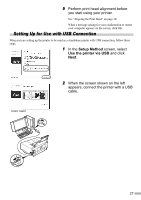
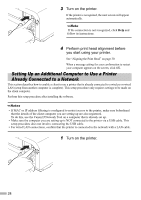
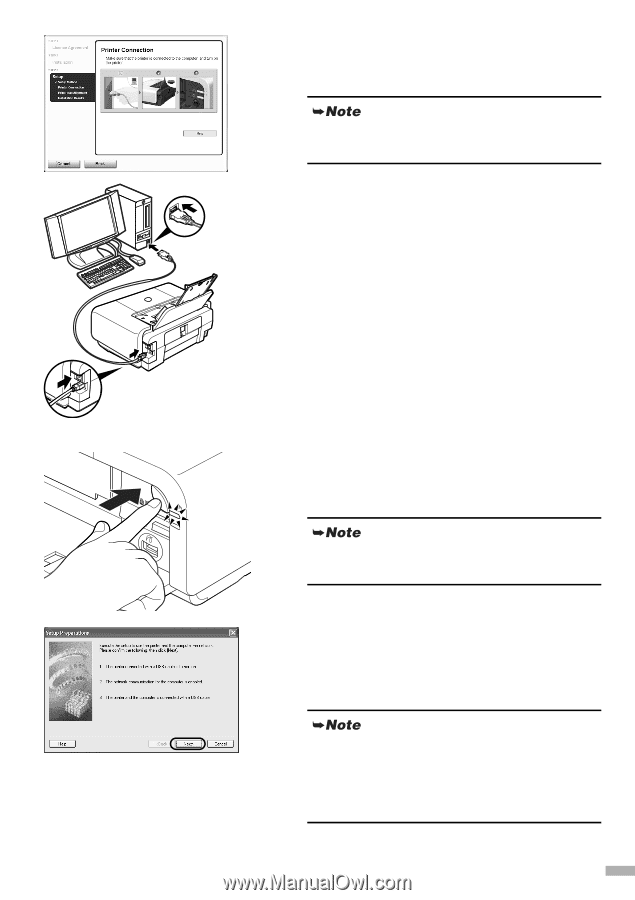
2 When the screen shown on the left appears, connect the printer with a USB cable. To set up a printer that is not yet connected to a LAN, connect to it by USB. 3 Turn on the printer. If the printer is recognized, the next screen will appear automatically. If the connection is not recognized, click Help and follow its instructions. 4 When the Setup Preparations dialog box is displayed, confirm that preparation is complete, then click Next. If the printer's network settings are already configured, the Setup Environment Confirmation dialog box appears asking you for confirmation to use the printer with the current settings. To reconfigure the network settings, click Reconfigure. 25
-
 1
1 -
2
-
3
-
4
-
5
-
6
-
7
-
8
-
9
-
10
-
11
-
12
-
13
-
14
-
15
-
16
-
17
-
18
-
19
-
20
-
21
-
 22
22 -
 23
23 -
 24
24 -
 25
25 -
 26
26 -
 27
27 -
 28
28 -
 29
29 -
 30
30 -
 31
31 -
 32
32 -
33
-
34
-
35
-
36
-
37
-
38
-
39
-
40
-
41
-
42
-
43
-
44
-
45
-
46
-
47
-
48
-
49
-
50
-
51
-
52
-
53
-
54
-
55
-
56
-
57
-
58
-
59
-
60
-
61
-
62
-
63
-
64
-
65
-
66
-
67
-
68
-
69
-
70
-
71
-
72
-
73
-
74
-
75
-
76
 |
 |
25
2
When the screen shown on the left
appears, connect the printer with a USB
cable.
3
Turn on the printer.
If the printer is recognized, the next screen will appear
automatically.
4
When the
Setup Preparations
dialog
box is displayed, confirm that
preparation is complete, then click
Next
.
To set up a printer that is not yet connected to a
LAN, connect to it by USB.
If the connection is not recognized, click Help and
follow its instructions.
If the printer’s network settings are already configured,
the
Setup Environment Confirmation
dialog box
appears asking you for confirmation to use the printer
with the current settings. To reconfigure the network
settings, click
Reconfigure
.