Canon PIXMA iP5200R iP5200R Setup Guide - Page 15
Loading Paper
 |
View all Canon PIXMA iP5200R manuals
Add to My Manuals
Save this manual to your list of manuals |
Page 15 highlights
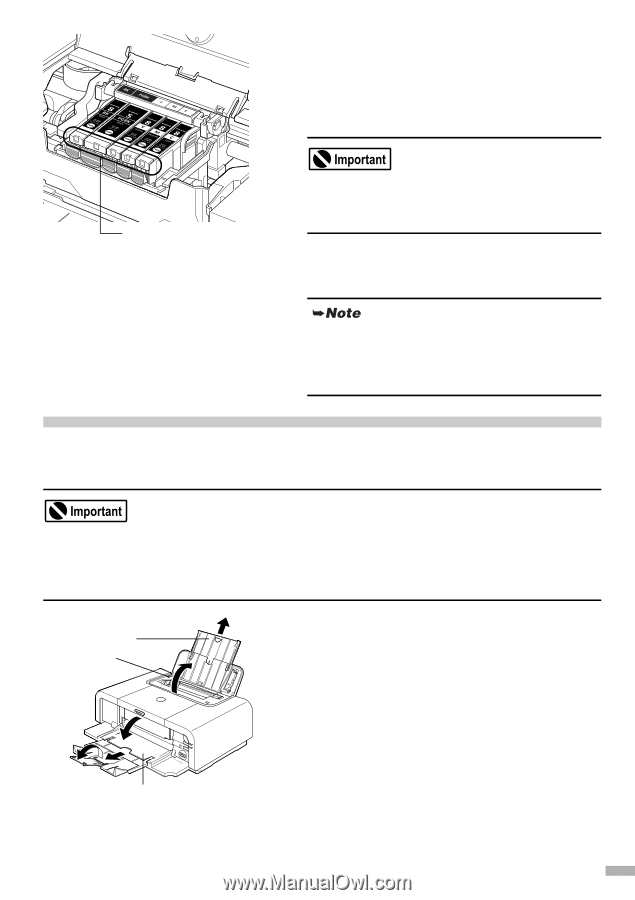
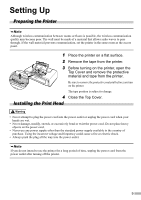
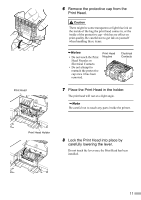
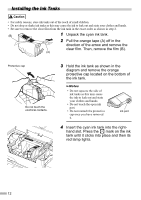
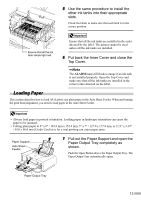
5 Use the same procedure to install the other ink tanks into their appropriate slots. Check the labels to make sure that each tank is in the correct position. Ensure that all the ink tank lamps light red. Ensure that all the ink tanks are installed in the order directed by the label. The printer cannot be used unless all the ink tanks are installed. 6 Put back the Inner Cover and close the Top Cover. The ALARM lamp still flashes orange if an ink tank is not installed properly. Open the Top Cover and make sure that all the ink tanks are installed in the correct order directed on the label. Loading Paper This section describes how to load A4 (Letter) size plain paper in the Auto Sheet Feeder. When performing the print head alignment, you need to load paper in the Auto Sheet Feeder. • Always load paper in portrait orientation. Loading paper in landscape orientation can cause the paper to be jammed. • Cutting plain paper to 4" x 6" / 101.6 mm x 152.4 mm, 5" x 7" / 127.0 x 177.8 mm, or 2.13" x 3.39" / 54.0 x 86.0 mm (Credit Card) size for a trial printing can cause paper jams. Paper Support Auto Sheet Feeder 1 Pull out the Paper Support and open the Paper Output Tray completely as shown. Push the Open Button above the Paper Output Tray. The Paper Output Tray automatically opens. Paper Output Tray 13
-
 1
1 -
2
-
3
-
4
-
5
-
6
-
7
-
8
-
9
-
 10
10 -
 11
11 -
 12
12 -
 13
13 -
 14
14 -
 15
15 -
 16
16 -
 17
17 -
 18
18 -
 19
19 -
 20
20 -
21
-
22
-
23
-
24
-
25
-
26
-
27
-
28
-
29
-
30
-
31
-
32
-
33
-
34
-
35
-
36
-
37
-
38
-
39
-
40
-
41
-
42
-
43
-
44
-
45
-
46
-
47
-
48
-
49
-
50
-
51
-
52
-
53
-
54
-
55
-
56
-
57
-
58
-
59
-
60
-
61
-
62
-
63
-
64
-
65
-
66
-
67
-
68
-
69
-
70
-
71
-
72
-
73
-
74
-
75
-
76
 |
 |