Canon PIXMA iP5200R iP5200R Setup Guide - Page 28
Wired LAN, Finish
 |
View all Canon PIXMA iP5200R manuals
Add to My Manuals
Save this manual to your list of manuals |
Page 28 highlights
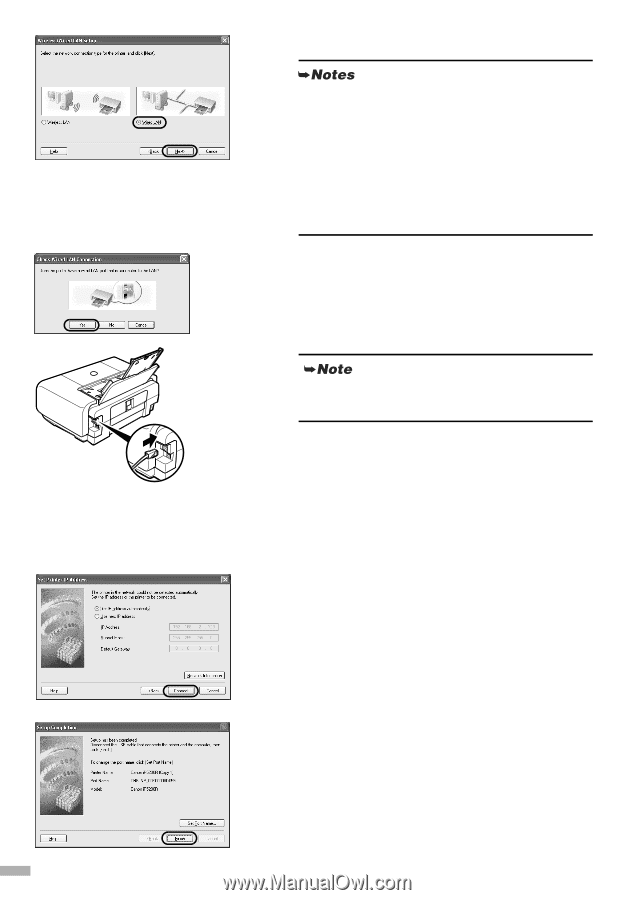
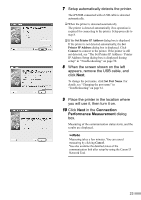
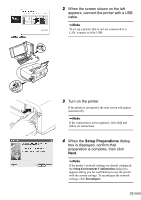
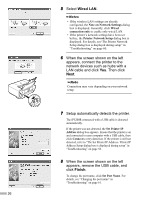
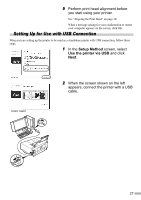
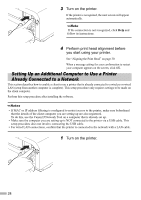
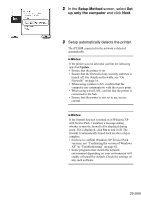
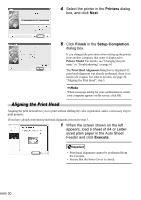
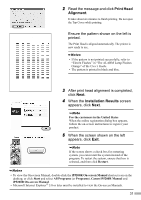
5 Select Wired LAN. • If the wireless LAN settings are already configured, the Note on Network Settings dialog box is displayed. Generally, click Wired connection only to enable only wired LAN. • If the printer's network settings have been set before, the Printer Network Setup dialog box is displayed. For details, see"The Printer Network Setup dialog box is displayed during setup" in "Troubleshooting" on page 60. 6 When the screen shown on the left appears, connect the printer to the network devices such as hubs with a LAN cable and click Yes. Then click Next. Connection may vary depending on your network setup. 7 Setup automatically detects the printer. The iP5200R connected with a USB cable is detected automatically. If the printer was not detected, the Set Printer IP Address dialog box appears. Ensure that the printer is on and connected to your computer with a USB cable, then click Connect to retry detection. If the printer is still not detected, refer to "The Set Printer IP Address / Printer IP Address Setup dialog box is displayed during setup" in "Troubleshooting" on page 58. 8 When the screen shown on the left appears, remove the USB cable, and click Finish. To change the port name, click Set Port Name. For details, see "Changing the port name" in "Troubleshooting" on page 61. 26
-
 1
1 -
2
-
3
-
4
-
5
-
6
-
7
-
8
-
9
-
10
-
11
-
12
-
13
-
14
-
15
-
16
-
17
-
18
-
19
-
20
-
21
-
22
-
 23
23 -
 24
24 -
 25
25 -
 26
26 -
 27
27 -
 28
28 -
 29
29 -
 30
30 -
 31
31 -
 32
32 -
 33
33 -
34
-
35
-
36
-
37
-
38
-
39
-
40
-
41
-
42
-
43
-
44
-
45
-
46
-
47
-
48
-
49
-
50
-
51
-
52
-
53
-
54
-
55
-
56
-
57
-
58
-
59
-
60
-
61
-
62
-
63
-
64
-
65
-
66
-
67
-
68
-
69
-
70
-
71
-
72
-
73
-
74
-
75
-
76
 |
 |