Canon PIXMA iP5200R iP5200R Setup Guide - Page 21
Set up procedures
 |
View all Canon PIXMA iP5200R manuals
Add to My Manuals
Save this manual to your list of manuals |
Page 21 highlights
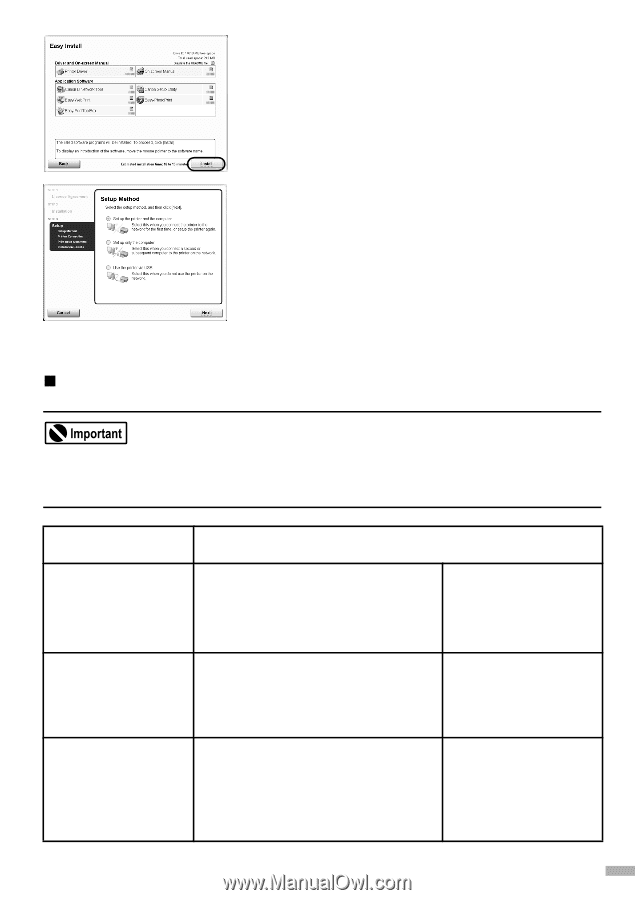
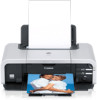
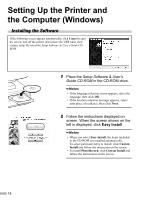
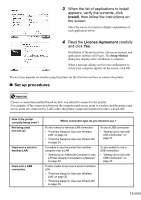
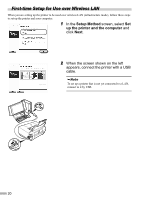
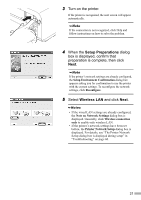
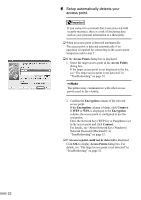
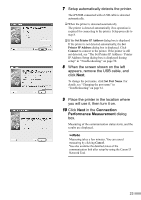
3 When the list of applications to install appears, verify the contents, click Install, then follow the instructions on the screen. Move the cursor over items to display explanations of each application below. 4 Read the License Agreement carefully and click Yes. Installation of the printer driver, On-screen manual, and application software will begin. The Setup Method dialog box displays after installation is complete. When a message asking you for your confirmation to restart your computer appears on the screen, click OK. The next step depends on whether using the printer for the first time and how to connect the printer: „ Set up procedures Choose a connection method based on how you intend to connect to the printer. For example, if the connection between the computer and access point is wireless and the printer and access point are connected by LAN cable, the printer connection method becomes wired LAN. How is the printer currently being used ? Not being used (not set up) Used over a wired or wireless LAN Used over a USB connection Which connection type do you intend to use ? To use a wired or wireless LAN connection • "First-time Setup for Use over Wireless LAN" on page 20. • "First-time Setup for Use over Wired LAN" on page 24. To enable to use the printer from another computer over a LAN • "Setting Up an Additional Computer to Use a Printer Already Connected to a Network" on page 28. To also enable to use over a wired or wireless LAN • "First-time Setup for Use over Wireless LAN" on page 20. • "First-time Setup for Use over Wired LAN" on page 24. To use a USB connection • "Setting Up for Use with USB Connection" on page 27. To also enable to use a USB connection • "Setting Up for Use with USB Connection" on page 27. 19
-
 1
1 -
2
-
3
-
4
-
5
-
6
-
7
-
8
-
9
-
10
-
11
-
12
-
13
-
14
-
15
-
 16
16 -
 17
17 -
 18
18 -
 19
19 -
 20
20 -
 21
21 -
 22
22 -
 23
23 -
 24
24 -
 25
25 -
 26
26 -
27
-
28
-
29
-
30
-
31
-
32
-
33
-
34
-
35
-
36
-
37
-
38
-
39
-
40
-
41
-
42
-
43
-
44
-
45
-
46
-
47
-
48
-
49
-
50
-
51
-
52
-
53
-
54
-
55
-
56
-
57
-
58
-
59
-
60
-
61
-
62
-
63
-
64
-
65
-
66
-
67
-
68
-
69
-
70
-
71
-
72
-
73
-
74
-
75
-
76
 |
 |