Canon PIXMA iP5200R iP5200R Setup Guide - Page 25
Connection, Performance Measurement - network setup tool
 |
View all Canon PIXMA iP5200R manuals
Add to My Manuals
Save this manual to your list of manuals |
Page 25 highlights
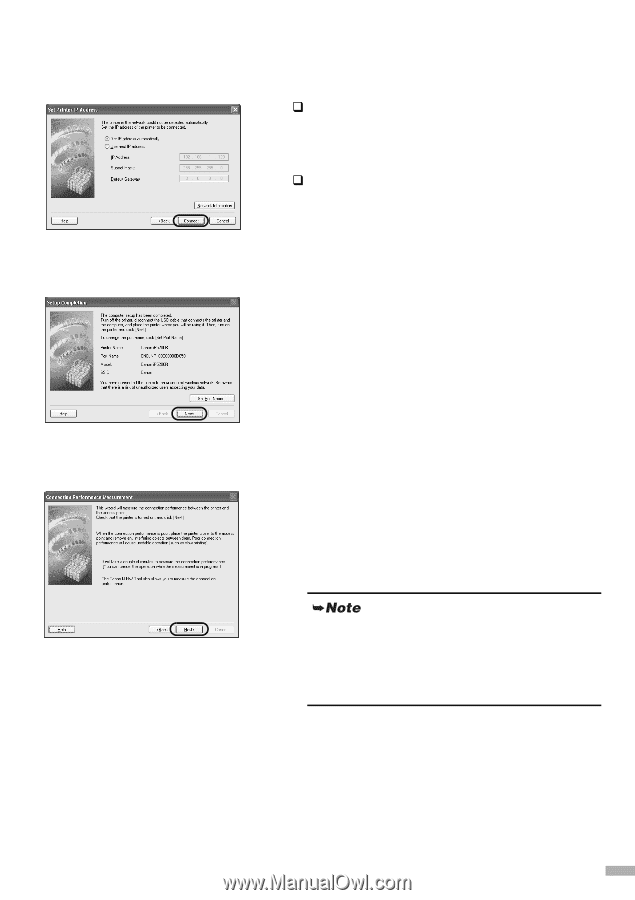
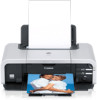
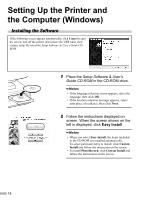
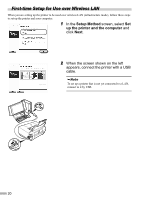
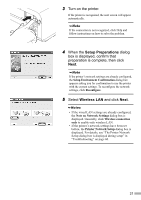
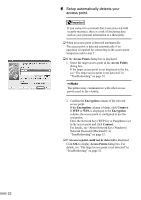
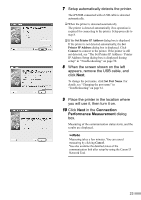
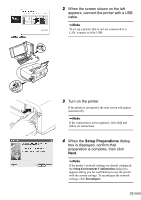
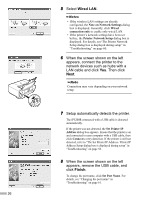
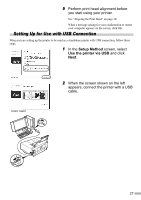
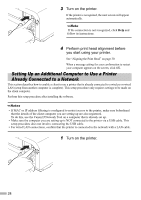
7 Setup automatically detects the printer. The iP5200R connected with a USB cable is detected automatically. ‰ When the printer is detected automatically The printer is detected automatically if no operation is required for connecting to the printer. Setup proceeds to step 8. ‰ If the Set Printer IP Address dialog box is displayed If the printer is not detected automatically, the Set Printer IP Address dialog box is displayed. Click Connect to connect to the printer. If the printer is still not detected, see "The Set Printer IP Address / Printer IP Address Setup dialog box is displayed during setup" in "Troubleshooting" on page 58. 8 When the screen shown on the left appears, remove the USB cable, and click Next. To change the port name, click Set Port Name. For details, see "Changing the port name" in "Troubleshooting" on page 61. 9 Place the printer in the location where you will use it, then turn it on. 10 Click Next in the Connection Performance Measurement dialog box. Measuring of the communication status starts, and the results are displayed. Measuring takes a few minutes. You can cancel measuring by clicking Cancel. You also examine the detailed status of the communication link after setup by using the Canon IJ Network Tool. 23
-
 1
1 -
2
-
3
-
4
-
5
-
6
-
7
-
8
-
9
-
10
-
11
-
12
-
13
-
14
-
15
-
16
-
17
-
18
-
19
-
 20
20 -
 21
21 -
 22
22 -
 23
23 -
 24
24 -
 25
25 -
 26
26 -
 27
27 -
 28
28 -
 29
29 -
 30
30 -
31
-
32
-
33
-
34
-
35
-
36
-
37
-
38
-
39
-
40
-
41
-
42
-
43
-
44
-
45
-
46
-
47
-
48
-
49
-
50
-
51
-
52
-
53
-
54
-
55
-
56
-
57
-
58
-
59
-
60
-
61
-
62
-
63
-
64
-
65
-
66
-
67
-
68
-
69
-
70
-
71
-
72
-
73
-
74
-
75
-
76
 |
 |