Canon PowerShot SX60 HS User Guide - Page 123
Sending Images to a Smartphone - app
 |
View all Canon PowerShot SX60 HS manuals
Add to My Manuals
Save this manual to your list of manuals |
Page 123 highlights
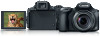
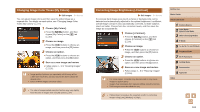
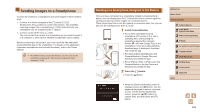
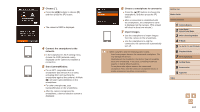
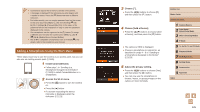
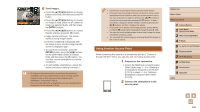
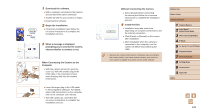
Sending Images to a Smartphone Connect the camera to a smartphone and send images in either of these ways. ●● Connect to a device assigned to the [ ] button (=123) Simply press the [ ] button to connect the devices. This simplifies importing images from a smartphone (=123). Note that only one smartphone can be assigned to the [ ] button. ●● Connect via the Wi-Fi menu (=125) You can connect the camera to a smartphone as you would connect it to a computer or other device. Multiple smartphones can be added. Before connecting to the camera, you must install the free dedicated CameraWindow app on the smartphone. For details on this application (supported smartphones and included functions), refer to the Canon website. ●● No matter how you connect the devices, you can also use the smartphone to geotag (=141) camera images and shoot remotely (=142). Sending to a Smartphone Assigned to the Button Once you have connected to a smartphone initially by pressing the [ ] button, you can simply press the [ ] button after that to connect again for viewing and saving camera images on connected devices. These steps show how to use the camera as an access point, but you can also use an existing access point (=126). 1 Install CameraWindow. ●●For an NFC-compatible Android smartphone (OS version 4.0 or later), activating NFC and touching the smartphone against the camera's N-Mark ( ) will start Google Play on the smartphone. Once the CameraWindow download page is displayed, download and install the app. ●●For other Android smartphones, find CameraWindow in Google Play and download and install the app. ●●For an iPhone, iPad, or iPod touch, find CameraWindow in the App Store and download and install the app. 2 Press the [ ] button. ●●Press the [ ] button. ●●When the [Device Nickname] screen is displayed, press the [ ] button. Use the keyboard displayed to enter a nickname (=31). On the [Device Nickname] screen, press the [ ][ ] buttons to choose [OK], and then press the [ ] button. Before Use Basic Guide Advanced Guide 1 Camera Basics 2 Auto Mode / Hybrid Auto Mode 3 Other Shooting Modes 4 P Mode 5 Tv, Av, M, C1, and C2 Mode 6 Playback Mode 7 Wi-Fi Functions 8 Setting Menu 9 Accessories 10 Appendix Index 123
-
 1
1 -
2
-
3
-
4
-
5
-
6
-
7
-
8
-
9
-
10
-
11
-
12
-
13
-
14
-
15
-
16
-
17
-
18
-
19
-
20
-
21
-
22
-
23
-
24
-
25
-
26
-
27
-
28
-
29
-
30
-
31
-
32
-
33
-
34
-
35
-
36
-
37
-
38
-
39
-
40
-
41
-
42
-
43
-
44
-
45
-
46
-
47
-
48
-
49
-
50
-
51
-
52
-
53
-
54
-
55
-
56
-
57
-
58
-
59
-
60
-
61
-
62
-
63
-
64
-
65
-
66
-
67
-
68
-
69
-
70
-
71
-
72
-
73
-
74
-
75
-
76
-
77
-
78
-
79
-
80
-
81
-
82
-
83
-
84
-
85
-
86
-
87
-
88
-
89
-
90
-
91
-
92
-
93
-
94
-
95
-
96
-
97
-
98
-
99
-
100
-
101
-
102
-
103
-
104
-
105
-
106
-
107
-
108
-
109
-
110
-
111
-
112
-
113
-
114
-
115
-
116
-
117
-
 118
118 -
 119
119 -
 120
120 -
 121
121 -
 122
122 -
 123
123 -
 124
124 -
 125
125 -
 126
126 -
 127
127 -
 128
128 -
129
-
130
-
131
-
132
-
133
-
134
-
135
-
136
-
137
-
138
-
139
-
140
-
141
-
142
-
143
-
144
-
145
-
146
-
147
-
148
-
149
-
150
-
151
-
152
-
153
-
154
-
155
-
156
-
157
-
158
-
159
-
160
-
161
-
162
-
163
-
164
-
165
-
166
-
167
-
168
-
169
-
170
-
171
-
172
-
173
-
174
-
175
-
176
-
177
-
178
-
179
-
180
-
181
-
182
-
183
-
184
-
185
-
186
-
187
-
188
-
189
-
190
-
191
-
192
-
193
-
194
-
195
-
196
-
197
-
198
-
199
-
200
-
201
-
202
-
203
 |
 |